Posted by Cameron on 01.31.10 8:57 PM
2010 AEC - All Rights Reserved") The display read 101°F when the digital thermometer beeped, which might have been okay if we were proofing yeast. But we were in the bedroom, not the kitchen — and the thermometer was under the tongue of my very achy, very sick wife. “You are not going to work,” I said. “And I am coming home early and making chicken soup.”
The display read 101°F when the digital thermometer beeped, which might have been okay if we were proofing yeast. But we were in the bedroom, not the kitchen — and the thermometer was under the tongue of my very achy, very sick wife. “You are not going to work,” I said. “And I am coming home early and making chicken soup.”
I don’t have an operatic range as a cook, but chicken soup is one of the dishes that I do well. I wish I could say that I follow a Secret Family Recipe steeped in a Romantic Patina of age and memory, written carefully in cursive on an index card that is Stained with Character and Creased with Use.
But the truth is that I found my chicken soup in a cookbook while we were living in Seattle, and I was first drawn to it by the fact that it had a gimmick: You start with a whole chicken and some vegetables, and end up two hours later with soup. The trick is accomplished by cutting the chicken (except for the breast) — bones and all — into very small pieces and sautéeing them before making a super-quick broth. It’s fast, it’s easy, it’s reliable, and it tastes fantastic.
I can modestly admit to having made a few small discoveries and tweaks to the basic recipe. The original calls for a 4-pound chicken, but I discovered that the larger the bird, the more tasty the soup. These days, we’re getting lovely little 3- to 4-pound birds from the Soul Food Farms CSA, so I add some feet, necks, and wings from the stock bag in the freezer to bring the total weight up to five pounds. I also cut my onions as finely as possible instead of the original medium dice, because I like them to melt into the soup.
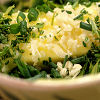
Finally, the original recipe calls for noodles, but I much prefer dumplings. I make a slightly wetter version of my standard biscuit dough and — when the soup is almost done — float globs of the dough on top, cover the pot with a lid, and steam for about 10 minutes.
2010 AEC *All Rights Reserved*")
2010 AEC *All Rights Reserved*")
2010 AEC *All Rights Reserved*")
2010 AEC - All Rights Reserved")
2010 AEC *All Rights Reserved*")
Hearty Chicken Soup
– adapted from The Perfect Recipe
3 T vegetable oil or chicken fat
2 medium onions, cut into small dice
1 whole chicken (about 5 lbs.; add extra necks and/or wings if your bird is smaller)
2 bay leaves
1 large carrot, sliced 1/4 inch thick
1 celery stalk, sliced 1/4 inch thick
1/2 teaspoon dried thyme leaves
1/4 cup minced fresh parsley leaves
Salt
Dumplings
– adapted from Joy of Cooking
1 3/4 cups all-purpose flour
1/2 tsp salt
3 tsp double-acting baking powder
6 T chilled butter
3/4 cup plus 1 T milk
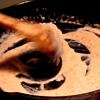
Cut up the whole chicken as if you were going to cook it in parts, splitting the breast into two pieces, but keeping the meat on the bone. (Cooking for Engineers has a nice post on breaking down a chicken. Alton Brown also does a good tutorial, although he takes the breast meat off the bone.)
Set aside the breasts and use a cleaver or poultry shears to hack the rest of the chicken — including the back, neck, and feet if you have them — into 1- or 2-inch chunks. Cut through the bones!
Heat the oil or fat over medium-high heat in a large soup pot. Add half of the chopped onion and all of the chicken pieces except the breast. Sauté until the chicken is no longer pink (I like to see some brown on the chicken pieces, but that can be tough to do in a crowded pot. Be careful not to burn the onions!). Reduce heat to low, cover, and simmer until the chicken releases its juices, about 20 minutes. Increase the heat to high and add 2 quarts of cold water, along with the chicken breasts, 2 teaspoons of salt, and bay leaves. Bring to a simmer, then cover, reduce heat to low and barely simmer until chicken breast is cooked and the broth is rich and flavorful, about 20 minutes.
Skim the fat from the soup and reserve it, then remove chicken breast from the pot and set aside. Strain the broth into a large bowl and discard the rest of the chicken pieces and bones. When the breast is cool enough to handle, remove the skin, and then remove the meat from the bones, shredding it into bite-sized pieces. Discard the skin and bones.
Return the pot to medium-high heat. Add 2 to 4 tablespoons of the reserved chicken fat, the remaining onion, the carrot and the celery, and a pinch of salt. Sauté until softened, about 5 minutes. Add thyme, broth, and shredded chicken. Simmer until the vegetables are tender and the flavors meld, 10 to 15 minutes.
If you like pasta, you can add two cups of egg noodles and cook until tender. Taste the soup and correct the seasonings — it will almost certainly need more salt. However, be careful with the salt if you’re going to add dumplings, as most dumpling/biscuit dough has salt in it somewhere… and I wouldn’t do both dumplings and noodles.
To make the dumplings, put the flour, salt, and baking powder in a food processor and pulse until well mixed. Add the butter, cut into tablespoon-sized chunks. Pulse until thoroughly mixed. Add the milk and pulse until the dough comes together. Drop globs of dough from a spoon onto the surface of the soup. Cover and simmer until the dumplings are cooked through, approximately 10 minutes.
Sprinkle with the parsley and serve.
Farmers and food artisans who created the ingredients for this week’s meal: 
Spring Hill Cheese Company, Petaluma: butter
Soul Food Farm, Vacaville: chicken
Guisto’s Vita-Grain, South San Francisco: sea salt, flour
Catalán Family Farm, Hollister: onion, celery
Straus Creamery, Petaluma: milk
…and our own homegrown thyme, carrots, bay, and parsley
(Exemption: baking powder)
cookbooks, cooking, Dark Days challenge, locavore, recipes
8 Comments »


Posted by Anita on 05.14.09 6:26 AM
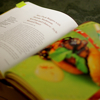
 Despite our enduring love for our nieces and pint-sized friends, this blog will never feature the sort of recipes that usually pass for kid-friendly meals. With high-octane cocktails, labor-intensive recipes, and frequent bouts of profanity, no sane reader would ever mistake me for a mommy blogger. And yet, one of the best food books I’ve read in quite some time — one I actually forked over cash to buy — is Hungry Monkey: A Food-Loving Father’s Quest to Raise an Adventurous Eater. A title that’s shelved not with the cookbooks, but in the heretofore unexplored Baby & Toddler section of my local bookstore.
I doubt Hungry Monkey would have found its way to our house if we weren’t already friends with the book’s author, Matthew Amster-Burton, and his daughter Iris. But that surely would have been my loss, because once I picked it up, I couldn’t stop reading. Or laughing. Matthew’s a pretty funny guy, something you may already know if you read his blog, Roots & Grubs, or his witty writings on Culinate, Gourmet.com, or pretty much anywhere else you go for clever, thoughtful food writing these days. And even if you couldn’t give a fig for the intricacies of raising a little fresser, you can’t help but be drawn in by Matthew’s no-nonsense ideas about food.
Now, in the interest of full disclosure, I think it’s only fair to admit that I’m friends not only with Matthew, his wife Laurie, and little Iris, but also with grandma Judy, and many of the other characters in the book — Tea, Shauna, Molly, and the gang — so reading a chapter is like old home week for me. Some of my favorite memories from our Seattle days involve the dinner parties we used to throw. Every New Year’s Day, we’d make an enormous pot of cassoulet and invite our friends to polish it off; the Amster-Burtons were among the 50 or so food-obsessed friends who came to the second-annual fête.
I don’t remember much else from that day, but I do remember Iris — who had just turned one — sitting on our kitchen floor and calmly polishing off an adult-sized plate of braised pork, beans, and duck confit. Reading the book, I was tickled that Matthew remembered, too: The cassoulet-gobbling tale is but one of dozens of spot-on anecdotes he uses to illustrate his theories. (In this case, the point is: “Stew is the ultimate in baby food. It’s easy to make. It’s easy to eat: you don’t even need teeth.”)
But aside from personal affection, Matthew’s stories of cooking for Iris are universal, whether you’re a parent, a proud aunt, or even kid-agnostic. In a way, my feelings about Hungry Monkey are similar to Matthew’s own enthusiasm for his daughter’s culinary education:
“I was gung-ho about sharing our food with Iris for the same reason people share food with each other everywhere: it’s fun. It was the first opportunity for Iris and me to share an experience and enjoy it for the same reasons. I mean, I liked playing peek-a-boo (I called it “peekytoe”) because it made Iris laugh, but it’s not like it’s something Laurie and I played before Iris was born — or, at least, I wouldn’t admit to it. But I like enchiladas. Iris likes enchiladas. We can agree on enchiladas.”
On the surface, I may not have a lot in common with a stay-at-home dad. But our mutual love of food — and a fondness for belly laughs — makes Hungry Monkey worth a read, even if you have no experience with the tribulations of breastfeeding, or coaxing a toddler to the dinner table. With the exception of a couple of purees, there’s hardly a recipe in the book that looks or tastes like kid chow. Last winter, Cameron and I tested a dozen or so of the recipes during the book’s development, and we’ll personally vouch for Matthew’s stacked enchiladas, Cornish pasties, and bibimbap, not to mention a recipe for carnitas that’s so quick and simple we didn’t believe it would work. (It did, deliciously.)
If you need further convincing, plan to pop by one of Matthew’s readings in the Bay Area the week of May 24 (check the schedule here). Photographic evidence indicates that Hungry Monkey is even more hilarious when read aloud by its author.
If you can’t get to one of Matthew’s book-signings, there’s still a chance to have your own brush with fame: I’ve got an extra copy of the book — there is some payoff for being a recipe-tester! — and it just so happens that Matthew will be visiting us on his swing through town. So, if you’d like to win an autographed copy of Hungry Monkey, leave a comment below telling us about your favorite food when you were little. Next weekend, I’ll pick a comment at random and get in touch with the lucky winner to ask how they’d like the book inscribed.
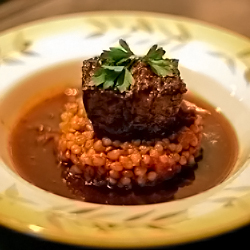
In the meantime, here’s a little proof that not all kid-friendly food has to look like stewed prunes and taste like mush.

Beer-Braised Short Ribs with Wheat Berries
– from Hungry Monkey by Matthew Amster-Burton, reprinted with permission
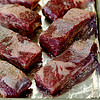
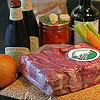
3 to 4 pounds beef short ribs (flanken or English-style)
salt and pepper
3 tablespoons olive oil
2 cloves garlic, thinly sliced
1 large onion, diced
1 carrot, peeled and diced
1 celery stalk, diced
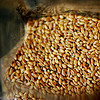
1 cup wheat berries (see note)
2 bottles (2-1/4 cups) porter-style beer
1 cup canned crushed tomatoes, not drained
1-1/2 cups chicken stock
2 tablespoons minced parsley
Preheat oven to 450°F.
Season the ribs liberally with salt and pepper and place them on a foil-lined baking sheet (bone-side down if you’re using English style ribs). Roast 45 minutes or until they’re nicely browned and have rendered plenty of fat. Reduce oven temperature to 275°F.
While the ribs are roasting, heat the olive oil in a Dutch oven or other large pot over medium heat. Add the garlic, onion, carrot, and celery. Cook until vegetables are limp but not browned, 5 to 10 minutes.
Add the wheat berries, beer, tomatoes, and chicken stock, and stir to mix. Add the browned ribs, raise the heat to medium-high, and cover. When the pot is boiling, transfer it to the oven (you did remember to turn it down to 275°F, right?). Braise for 2-1/2 to 3 hours, or until meat is very tender. Season with additional salt and pepper to taste.
If serving immediately, remove the meat and strain the sauce, then skim off the fat with a spoon or gravy separator. Otherwise, cool to room temperature and refrigerate everything together, skimming off the solidified fat before reheating. Give each person one or two ribs (remove the bones before serving if you like), a ladleful of wheat berries and sauce, and a sprinkling of parsley.
Note: Wheat berries are available in the bulk section at any health food store. Mine has sometimes managed to run out, so I’ve substituted pearl barley to good effect. Hard or soft wheat berries will work. For another variation, substitute French green lentils for the wheat berries.
cookbooks, meat, other blogs, recipes
26 Comments »
Posted by Anita on 11.16.08 10:44 PM
 The irony of yesterday’s 80-degree excursion to the Ferry Plaza was that none of us wanted summery stuff. We waltzed right past stalls filled with tomatoes, artichokes, and strawberries(!) and gravitated toward the pork, beans, and greens we all craved despite the heat.
With the unseasonably warm weather and our un-air-conditoned house, we knew it would stay too hot to braise, so we headed over to the Marin Sun Farms stand and checked out their grillable options. Laura picked out a lovely slab of pork ribs, and I walked across the aisle for a bag full of Brussels sprouts from the Iacopi’s stand.
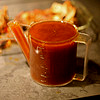
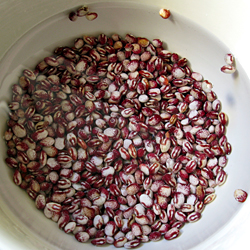
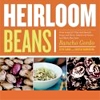
Since Laura’s only able to find pintos and cranberry beans at her local markets, she planned to load up her bag with lots of fun varieties from the Rancho Gordo stand. Little did we know that Steve Sando himself would be tending the stall on Saturday, training two new employees and charming the shoppers who were surprised to see the bean guru himself behind the baskets and bags. In addition to the four varieties Laura chose — old favorites Yellow Eye and Calypso, plus two others that escape me Pebble and Anasazi — we also bought a pound of Red Nightfall, for our Dark Days dinner that night. I had no idea how we’d serve them, but I knew we could find inspiration flipping through our just-bought copy of Steve’s new book, Heirloom Beans.
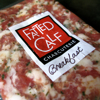
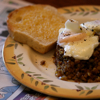
Cameron gave the ribs a simple rub (salt, pepper, dried sage, and pasilla), and we planned to serve them with a mustard-and-vinegar sauce, so we looked for a simple recipe that would showcase the beans’ natural flavors. It didn’t take us long to find a dish that we all agreed sounded delicious: What’s not to love about porky goodness topped with a drizzle of bright olive oil and a snowy dusting of cheese? We found a hunk of Fatted Calf pancetta in the freezer and snipped some fresh sage from the garden, swapped a red onion for yellow, and left out the original recipe’s carrot. The end result was delicious, if I do say so myself, and a perfect counterpoint to the smokiness of the ribs and the tart-bitterness of the shredded sprouts.
ps: For more great photos of our meal prep, don’t miss Laura’s set and post.

Beans with Pancetta and Sage
– adapted from Heirloom Beans
1/2 pound heirloom beans, soaked
– the original recipe calls for Jacob’s Cattle, but we used Red Nightfall
1/2 medium red onion, chopped
2 celery stalks, chopped
3 garlic cloves, minced
1/4 pound pancetta or slab bacon, diced
2T chopped fresh sage
dry Jack or other hard cheese, grated, for garnishing
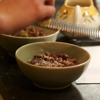
Place the beans and their soaking liquid in a tall pot, adding enough cold water to cover by at least an inch. Bring to a boil for 5 minutes, then reduce heat to low. Simmer, partially covered, until beans begin to soften (about 30 minutes).
Meanwhile, heat a heavy skillet over medium heat. Add the olive oil and warm through, then add the onion, celery, garlic, pancetta, half of the sage, and a little salt and pepper. (Keep in mind your pork may be heavily salted.) Reduce heat to medium-low and sauté very slowly; do not allow the ingredients to brown. When very soft and aromatic, about 20 minutes, remove from heat and set aside.
Add the sauteed mixture to the beans and bring to a simmer, adding more water as needed. Taste the simmering liquid, and adjust for salt as needed. Simmer, partially covered, until the beans are tender, about another hour, keeping an eye on the water level. When beans are cooked through and no longer chalky, add the remaining sage and adjust seasonings; simmer for 5 minutes.
Serve the beans with a little of their pot liquor in shallow bowls, drizzled with olive oil and sprinkled with the grated cheese.
—-
Disclaimer: Cameron and I are big fans of pretty much everything Steve Sando does; the three of us are friends from the olden days on various food boards, and we’ve been known to babysit his market stall on occasion. There’s no way to say that I’m not biased, but I still think that the book is fabulous: The recipes go well beyond the usual things you think of making with dried beans; the photography is stunning; and the graphic design is trademark Rancho Gordo, with bold typography, clean lines, lots of white space, and judicious use of bright accent colors.
Although I’ve only cooked once from it, at the price ($15 on Amazon) it seems like a bargain. It’s got a fun foreword by Thomas Keller (yes, Food Jesus is one of Steve’s fans, too), great front matter that covers everything from Rancho Gordo history to equipment notes, and recipes from some of our favorite restaurants — like Range‘s Cellini Bean Soup with Chard and Poached Eggs. I’m looking forward to exploring it in more depth, and I’d say that even if Steve wasn’t a pal.
cookbooks, Dark Days challenge, farmers markets, locavore, other blogs, recipes
6 Comments »
Posted by Cameron on 11.09.08 11:05 AM
 Knowledgeable guitarists say that tone is in the fingers. In other words, if I were to play Eddie Van Halen’s guitar through his stage rig, I would sound like… Cameron playing Eddie Van Halen’s guitar. I wouldn’t look like him either, even though I can make all the wide-eyed guitar hero faces.
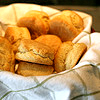
I’m beginning to think the same thing holds true for recipes. I made biscuits and sausage gravy for breakfast this morning, which I do every few weeks. I usually forget which recipe I use, so I spend about ten minutes combing through our cookbooks. I have tried biscuit recipes from the back of mix boxes (long ago), the Internet, and various cookbooks. But while they all have their own idiosyncrasies, when I make them they always taste like… well… my biscuits.
Today, I used the recipe from the Joy of Cooking, and I am here to tell you brothers and sisters that when it comes to basic American staples — particularly breakfast fixin’s like waffles, French toast, and biscuits — that Rombauer gal has got it wired. The Joy recipes are simple, direct, and every bit as tasty as the complicated shenanigans you find elsewhere. Especially from that uptight bastard in the bow tie. I mean my god, Kimball: I am not acidulating milk and using two different types of flour at 9am on a Sunday morning, even if Martha herself is coming for breakfast.

Rolled Biscuits
adapted from the Joy of Cooking
1-3/4 cups sifted all-purpose flour (I don’t bother sifting, and it’s never hurt)
1/2 teaspoon salt
3 teaspoons double-acting baking powder
4 to 6 tablespoons chilled butter
(Joy says that you can use shortening, but… ew. Might try lard, though.)
3/4 cup milk
Preheat oven to 450 degrees. Whisk the dry ingredients together in a bowl and then cut in the butter. (Doing this by hand is picturesque, but a huge pain in the butt, especially on the first cup of coffee on a Sunday morning. Get smart and get out your food processor and metal blade. Dump in the dry ingredients, pulse them a couple of times, then drop in the chilled butter, which you’ve cut into 6-8 cubes. Pulse again 10 to 15 seconds, or until the mixture looks like crumbs.)
Add the milk and mix (or pulse) until you have wet dough. Turn the dough out on a floured surface, knead very gently 5 to 7 times, then roll out 3/4 inches thick and cut biscuits. Bake on an ungreased pan for 12 to 15 minutes, or until the tops are brown.
baking, breakfast, cookbooks, recipes
8 Comments »
Posted by Anita on 06.30.08 6:52 AM
 A couple years ago, I decided my cookbook addiction had gotten out of hand, so I put myself on a strict “diet”: No new cookbooks unless I’d tried them out first and fallen in love. If I checked out a book from the library and it sat on the counter for 3 weeks without piquing my curiosity, back it went… without being added to the permanent collection.
The new process works remarkably well: I think we’ve added maybe six cookbooks to our stacks in the last three years — when I used to order half a dozen at once without even blinking — and all of them are in heavy rotation on the main cookbook shelf, not languishing away unloved.
Sometimes it’s hard to get my hands on a book for a test-drive; I must’ve waited 8 months on the reserve list for a copy of From My Home to Yours. (And no, much as I thought I had to have it, it didn’t make the cut. I’m just not much of a baker anymore.) Sometimes I have to borrow books from far away via interlibrary loan; luckily, I can do it all online, and pick up my loot at the library near my office when the mood strikes.
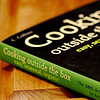
One book, though, I couldn’t find anywhere. Not only did the San Francisco Public Library system not have a copy of Cooking Outside the Box — a pretty rare thing, even with newer books — but no library in all of California has a circulating copy. Nobody had even blogged it, so I had no idea if it was any good. I decided to suck it up and buy a copy, rationalizing that $16 was pretty safe bet when it came to a cookbook aimed so squarely at my demographic: Easy, seasonal, organic.
Turns out, my hunch was right. The book — written by the founder of Abel & Cole, Britain’s top organic produce-box service — breaks down into four seasons’ worth of inspiration. His precious measurements are a bit loosey-goosey for my taste (How much is a “1/3 of a mug” of bacon?) and the often-vague directions will be confusing if you’re not an adept cook. Although the recipes offer both metric and American measures, you need to be the sort of cook who’s charmed, not frustrated, by British-isms like: “Your neighbour has stuffed surplus courgettes through your letterbox.” (Happily, I am.)
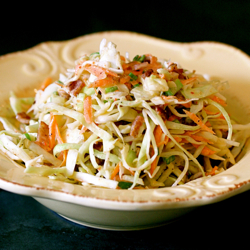
But all in all, every recipe I’ve made from the book has turned out just wonderfully, despite the lack of hand-holding. They’re mostly quite simple preparations, but usually include one perfectly fabulous tweak. Like bacon… in cole slaw. God love that British ingenuity.


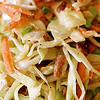
Abel & Coleslaw
– adapted from Cooking Outside the Box
1/2 head cabbage, shredded fine
1 carrot, peeled and grated
3 green onions, trimmed and thinly sliced
3 to 4 strips of bacon, fried until crispy and chopped
1/3 cup mayonnaise, preferably homemade
1 tsp cider vinegar
salt and freshly ground pepper
Mix the mayo and vinegar together in a large bowl. Add the vegetables and bacon, and stir well to combine; taste and adjust seasonings as needed. If time permits, chill 30 minutes before serving.
cookbooks, cooking, locavore
2 Comments »
Posted by Anita on 05.22.08 1:07 PM
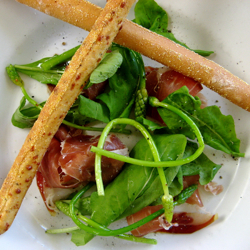
 “A whole bird, slaughtered for the nourishment and pleasure of the entire family, is a conspicuous display — if not of serious wealth, then at least of comfort and contentment.
These days, it is also one of the few family meals that demands to be eaten at the table, rather than in front of the television. And, more important perhaps, it is one of the few dishes that is actually capable of getting disparate family members around that table without protest.”
— Hugh Fearnley-Whittingstall,
The River Cottage Meat Book
.
KJ over at A Cracking Good Egg tagged me for the Book Wisdom meme:
1. Pick up the nearest [foodie] book.
2. Open to page 123.
3. Find the fifth sentence.
4. Post the next three sentences.
5. Tag 5 other people* and acknowledge who tagged you.
(* I don’t mind being tagged, but I know other bloggers who feel it’s an imposition. So, let me know in the comments if you want to play along.)
I’m not sure why it’s taken me this long to share The River Cottage Meat Book with you. Even though I’ve had it close at hand since Christmas — it’s always either on the coffee table or my nightstand — I am still wrapping my head around this volume. It’s not that I don’t know that I love it (because I most definitely do). And it’s not that I haven’t cooked out of it enough (because I definitely have). Nor is it because I don’t know if it’s worth your $40 investment (because it definitely is). And it’s not even that I am worried you’ll be unsettled by the beautifully photographed images and descriptions of ethically raised farm animals as they make their way from field to food (because I definitely was).
But despite my unequivocal endorsement — when I win the lottery, I’ll buy a copy for every omnivore I know — I also feel like it might take me years to fully explore this 500+ page treatise of meaty pleasures. It’s not the sort of lighthearted summer cookbook that inspires you to casually toss off a post and then go back to planning next week’s menu. It’s a thinking-man’s cookbook that’s unabashedly carnal and carnivorous, with plenty of thought-provoking commentary woven into its mouthwatering menus.
Don’t get me wrong: It’s no mere meat manifesto. Fearnley-Whittingstall somehow walks an ethical omnivore’s path that’s neither preachy nor overly sentimental. He’s straightforward in that very English sort of way, unromantic and yet so obviously enthralled in what he is doing that you can’t help but wish for your own bucolic farm on the rolling hills of West Dorset (picturesque stone house included). And although the Pollan-esque prose on carnivore ethics is what sets The River Cottage Meat Book apart most directly from most any other cookbook, it’s far from the only reason for owning it.
The book is chock full of useful information about how to purchase meat, even when a supermarket is your only resource. There’s an entire summary chapter devoted to meat thrift — an idea that Fearnley-Whittingstall takes pains to explain has nothing to do with being miserly, despite the obvious frugality. In between, the author shares his vast knowledge on the cuts of meat available from each of the major species, as well as offering up weighty chapters on each sort of cooking: roasting, slow cooking, fast cooking, barbecuing (by which he means grilling), and preserving. From the humblest cottage pie to the most elaborate holiday feast, the recipes are so engaging that you’ll find yourself plotting your next meal around them before you’ve reached the bottom of the page.
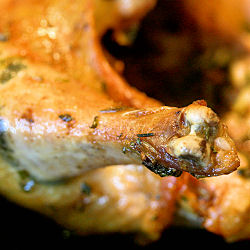
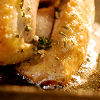
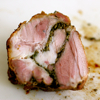
Now, you wouldn’t think that a simple roast chicken would tolerate much variation from the usual preparation: Season it, roast it, rest it, carve it. But it’s the little things that set the River Cottage method apart. First, the amount of butter used is quite frankly astounding, but once you taste the end result you’ll be happy you followed directions. The unorthodox technique — opening the body cavity wide; making multiple temperature adjustments; dousing the roasted meat in the buttery drippings — yields a moist bird with shatteringly crunchy skin, despite a relatively brief cooking time. It’s practically the antithesis of the widely lauded Zuni Cafe method, but the end result is equally eye-opening.
—
When I write about a dish I’ve made from a published source, I usually rewrite the recipe in my own words. (Listing a single recipe verbatim is almost certainly within the bounds of fair use, but as a professional writer I’m hypersensitive to issues of authorship. Call me wacky.) But this time, I’m giving you the real McCoy. Not so much because I want you to make this roast chicken — although I suspect it would make a nice change from your usual method, as it was for us — but because I want you to understand the author’s gift of turning even this simple weekend classic into an exercise in clarity, poetry, and deliciousness.
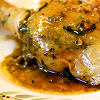

Herb Roast Chicken
– excerpted from The River Cottage Meat Book
1 small but plump roasting chicken weighing about 3 to 4 pounds
7 tablespoons soft butter
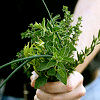
generous handfuls of fresh herbs, roughly chopped
1 garlic clove, crushed
1/2 glass of white wine
salt and freshly ground black pepper
Take off any string or elastic trussing from the chicken, place the bird in a roasting pan, and spread out its legs from the body. Enlarge the opening of the cavity with your fingers, so hot air can circulate inside the bird. It will cook quicker like that.
Put the butter in a bowl, throw in the roughly chopped herbs and the garlic, and season well with salt and pepper. Mix together with your fingers, then smear all over the chicken, inside and out. (Note from Anita: I also gently loosen the skin and spread some butter directly onto the meat. Yum.)
Place in the center of a hot oven (400F) and leave for 20 minutes (phase 1). Then baste the chicken [with the drippings], turn the oven down to 350F, pour the wine into the pan (not over the bird), and roast the bird for another 30 to 40 minutes (phase 2), depending on its size. Open the oven door, turn the oven off, and leave the bird for 15 to 20 minutes (phase 3). This is usually enough time to roast a small chicken through without burning the skin (the reason I prefer small chickens for roasting.) For a bigger bird, you will have to make the necessary adjustments, adding a few minutes to each phase. You may also wish to protect the bird’s skin with buttered foil for, say, the first 20 minutes of phase 2. A good test for doneness is to pierce that part of the bird where the thigh joins the breast; the juices released should run clear.
Forget about gravy. Carve the bird in the pan, as coarsely and crudely as you like (no wafer-thin breast slices, please), letting the pieces fall into the buttery pan juices and letting the fresh juices from carving mingle with the rest. Then take the pan to the table and pass it round your family or guests in the pecking order of your choosing, so they can pull out the bits they fancy. Pass it round a second time, to help redress grievances and encourage the further and fairer distribution of juices.
Accompaniments? Roast potatoes would be de trop. A green vegetable would probably go unnoticed. Some good bread to mop up the juices will be appreciated, while a leafy salad, produced only after your guests have demolished the chicken, might assuage a few guilty consciences.
The discover of the roasting pan, a day or so later in a cool larder, is a joy you may not wish to share. Plundered the jellied juices, congealed bits of skin, and crusty meat tatters that cling to the carcass before you quietly make the rest, along with the giblets, into stock.
cookbooks, cooking, meat, other blogs
22 Comments »
Posted by Anita on 05.12.08 12:09 AM
 I’m a big fan of Food & Wine magazine’s annual pocket-sized cocktail compilations. I picked up my first edition a few years back as an impulse buy in the supermarket checkout lane. Flipping through the slim volume while the woman in front of me attempted to write a check for her $4 order, I spied a recipe from the Zig-Zag boys and bought it on the spot.
Every year since then, I’ve waited impatiently for the new version each spring. Though I don’t always find a new favorite, there are enough “keeper” recipes in every edition that it’s worth the small expense — about $10 — and the photography and prop styling offer plenty of visual inspiration.
This year’s edition features a whopping 17 recipes from Bay Area bars and restaurants, including favorites like Nopa, Forbidden Island, Alembic, and more. Surely, I thought, there must be a good rum recipe in there, worthy of this month’s Mixology Monday roundup — hosted, aptly enough, by Trader Tiki.
Alas, somebody at F&W missed the memo about rum’s hot streak: A good chunk of the drinks in the Rum chapter are actually made with rum’s Brazilan cousin, cachaça. But one concoction did catch my eye: Scott Beattie’s “Thai Boxer” — a vanilla-rum drink that uses unsweetened coconut milk, muddled Asian herbs, and a dose of ginger ale. Truthfully, I’m not a huge fan of culinary cocktails that require a grocery-store excursion, but it just so happens that (a) I keep a case of coconut milk on hand for Thai curries and (b) we actually have all the herb ingredients growing in our yard.
Much as I love the folks at Charbay, I was reluctant to splash out $35+ for a bottle of their boutique vanilla rum, not knowing if I’d find another use for it. Perhaps it was a blessing in disguise: There wasn’t a single bottle to be found at any of my regular liquor shops. Happily, spiced spirits are one of the quickest and easiest infusions to make, and I was very pleased with my first effort at home-made vanilla rum.
But back to the recipe: Once the shopping’s done and the vanilla rum’s steeped, the hard part’s definitely done. I took the liberty of replacing the original recipe’s simple syrup with an equal amount of Canton ginger liqueur to double up the ginger beer’s flavor. Much like its namesake, this Thai Boxer’s a cute little thing with a surprisingly lethal kick.


Thai Boxer
– Adapted from a recipe by Scott Beattie in Food & Wine Cocktails 2008
10 leaves Thai basil, plus a sprig for garnish
 10 leaves fresh mint
10 leaves cilantro
1/2 oz Canton ginger liqueur, or simple syrup
1-1/2 oz vanilla rum (see Note 1)
1 oz lime juice
1/2 oz unsweetened coconut milk (see Note 2)
ginger beer, or a quality ginger ale
In a mixing glass, muddle the herbs with the liqueur or syrup. Add the rum, lime juice, coconut milk, and shake with ice until well chilled. Double-strain (using a Hawthorne strainer to hold back the ice and a fine sieve to catch the bits of herbs) into an ice-filled highball glass, and top with ginger beer. Garnish with a spring of Thai basil.
Note 1: If you can’t find a natural vanilla rum — Beattie recommends Charbay Tahitian Vanilla, which seems to be in short supply, even here in the Bay Area — it’s easy to make your own. Split and finely grind (or chop) a vanilla bean and steep in 8oz of white rum. Shake periodically, and strain through cheesecloth after 48 hours. Whatever you do, please steer clear of the artificially enhanced mass-market brands.
Note 2: You’re looking for the unsweetened Asian stuff here, not that ‘coco creme‘ crap. Try to not shake the coconut milk before using. In fact, it’s best if you can refrigerate the can for a day beforehand to allow the coconut cream to rise to the top and solidify. Be sure you’re using the thinner, watery milk at the bottom of the can for this recipe, or you’ll end up with an unappetizing film on the sides of the glass and a greasy-tasting drink.
—–
Other Drink of the Week posts featuring Rum:
Millionaire Cocktail #1 with Plymouth Sloe Gin
Fugu for Two at Forbidden Island
Dark & Stormy, San Francisco’s winter fave
Mai Tai at the Tiki-ti
Piña Coladas, au naturel
Mojitos a la Murray
Corn ‘n’ Oil, Cameron’s favorite rum drink
Bloody Beach, a Blood and Sand variation
Eggnog for a festive occasion
Painkillers straight from Tortola
Jolly Roger, for Talk Like a Pirate Day
Canton (aka Chinese Cocktail), the very first DOTW
cookbooks, Drink of the Week, drinks, Mixology Monday, recipes
9 Comments »
Posted by Anita on 02.20.08 11:34 PM
 Even otherwise reasonable people have been known to complain about the length of the recipes in Judy Rogers’ Zuni Cafe Cookbook. Indeed, our favorite recipe for mock porchetta (which, unless you live in the Italian countryside or know someone who butchers their own hogs, is as close as you’re likely to get to the real thing) does run to many pages. But it’s anything but complicated — especially if you’re handy with a boning knife — and it’s not even all that time consuming. Once you’ve made the recipe a couple of times, you can have the roast prepped and stuffed in less than 20 minutes; once that work is done, you’re pretty much home free.
As our very patient friends will attest, the Zuni porchetta is a dish we love so much we can’t help hauling it out for dinner parties all the freakin’ time. The glistening, heavenly scented, herb-infused pork shoulder is a stunner, its vermouth-spiked pan sauce an exercise in decadence. And, oh harried host or hostess, you can even roast your side dishes right in the same pan as the porchetta — who doesn’t like rosemary-and-pork-drippings on their fennel and potatoes? (And what is their problem?)
But the dirty little secret, the real reason why we’ll use any flimsy excuse to trot out this old favorite, is that it makes the world’s best leftovers, hands down. Thinly sliced cold porchetta is brilliant on rustic bread with a schmear of ricotta and a few grinds of coarse black pepper. Larger bits, especially those doused in leftover gravy, make a stunning filling in a hollowed-out crusty roll. A handful of moist shreds add panache to a composed salad. The possibilities are, as they say, almost endless.
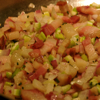
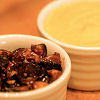
Despite all these lunchy luxuries, my favorite post-porchetta meal has got to be breakfast. Once you’ve had porchetta hash — especially when served with a perfectly poached pastured egg atop it and maybe some tomato-bourbon jam on the side — you may well forget about the corned-beef sort. Like the gorgeous love-child of crispy carnitas and silky rillettes, slow-cooked porchetta hash forms a golden-brown shell that hides a meltingly soft interior.
But first, you’ve got to make the porchetta.
I beg you: Don’t be daunted by the length of the recipe. Rogers has a knack for the subtle differences between a perfect outcome and a mediocre effort, and an all-too-rare talent for translating her technique into print. It’s nearly impossible for a pro to remember all the things she does by rote, the details that we amateurs need to be told explicitly, but Rogers gets this in spades.
Such a perfect recipe needs but one minor modification: Rodgers asks you to add the vegetables to pan, surrounding the roast, right at the start. I find they’re perfectly done if you add them at the one-hour mark, when you first turn the roast. (If you put your tongs on top of the veggie bowl, you won’t forget to add them.)


Mock Porchetta
— from The Zuni Cafe Cookbook
2-1/2 to 3-pound pork shoulder butt roast [Anita’s note: not the ‘picnic’ portion]
salt
1T capers, rinsed, pressed dry between towels, and barely chopped
1T lemon zest
3 garlic cloves, coarsely chopped
12 fresh sage leaves, crushed then coarsely chopped
a leafy sprig or two of fresh rosemary, leaves stripped and crushed (about 2T, packed)
2 tsp fennel seeds, barely crushed
1-1/2 tsp freshly cracked (not ground) black pepper
1 to 2 pounds prepared vegetables of your choice:
– carrot chunks, onion wedges, quartered fennel bulbs, baby potatoes, etc
a little mild-tasting olive oil
2/3 cup rich chicken stock
a few tablespoons of dry vermouth
Trimming, seasoning, and tying up the pork (1 to 3 days in advance):
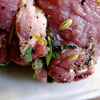
Trim any discoloration and all but a 1/4-inch-thick layer of superficial fat from the pork. Study the natural seams between the muscles on each side of the meat. Choose one that runs the length of the roast and close to the center of any face. Use the tip of a knife to gingerly separate the muscles along that seam, gradually exposing more seams, which you should then separate as well. The goal is to create lots of internal surfaces to cake with seasonings. If your initial foray doesn’t expose many internal seams, you can take a second stab at a different face, so long as you don’t cut the pork in two. Salt the splayed piece of pork evenly all over (approximately 1/2 tsp of sea salt per pound of meat).
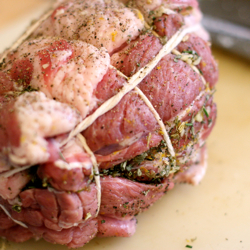
Combine the capers, lemon zest, garlic, sage, rosemary, with most of the fennel seeds and black pepper. (You should get about 1/2 cup, loosely packed.) Spread and pack this mixture all over the excavated insides of the pork butt, making sure the seasoning falls deep into the crannies where you’ve separated the muscles. Re-form the pork butt into its natural shape and tie tightly into a uniform shape, tying 4 or 5 strings around the circumference and another around the length of the roast. Rub the remaining fennel and pepper on the outside of the roast. Collect and refrigerate any loose herbs and seasonings. Cover the pork loosely and refrigerate.
Roasting the porchetta (2 1/4 to 2 1/2 hours)
Preheat the oven to 350°F. Toss the vegetables in a minimum of olive oil, barely coating the surfaces. Add a few pinches of salt and toss again; set aside.
Heat a 12- or 14-inch ovenproof skillet, depending on how many vegetables you are roasting, over medium heat. Place the pork roast in the pan; it should sizzle. Place in the oven.
The roast should begin to color at 45 minutes; if not, turn the heat up to 375°F until it does, then turn the heat back down.
At 1 hour, turn the roast over and add the vegetables, rolling them in the rendered fat. Work quickly, so you don’t lose too much oven heat and the roast doesn’t cool off. Turn the roast again at 2 hours and add about 1/3 cup of the stock or water.
Add any excess herbs and seasonings to the pan juices at this point and swirl the pan so they sink into the liquid. Roast for another 15 to 30 minutes, to about 185°F. The pork should be fragrant and glistening golden caramel.
Transfer the meat to a platter, tent loosely with foil, and leave in a warm, protected spot while you make the pan sauce. Place the vegetables on a separate warm plate.
Preparing the pan sauce and serving the roast
Tilt the skillet and spoon off the fat. Add the vermouth and the remaining 1/3 cup stock or water and set over low heat. Scrape and stir to dissolve the caramelized drippings on the bottom and sides of the pan. Skim the fat as the liquid comes to a simmer. Add any juice that may have trickled from the resting roast.
Slice the pork, removing the strings as you go, and serve garnished with the vegetables and a spoonful of the rich pan sauce.
cookbooks, meat, recipes
17 Comments »
Posted by Anita on 01.24.08 2:22 PM
 I may be the only foodie on the planet who doesn’t dig duck. I love the glorious seared breast they’ve been known to serve at Seattle’s Union, and we’ll pick up the occasional leg of confit for salads or cassoulet. I don’t actively dislike it, but duck’s not the kind of food I generally crave.
All that may be changing. On our recent trip to Napa, Cameron ordered the famous duck burger at Cindy’s Backstreet Kitchen. It smelled so heavenly that I had to try a taste. Needless to say, the combination of sweet, spicy, and smoky goodness made a lasting impression on me; as soon as we got home, I flipped open our copy of Big Small Plates to hunt down the details.
I found it easily enough, but the complexity of reproducing this dish was enough to make my eyes roll back in my head. The recipes, plural, went on for pages and pages — and that didn’t even count the marinade found in a separate part of the book. Ugh. But the flavor of that burger was haunting me… and besides, what better way could there be to spend a lazy Saturday afternoon?
Truth be told, the prep wasn’t all that difficult, or even time-consuming. There’s a lot of measuring and mixing, but that’s about it. We weren’t wowed by the original mustard sauce sub-recipe, however; it took too much time, dirtied too many dishes, made enough spread for a dozen burgers, and ended up tasting no better than a much easier substitution: store-bought honey mustard mixed with a touch of creme fraiche.
If you can find pre-ground duck for this recipe, things get even easier; some Whole Foods locations offer it, and any decent butcher should grind duck-leg meat (or any meat you want, for that matter) on request. Bizarrely, the recipe says you need two whole ducks at 4 pounds each — 8 pounds of bone-in duck!? — to make 1 pound of ground meat. Holy duck! Instead, we purchased 4 whole duck legs — about 1-3/4 pounds total weight, before boning — and ran the meat, fat, and a small amount of skin through our KitchenAid grinder. We ended up with exactly 1 pound of ground meat.


Cindy’s Famous Duck Burgers
– adapted from Big Small Plates
Patties
1 pound ground duck (see note in text above)
1 scallion, white and tender green parts, minced
1 tsp grated fresh ginger
1-1/2 tsp minced garlic
1T Mongolian marinade (see below)
1 tsp salt
1/4 tsp black pepper
Mustard Sauce
2T spicy honey mustard
2T creme fraiche
Shiitake Ketchup
2T olive oil
1 pound shiitake mushrooms, stemmed and quartered
1 onion, diced fine
1/2 tsp salt
1/2 tsp pepper
1/4 cup balsamic vinegar
2 tsp minced garlic
2 T molasses or dark honey
1/4 cup Mongolian marinade (see below)
To Finish
1 cup arugula
3 or 4 egg-sesame hamburger buns
Combine patty ingredients in a large bowl. Refrigerate duck mixture while making remaining components — at least 1 hour, or overnight.
Whisk the honey mustard and creme fraiche in a small bowl. Refrigerate until serving time.
Saute the mushrooms in a skillet with the oil over medium-high heat, cooking until tender. Add the onions and cook until translucent. Add the remaining ingredients, stirring well to combine, and simmer 3 to 5 minutes, until the sauce coats the mushrooms.
Portion the meat into 1/4- to 1/3-pound patties. Grill the burgers over a medium-hot fire, or broil in the oven, to medium rare — about 4 minutes on the first side, and 2 on the back — or to taste.
While burgers are cooking, toast the hamburger buns. Spread some of the mustard sauce on the bottom half of the bun. Top with the cooked burger, then the shiitake ketchup and arugula. Top with the other bun half, and serve.
—–
Mongolian Marinade
1/3 cup hoisin sauce
1-1/2 tsp sugar or honey
2 tsp tamari
2 tsp sherry vinegar
1 medium scallion, white and light green parts, minced
1/2 tsp Tabasco sauce
1/2 tsp black bean chili paste
1 tsp grated fresh ginger
2 tsp minced garlic
1/4 to 1/2 tsp ground white pepper
2T minced cilantro
1-1/2 tsp sesame oil
Whisk all ingredients together and set aside.
(Leftover marinade keeps for 3 to 6 months in the freezer, and works well on chicken or pork chops, too.)
cookbooks, locavore, recipes
10 Comments »
Posted by Anita on 01.09.08 8:03 AM
 Once upon a time, there was a Chef who toiled away in other people’s kitchens. After gaining acclaim for a rare skill with classic preparations, the Chef moved to Napa Valley and opened a signature restaurant on the fringe of the sleepy village of Yountville.
Soon, visitors flocked to the Valley not just to drink, but also to dine. An award-winning cookbook soon followed, then another cozier restaurant just down the road. The ensuing years brought more praise from the press, another cookbook, still more awards. Never content to rest on culinary laurels, the Chef recently opened a third restaurant aimed at a broader audience.
Think that you know this story? Not so fast. The hero of this particular tale is a woman, and the plot begins not in 1997 at The French Laundry with Thomas Keller, but in the dark ages of 1983 at a “truck stop deluxe” along Highway 29 known as Mustards Grill.
Before making history at Mustards, Cindy Pawlcyn made her name at the once-enthralling (but now sadly coasting) Fog City Diner. One of the first to popularize the conceit of comfort food as true cuisine, FCD was among the vanguard of New American restaurants. Pawlcyn was praised for her efforts there, and the cookbook she wrote remains a classic of the comfort-luxe genre.
When Pawlcyn took her jumped-up homespun specialties to Yountville, the national press knew she was onto something special. “[Mustards] changed Napa Valley and took the stuffiness out of dining,” said Gourmet magazine. Pawlcyn was soon in high demand, serving as chef and/or consultant to a string of well-known ventures, including San Francisco’s Bix, Marin’s Buckeye Roadhouse and Napa’s Tra Vigne. The Mustards Grill Napa Valley Cookbook won a James Beard Award, and it remains a perennial favorite in our kitchen (and many others, to judge from our friends’ bookshelves).
Pawlcyn eventually sold her share in the Real Restaurants empire to focus solely on Mustards, but with the 2001 takeover of St. Helena’s Miramonte, she again became a multi-location chef. Morphing into the less-threatening Cindy’s Backstreet Kitchen in 2003, this outpost continues to draw crowds — a happy success in a region where fickle diners often disappear as quickly as they came.
—-
We’ve eaten at most of Cindy Pawlcyn’s restaurants, including a good dozen visits to Mustards over the years, although a recent lunch there with family left me wondering if the 25-year-old landmark was feeling its age. The four of us ordered an assortment of options; none of our choices really wowed, and a few truly bombed. Months later, I grimace to recall a plate of greasy onion rings, and a pulled-pork sandwich with bland meat under a nearly inedibly sweet, heavily spiced sauce.
Happily, Pawlcyn’s two other ventures are as good as Mustards ever was in its prime.
We’ve returned to Cindy’s Backstreet Kitchen three times in as many trips north — twice last summer, and then once again last month. The food is old-school American with judicious flashes of Asian and Latin spark. If, like me, you’re a fan of Pawlcyn’s latest cookbook, Big Small Plates, you’ll find yourself equally taken with the dining room where many of its recipes first appeared. The decor evokes a gorgeous farmhouse, with a California crispness and vibrant splashes of Wine Country color. A long bar forms the centerpiece of the front dining room, a metaphor brought home by a clever cocktail list that weaves farm-fresh produce into a collection of delectable drinks.
In early 2007, Pawlcyn launched what is now her largest outpost: Go Fish. A “West Coast seafood house” along Highway 29, Go Fish is paradoxically cavernous but cozy, a coup that owes much to successful decor and lighting. The menu includes both traditional and modern seafood plates, but — as you might expect from a kitchen under the auspices of sushi master Ken Tominaga — the raw fish options are its stunning centerpiece. We visited over the holiday and out of a dozen nigiri and a few specialty rolls we sampled, only one (the kitchen’s very last portion of ikura, which we should have known better than to pounce upon) was less than sublime.
As lovely as Go Fish is, though, it’s too dear for everyday. It’s all too easy to spend hundreds of dollars on dinner for two, especially if you make a meal of the amazing sushi… which I highly suggest you do. Happily, there are many different ways to experience the inspired cuisine of the other — one might even say the original — Napa dining dynasty.


Cindy’s Backstreet Kitchen
1327 Railroad Avenue
St. Helena, CA 94574
707.963-1200
Go Fish
641 Main Street
St. Helena, CA 94574
707.963-0700
Mustards Grill
7399 St. Helena Highway
Yountville, CA 94558
707.944-2424
cookbooks, Napa & Sonoma, restaurants
5 Comments »
