Posted by Anita on 09.28.07 7:11 AM
 The folks at The Spirit World sure picked a doozy for the inaugural episode of their “Raiders of the Lost Cocktail” challenge. I spent many evenings thumbing through my bar library, searching for recipes featuring Liquore Strega, and found precisely one mention of this saffron-tinted herbal liqueur.
Excitement quickly turned to despair as I noted the drink’s name: The Strega-nator.
Oh, please. Spirits snob that I am, I didn’t give it so much as a second glance. There’s no way in hell I am making a drink called the Strega-nator, much less putting it on the blog. I’d never be able to show my face at Mixology Monday again! I headed back to the drawing board, muttering under my breath about slapped-together cocktails with frat-boy names, cursing the editors who foist them on their unsuspecting readers.
Next, I hit the public library. Even among dozens of titles both old and new, I didn’t uncover many options. My curiosity was piqued, though, by a UK-published book that suggested mixing Strega with Orange Smash Squash. I consulted our City’s guru of British comestibles, who promptly dashed my hopes again. Orange Squash was nothing short of “putrid” said Sam: “I wouldn’t trust anyone who suggests you put it in a cocktail.” (After having personally sampled it — I found a bottle in the British foods section at Mollie Stone’s — I’m inclined to agree. It’s something like the bastard stepchild of SunnyD and Hi-C Orange, neither of which has any place in my kitchen, much less my bar.)
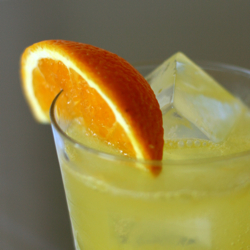
Once you’ve sunk to the depths of imported kiddie-colored juice substitutes, there’s nowhere to go but up. Having all the necessary ingredients on hand, I grudgingly gave the Strega-nator a whirl. And damned if it wasn’t tasty. Especially considering that it has no base liquor as its spine, it’s a fine drink. Well-balanced, nuanced, perhaps a tad sweet for my taste, but the herbal finish is quite bewitching. After much hand-wringing, I came to the realization that we’d all lived through one Drink of the Week with a god-awful name; why not make it a pair?
Unfortunately, I can’t imagine that a cocktail recipe published 18 months ago could really be considered “lost” for the purposes of the challenge. (Unless, of course, everyone else took one look at the name and flipped right past it, too — a distinct possibility.) I’ve got a few tricks up my sleeve, plus a full bottle of Strega and enough time before the challenge ends; there just might be another entry in the works.
As Arnold would say: “I’ll be back.”


Strega-nator
– published in Food & Wine Cocktails 2006
credited to BLT Prime, New York City
2 oz Strega
1 oz fresh orange juice
1 oz fresh lime juice
2 oz chilled club soda
1 orange wedge, for garnish
Fill a cocktail shaker with ice. Add the Strega and juices, and shake well. Strain into an ice-filled rocks glass, and top with club soda. Garnish with the orange wedge.
cookbooks, Drink of the Week, drinks, other blogs
11 Comments »


Posted by Cameron on 09.19.07 11:49 AM
 Like we needed more herbs.
Seriously, we’ve got thyme, rosemary, and oregano in the yard (and by the yard), probably the three most useful fresh herbs to have within easy clipping distance. Adding to that could be viewed as extravagance, piling on, perhaps even hubris. So why do we have a window box outside our breakfast room sprouting green leaves and stalks?
It all started in July with a bunch of sweet basil that Anita brought home from the farmer’s market. She used what she needed and stuck the rest in a glass of water on the kitchen windowsill, where we ignored it for two weeks. We must have added water at regular intervals, because the glass wasn’t all that big, but I don’t remember doing it or seeing Anita do it. It got less attention than a bald white guy at a dim sum parlor.
Darned if that bunch of basil didn’t grow roots and stay all green and lush and everything.
So about the time that we’re watching these stalks get their groove on in about a cup and a half of Hetch Hetchy’s finest, we start thinking that the view out the window of our breakfast room is a little stark. Which is not exactly a penetrating observation given that the window faces an expanse of painted plywood about eight feet away. This was also right about the time when the main garden was popping along in full summer bloom, and I was thinking that maybe I could see a faint tinge of green around the edges of my thumbs. Yes, even after I washed them. Smartass.
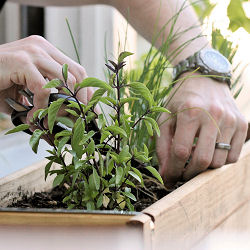
Anyway, I figured that if we gave this little survivor of a basil plant some dirt and a little love, we’d really see something. At the same time, a window box would be just the thing to spruce up the view. So I split the bunch of basil in two and planted half down in the yard near the bergamot tree. The other half I put in a window box along with some tarragon, chives, and Thai basil.
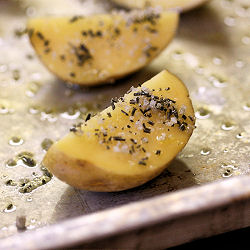
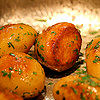
So far, the box has succeeded both as a still life and a food source. A little bit of the tarragon goes a long way, but it gave the sauteed potatoes that we made for our Julia Child dinner just the right touch. The chives have made cameo appearances in several dishes (including those same potatoes), and the Thai basil dropped in on one of our standby stir-fries last week.
The basil is still growing, but slowly; it’s a living demonstration of how my enthusiasm for gardening occasionally outstrips any calculations of practicality. As I’ve discovered, basil isn’t generally the sort of thing that you just pick a leaf or three off now and again. If you’re serious about consumption, you grow it in big bunches for regular harvest.
But honestly? I really don’t care. I know that I’ll have to plot (heh heh) and plan if I want to try a real vegetable garden… even a small one. In the meantime, it’s a thrill just to plant something green and watch it thrive. It feels like a promise that I’m making to myself.


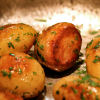

Pommes de Terre Sautées
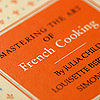
adapted from Mastering the Art of French Cooking
2 pounds “boiling” or new potatoes
2 T butter plus 1 T oil, for sauteeing
2 to 3 T softened butter
1/4 tsp salt
2 to 3 T minced fresh green herbs (parsley, chives, tarragon)
Peel the potatoes. As you do, try and make them as smooth as possible and give them an oval shape that may remind you of extremely large olives or impossibly small rugby balls, depending on how you spent your formative years. Do not wash the potatoes after peeling; pat them dry with a clean towel. If you need to hold the raw potatoes for a while before you cook them, wrap them in a damp towel, and then dry them before cooking.
Add the butter and oil to a skillet and heat it over medium high. When the butter stops foaming, put the potatoes in and leave them for two minutes. Control the heat so that the butter/oil mixture stays hot but does not color. Shake the potatoes in the skillet, rolling them around and letting them sit to sear until they are pale gold all over.
Sprinkle the salt over the potatoes, lower the heat, cover the skillet, and cook the potatoes for 15 minutes, shaking them every three or four minutes to prevent sticking. When the potatoes yield to slight pressure from your finger or when a knife pierces them easily, use the skillet cover to hold in the potatoes while you pour off the fat.
Take the potatoes off the heat, add the softened butter, herbs, and a few grinds of fresh black pepper. Shake the potatoes in the skillet so that they glisten with herbs and butter. Serve immediately.
cookbooks, garden, recipes
4 Comments »
Posted by Anita on 09.10.07 1:04 PM
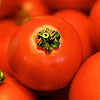
 It’s been a gazpacho-filled summer for us. In addition to the traditional Spanish soup’s regular appearances on our warm-weather menus, we kicked off tomato season with Cookie’s gloriously deconstructed version, and were lucky enough to sample Sean’s gorgeous white Andalucian gazpacho, too.
Now, I love me a straight-ahead gazpacho as much as the next tomato fanatic — that magical combination of cucumber, pepper, tomato, and vinegar is nearly unbeatable when it’s too hot to cook. But with two show-stopping variations fresh in my mind, I craved something equally appealing for Tami’s second Super Soup Challenge.
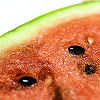
Rummaging through my library copy of Mitchell Davis’s Kitchen Sense, I spied a likely candidate. Much like the watermelon salad we brought to DPaul’s party last month, this fruit-based gazpacho is actually a savory appetizer, not a dessert. But it’s still easy as pie.
After rough-chopping all the veggies — all of which are in season and readily available from local farmers markets — you simply whiz them all together with a few simple seasonings, strain out any remaining bits, and chill for an hour in the fridge. At serving time, a pair of salty garnishes teams up with your best olive oil to add a touch of contrast. Drizzling the olive oil off the edge of a spoon gives the sparkle of beautiful small droplets.


Watermelon Gazpacho
– adapted from Kitchen Sense
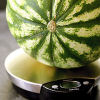
1 6-pound ‘icebox’ watermelon, red-fleshed
2 Kirby cucumbers or 1 hothouse cucumber, peeled (seeded, if necessary) and chopped
1 fresno chile or other medium-hot red chile, chopped
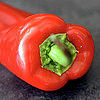
1/4 large red pepper, cored, seeded, and chopped
1/2 medium red onion, chopped
2/3 cup tomato juice
1/4 extra-virgin olive oil
1/4 cup sherry vinegar
1/2 tsp kosher salt
fresh-ground black pepper
—–
2 oz feta cheese, crumbled
3 T finely chopped Kalamata olives
your best olive oil, for drizzling
Remove the rind from the watermelon. Cut the flesh into chunks and remove the seeds, if necessary; you should have about 6 cups of melon. Using a stick blender, traditional blender, or food processor, blend all soup ingredients (except the garnishes) until well liquified — about 1 to 2 minutes. Strain the puree through a large-mesh strainer to remove any lingering seeds or other bits, pushing the pulp through with a spatula. Adjust seasonings as needed, and chill for at least an hour. Serve garnished with the feta and olives, and a drizzle of olive oil.
Serves 6 as an appetizer
cookbooks, cooking, farmers markets, locavore, other blogs, recipes
10 Comments »
Posted by Anita on 08.23.07 12:10 PM
 All the cool kids are taking blog-sabbaticals this summer. Oh, how I wish that were the reason why we’ve been so blissfully post-free. Truth is, we’ve got plenty of inspiration, and we’re cooking up a storm. We’ve had a week of meals lined up, shopped for, and planned to a fare-thee-well. But – sadly, right in the heart of the best-eating time of the year – we’re more than a little off our game.
First there were the gnocchi.
As any sane cook will tell you, gnocchi are fraught with peril, even in the best of circumstances. Attempting to devise gnocchi that are somehow simultaneously delicious, gorgeous, and interesting enough to write about adds a serious degree of difficulty. While I am sure there will be plenty of entries in this month’s exciting episode of Hay Hay, It’s Donna Day, my Day-Glo fuschia beet-ricotta gnocchi will not be among them. Fussy, dumpy, and not terribly tasty… it’s not too strong to call this an outright failure.
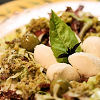
Then there was the antipasto salad. I think it’s safe to say that Nancy Silverton is decidedly not targeting my demographic with her latest book, A Twist of the Wrist. It’s a cool, heartfelt attempt at legitimizing the semi-homemade trend, streamlining weeknight dinners with the judicious application of store-bought gourmet goods. Like tapenade.
Oh, the tapenade.
Trust me, kids, it was all I could do to fight the urge to just buy some good olives and slap them in the Cuisinart with a splash of olive oil and a spoonful of capers – completely eliminating the book’s time-saving charm. So I didn’t; I bought a nice-looking bottle of chunky green-olive paste and added it to my pile of lettuce, salami, and herbs.
You know where this is going, eh?
Salty, metallic and otherwise irredeemably bad, the store-bought ‘tapenade’ overpowered all of the other ingredients – and I’d only used half what the recipe called for. I don’t think we actually tossed it all down the drain, but it was a near thing; there was a lot of picking good salami and cheese out of the hyper-salinated salad.
Returning to familiar territory, we pulled out a tried-and-true recipe for Thai shrimp-cakes from Dancing Shrimp. Our makrut lime tree is finally bearing fruit, and these savory morsels seemed the perfect way to showcase our harvest for Andrea’s “Grow Your Own” roundup. As I pulled all of the ingredients out of the fridge, I caught a whiff of the ‘fresh’ shrimp we’d bought at Whole Foods: It had spoiled overnight. (That will teach me to sleep in and skip the market. This would not happen at Shogun.)
Feeling defeated, we cannibalized a meal we’d planned to eat later in the week: Rib-eye steak and rosemary salt-roasted potatoes. It was fine, I guess, although we both picked through the definitely-not-Prather-quality meat and the too-sweet supermarket spuds.
Last night, in need of a sure thing, we hoofed it all the way down the peninsula to our favorite Mexican restaurant. We’ve eaten there for more than 10 years now, always bragging that we’d only ever had one bad meal there. Well, now we can say we’ve had two: Unmelted cheese, blown-out rice, tortillas heated to the point of hand-scorching rubberiness, and a squeaky-dry chicken tostada. At least the margaritas were good.
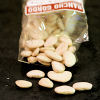
With the exception of a lovely dinner at Oliveto on Monday, I can honestly say that there were exactly two meals over the last week that I truly enjoyed: a fluffy Denver omelette I made from piperade leftovers, and a bowl of Rancho Gordo’s giant lima beans simmered with onions that had been sautéed in bacon drippings.
Amid an overwhelming collection of intricate disasters and well-planned flops, these simple, graceful plates stand out as a steady reminder: Sometimes even the best-laid plans are no match for kitchen kismet, and sometimes less is more.


Denver Omelette
3 large eggs
1 T half-and-half, or cream
2 T butter
1/2 cup diced onion
1/2 cup diced bell pepper
1/2 cup small ham cubes
1/4 to 1/2 cup shredded cheddar cheese
In an 8-inch skillet, melt the butter over medium heat. Saute the onions until they just begin to soften. Add the pepper, and saute until vegetables are well softened but not browned. Add the ham cubes and saute until heated through. Remove sauteed ingredients to a plate and keep warm. Return the skillet to the fire.
In a medium bowl, scramble the eggs and the half-and-half until well blended and a little frothy. Add the beaten eggs to the hot pan, and let sit for 15 seconds; stir gently with a wooden spatula, pulling the curds toward the center of the pan and encouraging liquid to fill in the gaps. When a little liquid remains, use the spatula to gently even out the thickness of the curds in the pan, and reduce the heat to low. Spread the cheese all over the soft-set eggs, then evenly top one side of the omelette with the filling. Cover the pan and let sit for a few minutes until cheese melts. (If the underside of the egg browns too much, turn off the heat entirely; the pan will be hot enough if you leave the lid on. Unlike a French omelet, you do want some color and crispness, but you don’t want leathery eggs.)
When cheese is melted, fold the unfilled side of the omelette over the filling. Slide onto a warmed plate, glazing the top with a bit more butter, if desired.
Serves 2 with salad as a light supper, or a very satisfying breakfast for one hungry soul.
breakfast, cookbooks, cooking, other blogs, recipes
8 Comments »
Posted by Anita on 08.15.07 12:31 PM
 Julie Powell notwithstanding, most cooks discovering Julia Child’s recipes for the first time seem mysteriously drawn to the most labor-intensive and luxurious among them. Apparently, this isn’t strictly a modern phenomenon: In his entertaining book The United States of Arugula, David Kamp recounts this very same thing happening when Child’s first book debuted, poking gentle fun at those who “deliberately chose the most difficult [recipes] to execute when company was coming.”
Among these over-the-top creations, Kamp makes much of the overwrought dish known as Veau Prince Orloff, “a display piece consumptive of enough time and money to garner status.” I looked up the offending recipe in my own copy of Mastering the Art of French Cooking, and felt a little queasy: The damned thing goes on for three full pages and contains — I kid you not — no less than a dozen sub-recipes.
Luckily for those of us who don’t have days to spend in the kitchen, Julia’s chef d’oeuvre also offers up simple recipes in spades. Scattered among the aspics and the suprêmes and the canard a l’orange lies a wide assortment of bistro classics and a fair number of recipes that rise no higher than the cuisine de bonne femme of everyday French households. Kamp recounts Julia herself choosing the simple potage Parmentier as the book’s first recipe “so that her audience would not be intimdated.”
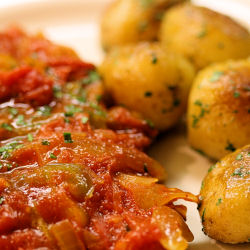
When I pull out my Grandpa‘s battered copy of Mastering, these are the sorts of recipes I crave: The Provençale garlic soup, the mushroom quiche, the steak au poivre. So when Lisa at Champaign Taste proposed her second-annual blog party to honor the 95th anniversary of Julia’s birth, I knew right away the sort of dish I’d share. Sure, it’s not going to win any beauty contests, but it’s a delicious and satisfying plate full of seasonal flavors with a subtle French flair.
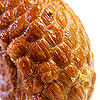
Julia recommends serving this humble “Ham Slices Baked with Tomatoes, Onions and Peppers” alongside her sauteed potatoes — and really, folks, how can you pass that up that kind of good advice? While I prepped the piperade, Cameron peeled a pound of baby spuds and trimmed them to roughly the same size, browned them in butter and oil, then covered them to steam until tender. Along with a bottle of French rosé, they were the perfect foil for the tangy, salty richness of the ham. We raised our glasses to the warbly voiced girl from Pasadena, and counted ourselves truly lucky to have lived in her era.
Jambon en Pipérade
– adapted from Mastering the Art of French Cooking
Cook’s note: Julia simply calls for “peeled, seeded, juiced and sliced” tomatoes; I’ve complicated matters a bit by explaining how you get there. If you dispense with peeling your own tomatoes and opt for good quality whole canned tomatoes — like Muir Glen — you’ll need 2-1/2 cups of tomato pulp plus about 3/4 cup of their juice. Go this route and this simple dish can be on the table in less than 45 minutes.
2 pounds cooked ham, sliced 1/2-inch thick
1 to 2 T bacon fat or olive oil
1 cup sliced yellow onions
1 cup sliced green bell peppers
2 pounds firm, ripe, red tomatoes
2 cloves garlic, mashed
1/8 tsp pepper
pinch of cayenne pepper
1/4 tsp fresh thyme
2 T minced parsley
Preheat the oven to 350°. Meanwhile, bring a saucepan of water to a boil.
While the water heats, prepare an ice-water bath in a large bowl. Peel the tomatoes by scoring an ‘x’ in the bottom of each, then dropping into the boiling water. When the skin begins to peel away from the ‘x’, remove from the pan with a slotted spoon, and drop each tomato in the ice-water bath. When cool enough to handle, remove the tomato and peel off the skin. Proceed with the remaining tomatoes until all are peeled.
Cut each tomato in half, and remove any hard core or stem section. Squeeze the juice and seeds out of the fruit, reserving on the edges of the cutting board (or in a bowl if they become overwhelming). Slice the squeezed tomato flesh into regular pieces. Set aside the tomato flesh and the tomato seeds/juice separately.
Trim any excess fat off the ham, and dry each slice on paper towels. Heat the fat in your largest skillet until it is almost smoking; then brown the ham for a minute or two on each side. Remove ham from skillet and place in a shallow baking dish large enough to hold the ham in one layer. (A slight overlap is fine.)
Lower the heat and stir the onion slices into the fat. Cook over medium-low heat for 5 minutes. Stir in the peppers and cook 5 minutes more, or until the vegetables are soft but not browned.
Place the tomato pulp over the onions and pepper, and continue to cook over medium-low heat. While this is happening, scoop the tomato seeds and juice, along with any seed jelly, into a strainer, and add the strained liquid to the skillet.
Push the solids to one side of the pan, and tilt the skillet to allow the liquids to gather on the now-empty half of the pan. Arrange the skillet off-center on the burner so that the juice side of the pan is directly over the flame, and the vegetables are further away. Simmer until the juices become minimal, stirring everything together and re-dividing every few minutes, to make sure that the juices reduce without overcooking the vegetables.
When the tomato juice has almost evaporated, stir it back into the vegetables and cover the browned ham slices with the mixture. Cover the baking pan with foil, and place in the preheated oven. Cook for 20 to 30 minutes, until the ham is heated through and tender. Baste with juices in the dish, then correct seasoning if necessary. Garnish with chopped parsley, and serve with sauteed potatoes.
cookbooks, holidays & occasions, meat, recipes
7 Comments »
Posted by Anita on 08.10.07 7:08 AM
 Last year, I put myself on a book diet. Watching my ever-expanding kitchen library take over the countertops, I knew the time had come for serious change. I still allowed myself to purchase cookbooks, but only after thoroughly vetting them first. Usually, this involved borrowing the book from a friend, or from the public library.
Even though it’s been difficult to curb the urge to acquire every buzz-worthy title on the market, the system that I fondly call “the new cruelty” has saved me from buying more than a few turkeys. The number of additions to our library has been small, but every one of them gets used regularly.
My real problem, though, was bar books. I’m the abashed owner of what any normal foodie would consider to be an unseemly quantity of cocktailian tomes. Given the vast amounts of spiritous inspiration lurking around every corner of the Internet, my hoard has proven truly unnecessary. In the strictest sense, most mixology manuals aren’t even all that inspirational — they often lack photos, and they’re typically burdened either by purple prose or too-clinical content. Enough, I said, was enough.
So while everyone else swooned over The Art of the Bar during its debut, I smugly folded my arms and turned my head. I have plenty of drinks books, I told myself. Besides, I’m not even that fond of Absinthe (the authors’ place of employment, that is, not the aperitif).
But one afternoon with some time to kill between mid-day appointments, I found myself in front of a local bookstore. I popped inside and headed down to the cookbook department. Grabbing a few titles and heading to the nearest bench, I was sucked into to The Art of the Bar by beautiful full-page photos, artfully styled but still obviously real. The copy was engaging, and the recipes — I grudgingly admitted — were interesting without being too “out there”. In short, it was the cocktail book I could justify buying.
But still I stood my ground for months, even after discovering that the San Francisco Public Library — quite scandalously — does not own a copy of this widely acclaimed title (all the more amusing because you could almost hit Absinthe with a muddler thrown from the roof of the Main Library). After finally scrounging a copy through interlibrary loan, it didn’t take more than a few test drinks to know that my moratorium would crumble.
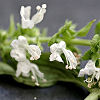
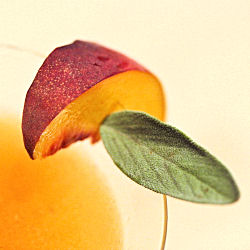
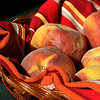
Living with one of the world’s most unrepentant punsters, it’s not surprising that one of the first recipes I flagged was a little number called Peaches & Herb. Stone fruits had just burst into season as my very own copy arrived on our doorstep, and the new sage plant was thriving — truly, my path was clear.
We’ve been mixing up a batch of these beauties almost every week for the last month, trying little variations here and there. You’ll be pleased to know that orange bitters, or even Angostura, can take the place of the requested peach bitters (although the original is undeniably better).
This month’s edition of Mixology Monday asks us to think orange — and the lovely P&H qualifies twice, both by virtue of its sunny color and one of its key ingredients. Even if you’re colorblind you’ll definitely want yellow peaches here; their white siblings clash with sage’s herbal intensity. And although brandy makes for some mighty smooth sipping, I’d be remiss if I didn’t recommend bourbon as a tremendously interesting variation.


Peaches & Herb
– from The Art of the Bar, by Jeff Hollinger & Rob Schwartz
3 to 4 slices of peach, plus 1 slice for garnish
3 to 4 fresh sage leaves, plus 1 leaf for garnish
splash of simple syrup
1-1/2 oz brandy (or bourbon)
1/2 oz Cointreau orange liqueur
2-3 dashes peach bitters
1/4 oz lemon juice
 In a mixing glass (or cocktail shaker), muddle the peach and the sage with the syrup (if needed, depending on the sweetness of the peach), to make a pulp. Top with ice; add the brandy, Cointreau, bitters, and lemon juice. Shake your groove thing until cold, and strain into a chilled cocktail glass; garnish with remaining peach slice and sage leaf.
cookbooks, Drink of the Week, drinks, Mixology Monday, recipes
10 Comments »
Posted by Anita on 07.30.07 12:48 PM
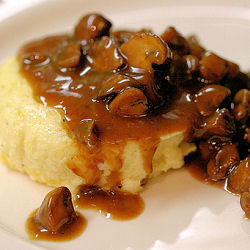 In my new favorite cookbook, Big Small Plates, author Cindy Pawlcyn names her savory corn custard as a brunch favorite. I have no problem believing that this dish flies out of the kitchen, no matter the time of day: We served this recipe a recent dinner party, and our guests all but licked the plates.
The first time I made the custard, I used a standard box grater to remove the kernels from their cobs — a messy proposition when dealing with super-fresh farmer’s market corn that spurts milk everywhere. After reading about the Kuhn-Rikon corn zipper in a magazine, I decided to invest in one of these $12 gadgets. Remarkably, it works just like its namesake: Wedge its little crown-shaped tooth at the end of an ear, give a gentle tug, and watch in amazement as two rows of corn unzip right off the cob in perfect alignment.
Does the corn zipper really make this custard better? Given that you end up whizzing the corn to a puree, the answer’s a definite NO. But it certainly makes the prep a lot less messy, and far more amusing. I’d even go so far to say that the corn zipper’s a must-have item if you’re you’re making corn relish or succotash, or any other recipe where whole kernels are a plus, or even if you’re cooking for anyone who loves fresh corn but can’t handle the cob. Yes, Alton acolytes, it’s a unitasker. (But then again, so’s my citrus squeezer, and you’d have to pry it out of my cold, dead hands.) On the plus side: It doesn’t take up much room in the prep drawer, and it’s so freaking cheerful that you just have to smile back — who could resist its happy little face? And as a side benefit, once you own a corn zipper, you’ll have no trouble deciding what to enter into a crazy kitchen gadget event (EDIT: like the one Kathy’s hosting here).
Like other Big Small Plates recipes we’ve tried, this one yields a serious mismatch of sauce and custard quantities. I doubled the sauce on my second attempt, and still ended up with just enough to garnish six servings (albeit rather generously). Either prepare for scantier saucing, or consider doubling the recipe — or at least the stock portion — yet again.


Sweet-Corn Custard with Mushroom Sauce
— adapted from Big Small Plates
Custard
3 ears fresh corn (to yield 2 cups kernels)
2 cups heavy cream
4 large eggs
1 cup (4oz) loosely packed grated Monterey Jack cheese
1 T Dijon mustard
1/2 tsp. salt
1/4 tsp. white pepper
Sauce
4 cups rich stock (beef, chicken, or veal)
2-4 T olive oil
1 pound mushrooms, stemmed and quartered
2 T butter
2 shallots, minced fine
Salt and freshly ground black pepper
Minced fresh chives, for garnish
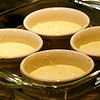
Using a corn zipper or the coarse side of a box grater, cut the kernels off the cobs. Heat the corn and cream together in a medium saucepan. Bring to a gentle simmer and cook 5 to 10 minutes until the corn is tender. Cool slightly, then puree with a stick blender. (If using a traditional blender, let mixture cool further.) Strain the puree through a fine sieve into a large mixing bowl, pressing well to extract all the liquids. Add the eggs, cheese, mustard, salt, and pepper to the bowl, and stir gently to combine.
Preheat the oven to 325F, and butter eight 6-to-8 oz ramekins. Measure an equal amount of custard into each dish, leaving at least 1/4-inch of headspace. Place the ramekins in a large, shallow pan and carefully fill the pan with enough hot water to reach 2/3 of the way up the side of the ramekins. Cover the pan with aluminum foil, punching a few holes in the top with a skewer, to help prevent condensation drips. Bake the custards in the water bath until just set; start checking at 45 minutes. (The time will depend on the thickness and size of your ramekins, and the size of your water bath.)
To make the sauce, rapidly simmer the stock in a saute pan over high heat until reduced to a sauce-like consistency. Meanwhile, heat the olive oil in another saute pan over medium-high heat. Add the mushrooms and cook, stirring, until they have released their juices and the pan has dried out a bit, 10 to 15 minutes. When the mushrooms are done, salt them to taste and increase the heat to high and pour the stock into the mushroom pan. Bring the stock to a simmer and cook 2 minutes. Just before serving, add the butter and shallots, swirling into the sauce. Season to taste with salt and pepper.
Turn the custards onto individual plates. Pour some sauce over or around each of the warm custards and garnish with the minced chives.
Note: Custards can be kept warm in their water bath for about 20 minutes; if you need to wait longer, refrigerate and gently reheat in a water bath for 10 to 15 minutes before serving. The texture will suffer slightly, but the taste is undiminished.
cookbooks, equipment, other blogs, recipes
12 Comments »
Posted by Anita on 07.25.07 9:21 PM
 Otto von Bismarck reportedly quipped that “The less the people know about how sausages and laws are made, the better they sleep at night.” Although the ol’ Prussian was undoubtedly right about legislation, when it comes to wurst, I’d beg to differ. Not only is sausage-making entertaining and educational, it’s also much easier than you might think.
It can even be fun, especially if you divvy up the work among a crew of like-minded friends. One recent Sunday, we rounded up Sean and DPaul plus our new pals Jon and Karen, classmates from Kasma’s Thai cooking series. Everyone brought a dish to share and a five-pound pork shoulder; Cameron and I provided the recipes, the seasonings, the casings, and other miscellaneous bits. In a matter of hours, the six of us created a spectacular assortment of sausages to stock our freezers.
Between us, we amassed four KitchenAid mixers, three meat grinder attachments, two pairs of sausage-stuffing tubes, and one very porky kitchen. All told, we ended up cranking out more than 25 pounds of sausage. We stuffed a French-style garlic saucisse — courtesy of Michael Ruhlman’s acclaimed Charcuterie — into stout links, curled Kasma’s recipe for spicy sai oa into a hog-casing spiral, squeezed delectable Kentucky-style breakfast sausage into petite sheep casings (plus a few patties), and parceled out our spicy Mexican chorizo in bulk. Even after a hearty sampling, everyone went home with a bit more than a pound of each flavor, with no more effort than making a single batch on their own.
Although we had a blast with the grind-and-stuff method, don’t let a lack of specialized equipment hold you back from making great sausage. Most good butchers will grind any roast to order. Choose a nice, fatty pork shoulder — also known as a Boston butt or simply pork butt, even though it comes from nowhere near the hind end of the pig — and ask for a coarse grind. Mix the ground pork with your seasonings, shape into patties, and voilá: You’ve just made sausage.
Folks were pretty evenly divided about which of our creations they loved best. For me, the winner of the day was the Kentucky breakfast sausage. There’s no stronger compliment that I can pay it than it just tasted right… something like your Southern grandmaw would have made, if you’d been so blessed.
Go on, don’t be shy: Be your own Southern grandmaw. It’s much easier than getting a bill through Congress, I promise.


Kentucky Breakfast Sausage
– adapted from Bruce Aidells’ Complete Sausage Book
4 pounds well-marbled pork shoulder, cubed
1-2 pounds pork back fat, cubed
— quantity varies depending on the fattiness of the meat
2 T kosher salt
4 tsp freshly ground black pepper
1/4 cup ground, dry sage
2 tsp ground cayenne pepper
2 tsp ground coriander seeds
1 tsp freshly grated nutmeg
1 cup water
sheep casings (optional)
Cut the pork and fatback into cubes. Place in a metal bowl in the freezer for 30 minutes to chill well, along with the grinder parts. When thoroughly chilled, grind the pork and 1 pound of fatback through the coarse plate of the grinder.
In a large bowl, mix all the ingredients (except casings), kneading and squeezing until well blended. Fry a test patty and taste for seasonings and fat content; adjust as needed.
For links, stuff the sausage into casings and tie or twist at three-finger-width intervals. If making patties, shape the meat into large rolls, 2 inches in diameter. Wrap them in waxed paper, and refrigerate until ready to use; slice into patties as needed.
(Sausage keeps refrigerated for 3 days, or frozen for 2 to 3 months.)
cookbooks, cooking, equipment, meat, recipes
14 Comments »
Posted by Anita on 07.10.07 1:14 PM
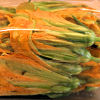
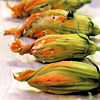
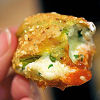
 Every summer, I walk by baskets of squash blossoms at the farmers market, longing to find a use for them. Stuffing fragile flowers seemed like a tedious task for a weeknight meal, so I’d always given them a pass. But once I saw Jen’s fritters — which were in turn inspired by a course at Derrick and Melissa’s much-discussed dinner party — I knew I couldn’t put it off any longer.
The basic idea seemed simple enough: Stuff the blossoms with cheese, dredge them in dairy and starch, and fry until golden. But I wanted to dress them up a bit — make them nice enough to serve as a light supper, alongside a simple salad — so I turned to my new favorite cookbook, Big Small Plates. The text of this popular title is written by Cindy Pawlcyn (of Mustards Grill fame) but the recipes themselves are largely the work of her two partners: Pablo Jacinto, the chef at Cindy’s Backstreet Kitchen, and his brother Erasto, who holds the same title at Mustards.
The book’s tapas-style approach draws inspiration from around the globe. There are plenty of straight-up California-American preparations, and Asia is well represented: A Vietnamese mini-burger salad we tried was especially delicious. But — and here I must admit to being biased — it’s the book’s Latin-influenced dishes that really shine. We’ve tackled a glorious mole casera, two batches of perfectly wonderful empanadas, and a handful of other Mexican-tinged dishes that hit the mark both in taste and in appearance.
The book’s a delight to use, aside from a few scale issues: the empanada recipe yields twice as much filling as wrappers to enclose it, and the original squash-blossom dredge made easily three times as much as I needed (I’ve corrected the proportions below). Most of the recipes serve six as an appetizer course or side dish, but many can serve as two or even four entree-size portions. Some dishes involve prepping multiple sub-recipes, but the auxiliary instructions usually revolve around simple garnishes like the lime-infused crema here. Ingredient lists can seem daunting, but the end results come together with minimal fuss. And they look as good on the plate as they do in the photos — no small compliment in the realm of chef-written cookbooks.
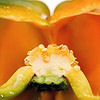
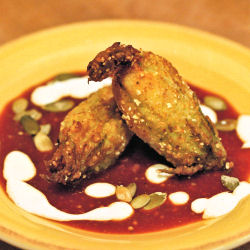
But back to those blossoms. I was worried that I’d waited too long between market day and making the dish: The flowers had started to wilt and the petals were sticking together. But despite their tissue-thinness, and warnings in nearly every recipe I read about the perils of tearing the flowers, the squash blossoms proved surprisingly resilient. Pulling two petals apart at the seam between them, I could split the blossom (much like you would when making a chile relleno) to remove the pollen and stuff the interior. The petal’s own natural moisture combined with the stickiness of the filling meant that I could patch the petals back together after stuffing; the batter held in any remaining leaks during frying.
It was a fiddly process, to be sure, but a highly rewarding one. Once the blossoms are stuffed, you can hold them in the fridge for a few hours. The dredging and frying comes along quite quickly after that, and if your garnishes are prepped and waiting, you’re 90 percent done with a spectacular summer appetizer. (Or one very decadent supper.)

Crisp-Fried Squash Blossoms
adapted from Big Small Plates
2 ears fresh corn
1 tsp olive oil
1/2 cup grated Monterey Jack cheese
1/2 cup fresh ricotta
2 T minced cilantro leaves
—
1/4 cup cornstarch
1/4 cup cornmeal
1/4 cup all-purpose flour
1/2 tsp salt
1/4 tsp freshly ground black pepper
1/4 tsp cayenne pepper
—-
1/2 cup buttermilk
vegetable or canola oil, for frying
—
12 to 18 very fresh squash blossoms
1/4 cup toasted pumpkin seeds
1/4 cup sour cream, mixed with the juice and zest of 1/2 lime
1 cup tomatillo red-chile salsa (homemade or a good store-bought brand), warmed
Cut the kernels off the cobs. Heat the olive oil in a skillet over medium-high heat and saute the corn 2 to 3 minutes. Set aside and allow to cool, then combine with the Jack cheese, ricotta, cilantro.
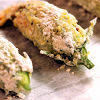
Open each blossom as gently as possible, and remove the stamen. Stuff each blossom with a spoonful of the cheese-corn mixture; the amount will vary with the size of your blossoms, but don’t be afraid to stuff them well. The flowers seem delicate, but they’re surprisingly resilient. If you need more room to work, peel the flower apart at one of the ‘seams’ between the petals; you’ll be able to pinch everything back together (within reason) using the filling as glue. Leave enough room to twist each blossom shut.
Set the stuffed blossoms on a wax-paper-lined cookie sheet and place in the fridge to set. Meanwhile, combine the cornmeal, cornstarch, flour, and seasonings in a shallow bowl; put the buttermilk in another shallow bowl. Dredge each stuffed blossom, first in the buttermilk, then in the flour mixture, shaking off the excess at each step. Return them to the wax paper, then refrigerate again briefly.
Set up a cooling rack topped with two layers of paper towels next to the frying area. Add oil to a shallow skillet to a depth at least half as high as the average stuffed blossom. (I used 2 cups in a 10-inch pan.) Heat oil to 375 degrees. Slowly lower the blossoms into the pan, four or so at a time to prevent crowding, turning each over as soon as the bottom side is golden brown. It will go rather fast, but if the coating turns dark brown immediately, back off on the heat a bit; you need enough time to melt the cheese. With a spider or slotted spoon, remove the crispy blossoms to the paper towels. Repeat until all blossoms are fried.
Spoon a bit of the warmed salsa on each plate, then top with 2 or 3 blossoms. Drizzle with the lime crema, and scatter toasted pumpkin seeds for garnish.
cookbooks, cooking, farmers markets, Mexican, other blogs, recipes
6 Comments »
Posted by Anita on 07.04.07 7:33 PM
 Summertime is finally upon us! Even here in San Francisco — where our summer months are notoriously cold and foggy — the sun is shining high and bright, the skies are a precise shade of coastal blue, and everyone’s outside enjoying the weather. We know it’s merely a respite from the gray gloom that will descend again, without fail; Three days of sun are all San Franciscans ever expect.
Another sure sign of the season: Ice cream and sorbet stories are everywhere. Today’s food section turned up as crammed full of ice cream as an apartment freezer: Make it, buy it, stand in line for it… the Chron‘s got us covered in the frozen-confection department.
As if that’s not enough, not one but two blog events this month are dedicated to scoopable sweets: Laura picked sorbet as this month’s “Hay Hay, It’s Donna Day” theme, and Meeta’s Monthly Mingle 12 focuses on ice cream. So I was already flipping through the recipe file when I got an email from the library, telling me that my copy of David Lebovitz‘s new ice-cream book — the darling of the blogosphere — is ready to be picked up, at long last.
OK, wow. Really, I can take a hint: Time to get churning.
I won’t bore you with another gushing post describing what a treat it is to read The Perfect Scoop — I’m too late to the ice-cream social for that, and I couldn’t possibly come up with any more synonyms for “mmmmm!” than you’ve already read elsewhere. Suffice to say that I was bowled over (har har) by all the delectable-sounding options — hello, chartreuse ice cream? — and picking just one recipe proved impossible. I compromised: One ice cream, one sorbet.
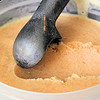
Sultry summer weather at the Ferry Plaza Farmers Market seduced us into buying more stone fruit than two people could possibly eat, so we opted to sacrifice a few pounds’ worth for the apricot variation on David’s peach sorbet. Not wanting to overwhelm their perfect ripe essence, we substituted St-Germain liqueur for the recipe’s standard kirsch. The color was vibrant and the flavor sublime, but the texture turned a tad bit grainy for my taste. A beautiful scoop, nonetheless, but nothing to make me abandon my old standby ice-cream book.
Our second trial, though, helped me understand what all the swooning reviews were about. A perfect coconut ice cream doesn’t just toss a cup of shreds into a vanilla custard and freeze them up. Instead, it starts by infusing warm dairy with freshly-roasted coconut, steeping to extract subtle flavors. Then we strain the solids out of the coconut-scented cream, which is used to finish a rich, not-too-sweet custard base (and which I could barely restrain myself from eating with a spoon).
After churning and freezing, the mixture emerged as a beautiful, smooth off-white velvet, redolent with coconut but minus the “pencil shavings” texture that some (including Cameron) find unappealing. We loved it equally on its own and topped with toasted almonds for added crunch. But our favorite treat of all — sure to be the hit of the summer — paired the luscious toasted coconut ice cream with the icy apricot sorbet to make a Creamsicle-style treat to brighten even the cloudiest day.
Bring it on, summer. We’re ready for you.


Toasted Coconut Ice Cream
adapted from The Perfect Scoop by David Lebovitz
1 cup unsweetened coconut flakes
1 cup whole milk
2 cups heavy cream (not ultra-pasteurized)
3/4 cup granulated sugar
1 vanilla bean, split and scraped
5 large egg yolks
1 teaspoon dark rum
Toast the coconut on a baking sheet in a moderate (350°) oven for 5 minutes or until golden and fragrant, stirring occasionally to toast evenly.
Warm the milk, half of the cream, and the salt and sugar in a heavy saucepan over medium-low heat. Add the toasted coconut and the vanilla seeds and pod. Cover the pan and remove from the heat to steep.
After an hour, rewarm the infused mixture. Strain through a medium-mesh strainer into another saucepan, pressing down on the solids to extract all the liquid. Discard the solids, reserving the vanilla-bean pieces for another use, if desired.
Combine the remaining cream with the rum in a large bowl. In a separate large bowl, whisk the egg yolks together. While whisking constantly, slowly add the coconut cream to the egg yolks.
Return the custard to the pan and place over medium heat, scraping the mixture to avoid scorching. Cook until the custard coats the back of the spatula. Pour the custard through the strainer into the cream-rum mixture, and cool over an ice bath.
Cover the bowl of cooled custard, and place in the refrigerator until well chilled, preferably overnight. Freeze according to your ice-cream machine’s directions for custard-based recipes.
cookbooks, dessert, other blogs, recipes
11 Comments »
