Posted by Anita on 02.20.09 1:48 PM
 It’s always an thrill to discover that one of your idols admires your work, and a huge honor for another blogger to trust you with their “baby”. So you can imagine my elation — and perhaps even sense my panic? — when the lovely Tartelette asked me to guest-post over at her place this week.
I’m beyond flattered to be asked to contribute to Tartelette’s incredible site, winner of Food Blog of the Year in the 2008 Well Fed Awards and — just this week! — placed at #43 on the Times Online list of the World’s 50 Best Food Blogs.
After a lot of hemming and hawing about whether I had the chops to showcase my meager pastry skills on such a gorgeous site, I finally mustered enough courage. With some spirited inspiration from David Lebovitz‘s fabulous book, The Perfect Scoop, not to mention a healthy dose of chocolate, I think I managed to bluff my way through without too much embarrassment with a recipe for Profiteroles with Chartreuse Ice Cream.
Be sure to head on over to Tartelette‘s place to read the story, get the recipe, and enter for a chance to win a copy of The Baker’s Odyssey by Greg Patent.
baking, other blogs
9 Comments »


Posted by Cameron on 11.09.08 11:05 AM
 Knowledgeable guitarists say that tone is in the fingers. In other words, if I were to play Eddie Van Halen’s guitar through his stage rig, I would sound like… Cameron playing Eddie Van Halen’s guitar. I wouldn’t look like him either, even though I can make all the wide-eyed guitar hero faces.
I’m beginning to think the same thing holds true for recipes. I made biscuits and sausage gravy for breakfast this morning, which I do every few weeks. I usually forget which recipe I use, so I spend about ten minutes combing through our cookbooks. I have tried biscuit recipes from the back of mix boxes (long ago), the Internet, and various cookbooks. But while they all have their own idiosyncrasies, when I make them they always taste like… well… my biscuits.
Today, I used the recipe from the Joy of Cooking, and I am here to tell you brothers and sisters that when it comes to basic American staples — particularly breakfast fixin’s like waffles, French toast, and biscuits — that Rombauer gal has got it wired. The Joy recipes are simple, direct, and every bit as tasty as the complicated shenanigans you find elsewhere. Especially from that uptight bastard in the bow tie. I mean my god, Kimball: I am not acidulating milk and using two different types of flour at 9am on a Sunday morning, even if Martha herself is coming for breakfast.

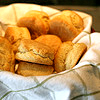

Rolled Biscuits
adapted from the Joy of Cooking
1-3/4 cups sifted all-purpose flour (I don’t bother sifting, and it’s never hurt)
1/2 teaspoon salt
3 teaspoons double-acting baking powder
4 to 6 tablespoons chilled butter
(Joy says that you can use shortening, but… ew. Might try lard, though.)
3/4 cup milk
Preheat oven to 450 degrees. Whisk the dry ingredients together in a bowl and then cut in the butter. (Doing this by hand is picturesque, but a huge pain in the butt, especially on the first cup of coffee on a Sunday morning. Get smart and get out your food processor and metal blade. Dump in the dry ingredients, pulse them a couple of times, then drop in the chilled butter, which you’ve cut into 6-8 cubes. Pulse again 10 to 15 seconds, or until the mixture looks like crumbs.)
Add the milk and mix (or pulse) until you have wet dough. Turn the dough out on a floured surface, knead very gently 5 to 7 times, then roll out 3/4 inches thick and cut biscuits. Bake on an ungreased pan for 12 to 15 minutes, or until the tops are brown.
baking, breakfast, cookbooks, recipes
8 Comments »
Posted by Anita on 11.02.08 8:48 PM
 I must be getting old, because I actually just said out loud: “Where has the year gone?” Really, people, can I get an amen here? Doesn’t it seem like 2008 has just screamed on by? (And yet, somehow, Election Day seems like it might never come.) I don’t want to get ahead of myself, but the holidays are really right around the corner, with Halloween just past and everyone’s favorite feast less than a month away. And today’s a holiday, too: Dia de los Muertos.
I feel like I’m repeating myself a little here — we talked about marigolds, sugar skulls, and La Catrina last year. But really, there’s so much more to enjoy, so many more wonderful food traditions that go along with this fiesta. After all, the idea behind the Dia de los Muertos ofrendas — the memorial altars to loved ones — is that the living tempt the spirits of loved ones to pay a visit by putting out their favorite foods, drinks, and other little mementos of the things they loved in life.
Last year, I took a day off from work and brought home a whole table’s worth of treats. This year, the weekend snuck up on me; the best I could manage was relocating a flowering houseplant (not quite marigolds, but hey, at least they’re orange), and adding a few things I know my Dad loved: A jar of home-made tomatillo salsa, a shaker of Tabasco-flavored seasoning salt, and the little greyhound calaca figurine — Dad would never travel anywhere without his dogs.
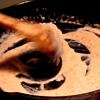
Almost as much as he loved greyhounds and spicy food, Dad loved sweets. I knew the ofrenda couldn’t do without pan de muertos, the rich, eggy bread made just for the occasion. But I had no time to head to the Mission, and with Eat Local Challenge just wrapping up it didn’t seem right to buy a loaf filled with goodness knows what.
My first attempt at homemade pan de muertos was a qualified success; tasty, but flawed. I can almost hear Dad telling me, as he always did, that I am being too critical of my own efforts: “Neen, it looks great. I don’t know what you’re talking about.” (And he’d be right… it really does look fine, just not like I expected, and definitely not like store-bought.)
The nice thing about pan de muertos — and all of the tempting treats laid out on the ofrendas — is that they’re just as much for the living as for the deceased. Hooray, we get to eat it, too! And even though I know that the holiday is supposed to be filled with happiness and fond memories, this year I’m happy to have a little extra bit of comfort to help me get in the festive mood.
You see, this year we’re also remembering our friend Briana Brownlow in our celebrations. Bri passed away just last week, at the impossibly young age of 31, after a hard-fought battle against cancer. Though we met her in person only once, we knew her well as one of those people who makes everyone’s life online a little brighter. Even in the midst of her cancer’s recurrence, it was a joy to see Bri’s optimism, and her obvious joy as friends offered support through food (and a food-bloggers’ fundraiser).
Tomorrow morning, when I toast up a piece of the leftover pan — looking out at the bright yellow of our lemon tree in the otherwise grey, rainy yard — I’ll smear it with some of the citrus curd I made from our backyard fruit and remember the woman whose strength inspired so many.


Alas, no recipe today. I’d planned to share my variation on Diana Kennedy’s pan de muertos, but something went awry. Not badly enough to keep us from eating the bread, but odd enough to keep me from unleashing the recipe on you. The “bones” melted into the main body of the bread, and the whole thing came out far too flat and wide; I think I must have miscounted egg yolks or mis-measured butter. It still tastes fabulous, though… it just doesn’t really look the way it ought.
But don’t let that discourage you from giving it a whirl. Although it’s a time-consuming recipe that calls for fussy things like overnight rises in the fridge and multiple buttered sheets of waxed paper, it’s a very forgiving dough that’s a lot of fun to make.
baking, family, holidays & occasions, Mexican, other blogs
1 Comment »
Posted by Anita on 04.18.08 8:09 PM
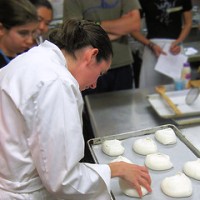
 When I read that Shuna Lydon was teaching her legendary pastry tutorial — a class that, by her own admission, she’s taught so many times she’s lost count — I leapt at the chance to sign up. The last time I had the pleasure to learn at her elbow, I picked up countless little tricks for making outrageously tasty seasonal fruit desserts.
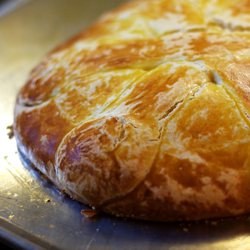
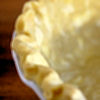
This time out, I finally learned why my usual pie-dough recipe is fine for savory applications like quiche, but not so hot for desserts. I got to see and feel where I’d been going wrong in my previous pie-making expeditions. As a side benefit, I got to hole up inside a breezy commercial kitchen on one of the hottest days of the year, relaxing into the busy charm of a kitchen full of women. Perhaps best of all, though, I got to come home with one seriously gorgeous pie crust for my troubles.
As I carefully ferried my flaky cargo across the bay in an insulated bag, visions of oozy pastry goodness danced before my eyes. But as bountiful as our spring produce is here already, we’re in that awkward in-between stage, fruit wise. It’s too late for apples, way too early for blackberries. Strawberries are coming into season, but I don’t really like them cooked. I’d hoped to have enough lemons off of our tree by now to attempt a lemon meringue, but you can’t rush Mother Nature. So I dusted off the cookbooks and went looking for options.
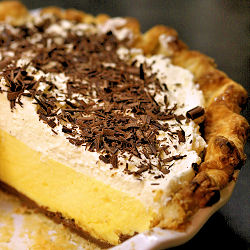
There it was, smack in the middle of my 1961 edition of The Joy of Cooking. A long-forgotten childhood favorite, that humble all-American dessert known as black-bottom pie. Line a simple pastry crust with chocolate custard (or ganache, if you’re feeling modern and fancy), cover with a rum-kissed custard, and top with whipped cream. Even with the cheapest ingredients, it’s indisputably delicious, even if a bit homely. When made with top-drawer bittersweet chocolate, pastured eggs, and the best dairy you can find, this simple combination turns into a dessert worthy of a pastry chef’s crust.
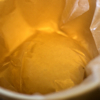
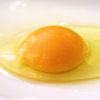
I separated four Marin Sun Farms eggs, and right away I could tell I was in for a treat. These eggs are always delicious, but some weeks — especially in the winter — they’re not especially gorgeous. These were a sure sign of spring: Yolks so yellow they were almost-orange standing proudly atop solid whites. Separating them felt almost cruel, as each half clung tenaciously to the other.
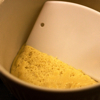
Cooking the custard until it was thick enough to coat the back of a spoon took mere moments — not the 20 minutes that Mrs. Rombauer instructed. Whipping the whites (to fold back into the custard) was equally swift: Even using a wimpy hand-held mixer, they flew right past soft peaks and into firmness in a matter of seconds. When yolks and whites were reunited, the resulting rum chiffon stood high in the bowl without the usual gelatin stiffener.
And the taste? Oh, my… so decadent. I can’t give away all of Shuna’s pie-crust secrets — though they’re there for the taking if you know where to look.


Black-Bottom Pie
1 pie shell, blind baked and cooled to room temperature
1/2 T (approx. 1/2 packet) gelatin*
2 cups whole milk
1/2 cup sugar
4 tsp cornstarch
4 eggs, separated, with 1 white discarded
1-1/2 oz unsweetened chocolate, grated or shaved
1/2 tsp vanilla
2 T white rum
1/4 tsp cream of tartar
1/4 cup sugar
1 cup whipping cream
2 T confectioners sugar
1/2 oz bittersweet chocolate, for shaving
If using gelatin, soak in 1/4 cup cold water and set aside. Scald the milk. In a small bowl, add the sugar and cornstarch, and whisk gently to combine; set aside. In a medium metal bowl, whisk the egg yolks until light in color. Slowly stir the hot milk into the eggs with a wooden spoon or heatproof spatula, then add the sugar mixture.
Bring a cup or two of water to a simmer in a medium saucepan. When you’ve reached a stable, steady simmer, place the metal bowl over the steam to cook the custard. Make sure that the water is not touching the bottom of the bowl; you’re cooking with the steam, not by direct water contact. Stir constantly with the spoon or spatula, making sure no hot spots develop. The custard is ready when it thickly coats the back of the spoon; this can take anywhere from 5 to 20 minutes, depending on the freshness of your eggs, the thickness of the bowl, and the speed of your simmer.
Place the grated unsweetened chocolate in a medium bowl. When the custard is done, immediately measure out 1 cup of the cooked custard into the bowl of chocolate, and stir until the chocolate melts and combines with the custard. Add the vanilla and a pinch of salt, and stir to combine. Pour the chocolate into the prepared pie shell, spreading evenly around the bottom.
If using gelatin, add it to the remaining custard while still warm, then add the rum; stir all until combined and the gelatin completely dissolves.
Using a stand mixer or electric hand mixer, beat the egg whites until stiff but not dry. Continue to mix while gradually adding the granulated sugar, a teaspoon at a time to keep from deflating your eggs.
Fold the whipped egg whites into the custard. Add the rum custard to the pie shell atop the chocolate layer, and chill the entire pie until set (about an hour).
When ready to serve, whip the cream to stiff peaks, then add the confectioners sugar. Cover the custard layer with whipped cream, and garnish with chocolate shavings or chocolate curls.
Pie will keep, in the fridge, for a couple of days.
—–
* Note: Most recipes call for a full packet of gelatin, which I find makes for a very firm, almost artificial-feeling chiffon. You can reduce it to half that amount, as noted here, to keep the texture less spongy. If you want the pie to be strictly vegetarian, the gelatin is optional providing that you’re using very fresh eggs, that you don’t stint on fully whipping them to stiff peaks, and that you don’t mind your custard layer being a little loose. (I actually prefer it this way myself.)
Also, the egg whites are essentially raw here, so the usual food-safety caveats apply.
—–
This little slice of yolk-yellow love also happens to be our entry for A Taste of Yellow, a blog event now entering its second year. Hosted by Barbara of Winos and Foodies, A Taste of Yellow features entries from food bloggers around the world — last year’s inaugural edition boasted 149 entries! — in support of LiveSTRONG Day, the Lance Armstrong Foundation‘s initiative to raise awareness and funds for the cancer fight.
 We dedicate our Taste of Yellow post both to our hostess Barbara, in her ongoing efforts to remain cancer-free, and to our friend Briana. Many of you know her blog, Figs with Bri, where she posted Wednesday about her recent setback: breast cancer has metastasized to her lungs. Since then, her site’s gone dark and her email account is offline. We’re keeping Bri and her husband Marc in our thoughts and prayers, and hoping for the very best.
baking, classes, dessert, East Bay, other blogs, recipes
10 Comments »
Posted by Anita on 11.28.07 10:57 AM
 Come on, people, say it with me:
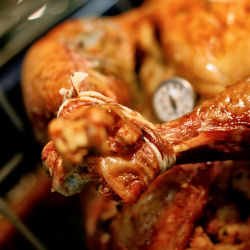
“Ugh, not turkey again!”
I know, I know — you’re probably as sick of reading about turkey as I am of eating it right about now. But, alas, that’s one of the perils of being the hostess: A house full of family and a fridge full of food seriously cuts into your blogging time. But now they’re all on their way — the relatives to the airport, the leftovers to the freezer or compost bin — and I’ve got a moment to get caught up.
(And I promise if you stick with me to the end, there’s a treat.)
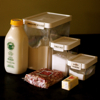
I’d been noticing the steady disappearance of some of our autumn staples from the farmers market — bye-bye avocados, so long green beans — but at least when it came to our Thanksgiving feast, nearly everything came from within a 100-mile radius of home. As I wrote out my shopping list, I realized that I didn’t have to eliminate many favorites, and it occurred to me that Thanksgiving may be one of the few times of the year that most Americans are eating seasonally. With the exception of the cranberries in the relish, the bowl of buttered corn niblets (which I zipped and froze a few months ago), and a bit of commercial flour, everything on our plates came fresh from the farm, ranch, or dairy just a few days before they were eaten.
 Rather than list a page-long litany of producers and distances here, I decided to create a GoogleDocs spreadsheet. (Geek is the new black, they tell me.) I was so pleased that we inadvertently managed to do even better than usual for this one meal — our turkey was the only significant item that came from more than 100 miles away, although still very much inside our 200-mile protein foodshed. We also managed three other 99%-local meals this week: Lasagne served with beet and bleu cheese salad, pork chops with risotto and roasted cauliflower, and the ever-popular family tradition of a “(Not)-Spam and Eggs” holiday brunch.
—–
But enough about that; let’s skip ahead to dessert.
Longtime readers may recall my earlier confession that neither Cameron nor I enjoy eating squash. Amusingly enough, this even extends to pumpkin pie… or at least it did until a few years ago. In deference to holidays guests — for whom Thanksgiving would not be complete without a slice of crusted Curcubita custard — I grabbed a handy recipe and whipped it up.
The recipe’s unique twist was the use of pumpkin puree, rather than solid-pack squash, a tricky thing to find outside of health food stores in those days. (It’s since become ubiquitous at Whole Foods and the like, so you shouldn’t have to hunt.) My guests raved about the pie with such genuine eye-rolling pleasure that I reluctantly tried a small sliver. And wouldn’t you know it: This pie, for some reason, had no trace of the abhorred squashiness, just a luscious, pumpkin-y goodness.
I suspect that there’s something about the solid-pack processing that makes pumpkin especially gag-worthy, and that choosing puree keeps the texture light and the flavor fresh. This year, we steamed our own Sugar Pie pumpkins from Mariquita Farm, pureed the flesh, and used it in place of the canned variety. If anything, the result was even better than usual — a pumpkin pie that even squash-haters can love.


Classic Pumpkin Pie
single-crust pie dough, chilled 1 hour
(I use Martha’s pate brisee, replacing half of the butter with home-rendered leaf lard)
1/2 cup granulated sugar
1/2 cup loosely packed brown sugar
1-1/2 tsp. ground cinnamon
1 tsp. ground nutmeg
1/2 tsp. table salt
2 large eggs
4 large egg whites
1 pound pumpkin puree, or a 15 oz can (not solid pack)
1 cup cream
1 tsp vanilla extract
Position rack in lower third of oven, and preheat to 425° F.
In a large bowl, whisk sugar, brown sugar, cinnamon, nutmeg, and salt. Add eggs and egg whites, and whisk until well blended. Add pumpkin, whisking until smooth, then cream and vanilla; continue whisking until well combined.
On a lightly floured surface, roll out the dough into an 12-inch circle. Drape dough over rolling pin and fit into a 9-inch pie pan. Fold edges under and crimp. Place crust on a baking sheet.
Pour filling into crust, and bake for 10 minutes. Reduce oven temperature to 325° F, and continue to bake 55 to 75 minutes more, until center barely jiggles when the pan is tapped. If needed, cover the crust with foil strips or a shield to prevent over-browning.
Transfer pie to a wire rack, and cool. If not serving within the hour, loosely cover and refrigerate. (The crust suffers slightly, but the filling is even better when chilled.)
baking, dessert, holidays & occasions, locavore, recipes
6 Comments »
Posted by Anita on 10.28.07 7:50 PM
 When my mom was growing up, homemade dessert was a regular occurrence around the dinner table. By the time I was a kid, the family tradition had lapsed; cakes and pies showed up mostly around the holidays or on someone’s birthday. Not that I felt deprived: To this day, my idea of dessert is scraping the bowl for the last spoonful of mashed potatoes, or sneaking an extra meatball from the lunch-bound leftovers.
Despite my defective sweet tooth, I love to bake for friends and family. At my office in Seattle, I belonged to a crew of hard-core amateur pâtissières dubbed the Spare Change Bakery. We all kept jars on our desks for our coworkers’ contributions, and as soon as we scraped together enough nickels and dimes, one of us would whip up a double- or triple-batch of something sweet and scrumptious for the next staff meeting. By the time we disbanded, we were collecting enough cash to bake every week — a gratifying but rather exhausting sign of our popularity.
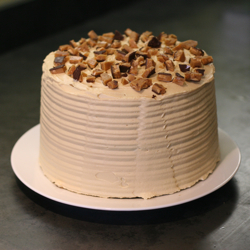
But since we moved back to San Francisco, I haven’t had many excuses to bake. Sure, our dinner parties often need a sweet ending, but I miss those crowd-pleasing desserts: Brownies, bars, and other decidedly lowbrow sweets. So when I saw the photo of the Spice Cake with Coffee Toffee Crunch on the cover of the new issue of Sunset, I knew my path was clear. The theme for this month’s “Waiter, There’s Something in My…” event is layer cakes, after all, and there’s just something about a sky-high cake with cream-cheese frosting that sends me running for my sifter and whisk.
 Working my way through the recipe, I found it refreshingly well documented. The writer details a number of steps — creating a crumb coat, and using strips of parchment to keep the serving plate clean — that help give the final cake a centerpiece-worthy appearance. With the exception of the recipe’s lack of measurements by weight (the serious baker’s preferred method for dry ingredients like flour and sugar, especially), it was one of the best-written magazine recipes I’ve used in months.
Aside from substituting Alfieri Farms’ almond brittle for homemade coffee toffee, I followed the recipe to the letter, so click over to Sunset’s site if you want the full rundown. Although I doubt the magazine’s suggestion that this cake will replace pumpkin or pecan pie on your holiday dessert buffet, it’s got a spicy, deep flavor that would make a perfect finish for an autumn feast. While the icing’s got enough sugar to satisfy even the most intense sugar junkie, the cake itself — sweetened with molasses — keeps things moist and spicy without too much sweetness… just the ticket for a baker without a sweet tooth.


baking, dessert, magazines, other blogs
10 Comments »
Posted by Anita on 04.23.07 9:14 PM
 I have to brag: I spent a lovely Sunday afternoon learning the tricks of seasonal fruit desserts at the elbow of Shuna Fish Lydon, the Edible San Francisco regular who sings songs in the key of sweet (and sometimes bittersweet) over at the award-winning eggbeater. But don’t be jealous: You can play, too.
Shuna’s enthusiasm for this subject matter is infectious, and the class style is so intimate and inclusive that — even if you choose a topic that’s all demonstration, as I did — Shuna shows you all the tricks and gives everyone enough hands-on time with the ingredients along the way that you’re ready to fly solo in your own kitchen. The classes are liberally peppered with tales from Shuna’s restaurant career at The French Laundry, Citizen Cake, and Gramercy Tavern, among other places you’ve certainly also heard of.
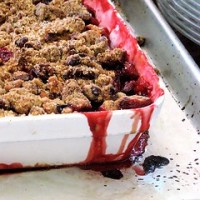
 Even if you think you know it all, you’re sure to find some hidden gems. One example: I make fruit crumbles almost weekly once summer strikes, but I learned a great trick for keeping the oven clean from bubble-over messes and discovered a new secret ingredient to add to my topping.
And as someone who thought she hated rhubarb, I’m here to tell you that if you learn to make it Shuna’s way, you may become a convert, too. (No stringy nursery sludge here, nope.) And, talk about eating locally: The flavorings for the Meyer lemon and lemon verbena ice cream — which we ate with our vanilla-bean roasted strawberries — were sourced right in Shuna’s neighborhood!
The new Eggbeater class schedule‘s just been posted. Check it out:
Sunday May 6, 2007: Pie & Galette Dough
Sunday May 20, 2007: Ice Cream & Sorbet
Sunday June 3, 2007: TBA
Sunday June 10, 2007: TBA
End of June: A Knife Skills Class and a Baking Class in NYC!
Mid July: A Knife Skills Class and possibly a Baking Class in Portland, Oregon!
Yep, you East Coast and Pac Northwest kids can get in on the fun, too.
Still on the fence? Take a peek at the sort of gorgeous desserts you’ll learn to make (and get to eat!) and see if your willpower holds out.
baking, classes, dessert, other blogs
6 Comments »
Posted by Cameron on 04.10.07 4:31 PM
 Last Saturday, we enjoyed a pre-Easter dinner with our friends DPaul and Sean and Anita’s mom, Toni. Anita has already described the first course; my contribution was Cornmeal Rosemary Cake with Lemon Glaze from one of our two Tom Douglas cookbooks, Tom’s Big Dinners.
I’m not sure exactly why I ended up making it, as I’m not much of a baker. Anita is usually the head chef in our kitchen, but she was called away to help with the transportation of Sean and DPaul’s new (and absolutely adorable, but indisposed) family member. We needed to get cracking on dinner, but when Toni–who is an accomplished baker–asked to be put to work, I pointed her at the soup, not the cake. Go figure.
The batter assembly went smoothly. Or at least I thought it did until I realized that I had used rough, coarsely ground cornmeal instead of the medium-grind called for by the recipe. I pinched the bridge of my nose and rehearsed stand-up material to explain the…er…crunchy cake. “So rustic, isn’t it?” I imagined myself saying through my best Joy of Cooking smile. “Here, have another large glass of whiskey to wash that down. It’s a family tradition.”
Then, after fifteen minutes of baking, I noticed that while I had set the oven to 350 degrees, the thermometer inside read 325. Great. I turned up the heat.
The baking time recommended by the recipe came and went and I hovered at the oven window. The top started to brown and the cake tester came out clean, but when the cake was lying unmolded and upside down, it was obviously still mushy in the middle. Rummaging through our generous assortment of nonstick cake pans, I said a silent little prayer of thanks for my lovely, brainy wife and her talent for collecting cookware.
I re-panned the cake and shoveled it back in the oven, setting the timer in five-minute increments and wondering how the hell I would know when the damn thing was done. Out of desperation, I fell back on my grill-fu and started poking the cake with my (scrupulously clean) fingers, comparing the center with the edges, which I figured were sufficiently cooked.
Eureka! The top was much browner than I would have dared let it go otherwise, but eventually the cake stopped feeling like a waterbed. Cooled and unmolded, it actually looked edible–after Anita helped re-assemble the chunks that had stuck to the non-stick pan.
But I had the baker’s ace up my sleeve, the magical stuff that hides an epic poem’s worth of sins. I generously brushed on a Meyer lemon syrup (fruits from our tree!) and then took great comfort in watching my missteps and misgivings disappear beneath a dense white robe of sugary glaze speckled with rosemary leaves and lemon zest.
Didn’t taste bad, either. No whiskey necessary.
baking, cookbooks, dessert, family, holidays & occasions
5 Comments »
Posted by Anita on 02.19.07 6:06 PM
 Every cook has those recipes that she considers so perfect that she won’t even entertain the idea of trying another variation. In our house, for example, there is no meatloaf but our meatloaf. I’m so set in my ways that not only will I not try new meatloaf recipes, I rarely even order meatloaf at restaurants.
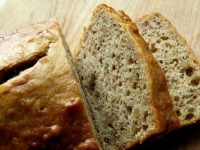
So when, during a long-overdue freezer cleanout, Mom and I discovered a stash of bananas, and then another stash, we knew it was time for another of those “don’t bother with another recipe” recipes: Banana bread.
Now, with all modesty, I’m not the only one who loves this stuff. It’s a recipe so wonderful that it was printed — albeit with some non-fatal editorial alterations — by Cooking Light many years ago, and apparently remains a reader favorite. (I cringed in anticipation when I clicked on the reader comments link, and was amazed to see that everyone likes this recipe as much as we do. Whew!)
Here’s my introduction from the original issue:
My mom, Toni, has been making this banana bread for what seems like forever. We’re nuts about all kinds of bread, and this is a family favorite — even the dog loves it. While it may seem odd not to add spices, the pure banana flavor is what makes it so delicious.
You can find the tinkered-with version on Cooking Light’s site, but here’s the original, which isn’t really much higher in fat:
Toni’s Banana Bread
1-3/4 cups flour
3/4 tsp. baking soda
1-1/4 tsp. cream of tartar
1/2 tsp. salt
1/3 cup vegetable oil
2 eggs, lightly beaten
2 medium super-ripe bananas (about 1 cup)
scant 2/3 cup sugar
1/2 cup chopped walnuts (optional)
Preheat oven to 350F, and butter an 8×4 loaf pan (or two 7×3 pans for tea-size loaves).
Whisk dry ingredients together in a large mixing bowl, and set aside.
Put the remaining ingredients (except optional nuts)Â in a blender and puree until smooth. Pour the banana puree over the dry ingredients, and fold lightly — adding nuts, if using –Â with a rubber spatula, just until combined; do not overmix.
Pour batter into the buttered loaf pan. Bake for 40 minutes or until a cake tester inserted in the center comes out clean, but do not overbake. Cool for 10 minutes in the pan, then remove from pan and cool completely on a wire rack.
baking, family, magazines, recipes
5 Comments »
Posted by Anita on 01.22.07 6:08 PM
 Yesterday, the Bald Guy celebrated his thirty(mumble) birthday — an occasion worthy of pulling out all the stops… and half of the pantry bins. But when you’re baking in a
 toaster oven countertop convection oven, your patisserie options are a wee bit limited. In one of those “only in the food-blogosphere” coincidences, Chockylit and Garrett are hosting a cupcake roundup this week — and yours truly just happens to have a little six-cup muffin tin that’s perfect for a half-batch of mini birthday cakes.
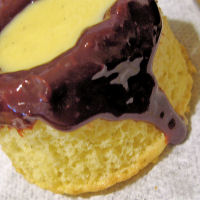
Not content to follow a request for “yellow cake with chocolate icing” to the letter, I started thinking about fancier alternatives. A series of chats about classic New England fare got me wondering how I could make Boston Cream Pie in a cupcake format. So I whipped up a batch of vanilla sponge cake [link removed*], some pastry cream, and a simple chocolate glaze: a cup of heavy cream, a quarter-pound of dark chocolate chips, and a tablespoon of Karo syrup.
One of the things I love about Boston Cream Pie is the way it combines a trio of simple Home Ec 101 recipes into a fun, old-timey dessert. But, as I soon discovered, the original format — cake sliced in half, pastry cream between the layers, chocolate glaze over the top and dribbled down the sides — doesn’t work very well in miniature. If you add enough cream to make a distinct filling layer, the pieces won’t stay together. You end up with a (delicious) mess, rather than a cupcake.
Undaunted, I tried a new method: Using a doughnut hole-cutter, I punched halfway down each cupcake, and dug out the center, ever so gently. Then I dipped the top of the cupcake in the chocolate glaze, far enough that the center got coated. I added a tablespoon of the pastry cream to the well, and filled the hole with the top half of the cut-out round. After a little more experimentation, I realized that it was easier to dip the center piece of cake in chocolate before placing it over the cream, rather than drizzling more glaze over the almost-finished cupcake. (If all this is too much to visualize, I’ve documented it all in a Flickr set.)
An excellent side benefit of dipping the unfilled cupcakes and their “stoppers” — rather than pouring glaze over the completed cupcake — is that the chocolate keeps the cream filling from soaking into the cake. And, it also makes a whole lot less mess.
—-
* Edited to add: We removed the link to the Cook’s Illustrated recipe in July 2008 in protest of their bullying tactics.
baking, dessert, holidays & occasions, other blogs
16 Comments »
