Posted by Anita on 01.19.09 7:54 AM
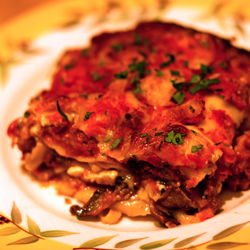 It must happen to everyone: That moment when you lose all ambition for trying new recipes and just fall back on the tried and true, the comfort foods that make your heart and belly happy, with a minimum of fuss.
Last week, Cameron came down with a doozy of a cold. It wasn’t really terrible, in the symptoms department, but it seemed to go on forever and ever. It wasn’t the end of the world, but it was just annoying enough to keep him home, working at the dining room table and sipping mug after mug of lemon and honey. In much the same way, taking care of the house and the dogs all on my own isn’t really traumatic, but it is time-comsuming… and the thought of coming home and spending an hour or more in the kitchen — especially all alone — wasn’t terribly appealing. I looked for recipes that I could prep, preferrably in the morning or the night before, and then pop into the oven when I got home. And, of course, they had to appeal to the palate of a guy who had a head full of winter weather.
 Unfortunately for you, and for my narrative, the two all-local meals we ate last week were both repeats: My mom’s famous meatloaf — with Dirty Girl romanesco and baked Little’s potatoes on the side — and a thrown-together lasagna using home-canned tomatoes, locally made cheeses and fresh pasta.
For both of these meals, I took a slightly different route than my usual, mixing ground pork from our meat CSA with spices to make bulk sausage — home-grown sage for the meatloaf’s breakfast sausage, and home-grown fennel seed for the lasagna’s Italian sausage. Of course, the texture’s no match against real home-ground sausage, but in a highly flavored dish like lasagne, the difference is fairly negligible. And the taste? Comforting and hearty, just like always.

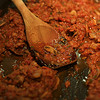


Quick Italian Sausage
1 pound ground pork (at least 30% fat)
1T kosher salt
1T fennel seed
1-1/2 tsp coarse black pepper
3/4 tsp sugar
2-3T ice cold water
Mix all ingredients together well. Fry a small test patty to taste for salt and seasoning, and adjust as needed. Let sit overnight, if possible, to allow flavors to blend.
Dark Days challenge, Italian, locavore, meat, recipes
5 Comments »


Posted by Anita on 01.12.09 7:22 PM
 After two-plus weeks in London, we knew it was going to be difficult to get back to the grind, and the cold, grey weather here in San Francisco wasn’t doing anything to help us get over our jetlag.
In a rare fit of travel wisdom, I’d planned our return for Saturday, to give us time to do little things like food shopping and laundry before heading back to work. But we arrived home far too late to get to our usual market at the Ferry Plaza, and the idea of trudging through a brightly lit supermarket didn’t seem the slightest bit appealing.
So after a fortifying Sunday morning breakfast, we headed across the Golden Gate bridge, in search of the Marin Civic Center farmers market. Even though this market isn’t much further from home than the downtown Berkeley market, we’d never checked it out. What we found was pretty impressive: A good number of stalls — maybe close to 100 — with a lot of variety, even in the middle of winter.
 We certainly had no problem finding meat. Marin Sun Farms was there, as were the Prather Ranch boys and Devil’s Gulch Ranch — a name we’ve seen on menus, but never bought; they don’t sell at the SF markets. By the time we arrived, all they had left was a big five-pound pork shoulder roast. We hemmed and hawed, then decided that we could make a big batch of carnitas and save the leftovers for a later meal. A vendor from San Luis Obispo — technically outside our challenge radius, but we fudged it — was selling avocados, and a bakery from Sacramento had corn tortillas; we’d made the right decision.
We also picked up a pretty bone-in pork chop from Marin Sun, plus the usual assortment of vegetables and starches. Once we returned home, I popped the pork chop in my usual cider brine for a few hours. For our first Challenge meal of the week, we served it with mashed potatoes and a really nice chopped salad of romaine, avocado, radishes, carrots, and cucumbers, all tossed in a citrusy dressing and topped with grated dry Jack. (I was mimicking a salad I used to love ordering at Two before they went downhill, and I think I got pretty darned close.)
Every time I opened the fridge, that enormous pork shoulder was staring back at me. With a full week of evening commitments ahead, I quickly figured out that I’d bitten off more than I could chew; there just wasn’t time in our schedule for the full evening of patient simmering that carnitas requires. And with a slate of office projects piling up, there was no way I could work from home to coddle it.
I wondered aloud if the Crock-Pot might offer a solution, and Cameron agreed that it might be worth a try. “The worst thing that happens is you end up with pork stew.” A quick cruise around the Web didn’t really turn up much in the way of a trustworthy recipe, so I decided to wing it. I used our usual carnitas recipe, with a couple of changes: I left the meat in larger chunks to combat the tendency for everything to turn to mush. I also reduced the liquid — slow cookers retain a lot more moisture than even the best-sealed pots — and kicked up the brightness with a little citrus, to compensate for slow cooking’s flavor-dulling effect.
I’d popped the ingredients in the pot, then headed to the office, fully expecting to return home in about 8 hours to keep an eye on the tail end of the cooking process. Naturally, work dramas conspired against me, so it was nearly 12 hours later that I walked in the front door. A heavenly smell from the kitchen relieved some of my fears that I’d created a pile of overcooked, dry slop.
I shouldn’t have fretted. The part of the meat that wasn’t submerged got pretty toasty… an unexpected bonus. The rest of the meat was perfectly cooked, juicy and tender, with just enough connective tissue left to keep things together until you hit it with a fork.
In a traditional carnitas recipe, the braising liquid gets simmered down — with the meat in it — at the end of the cooking process; the meat gets nice and crispy in the fat that remains after the broth simmers away. To simulate this effect, we drained the juices and skimmed off the fat to sear the meat. And as a bonus, we have an ice-cube tray full of really yummy pork broth.

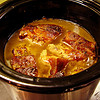

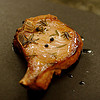

Crock-Pot Carnitas
4 pound boneless pork shoulder
1T whole cumin seed, lightly chopped or crushed
2 bay leaves
1 onion, quartered
1 cup rich pork or chicken stock
1 oz orange juice or Meyer lemon juice
salt, to taste
water, as needed
Cut the pork shoulder into large chunks, and sprinkle with the salt and cumin. Place in the Crock-Pot with the bay, onions, stock, and juice. Add enough water, if needed, to come halfway up the meat. Cover with lid, set pot on low, and cook for 10-12 hours, until meat is very tender.
Remove the meat from the pot and set aside in a warm place. Pour the cooking liquid into a fat separator, let settle, and then pour the defatted broth into a wide pan or baking dish to cool, reserving for another use. (Alternately, use a glass measuring cup and a turkey baster to separate the fat from the broth, or your usual fat-separating method.)
Heat a large skillet, and add enough of the skimmed carnitas fat to the pan to cover the surface well. Pull the meat apart, creating pieces approximately 1 inch long, and add to the pan once the fat is sizzling. Brown the meat until crispy on the outside, turning with tongs as needed. Remove each piece from the pan as it browns on all sides, keeping warm until ready to serve.
Serve with warm tortillas and your choice of condiments: salsa, chopped cilantro and onions, guacamole, sliced radishes, etc.
Dark Days challenge, farmers markets, locavore, meat, recipes
6 Comments »


Posted by Anita on 12.15.08 10:54 PM
 When Sean and DPaul asked me to contribute a signature cocktail to serve with the appetizer course at their holiday soirée last weekend, I kept running into dead ends. For my previous stint behind the Hedonia bar, I’d whipped up a pair of well-received drinks, but for the holidays I wanted to try something a little more classically festive — and what’s more festive than bubbly?
But, if you know those Hedonia boys, you know that their parties are a feast for the eyes as well as the palate; a simple Champagne cocktail — classic though it may be — would not do. No, I needed a conversation starter, a ‘wow’ of a drink that would be sure to set off the beautiful hors d’oeuvres. I toyed with a number of ideas, but kept coming back to the idea of poinsettias and other holiday flowers. Then, while digging through the liquor cabinet, I noticed a jar of candied hibiscus flowers: pretty, festive, and a perfect holiday red.
The purveyor of these little antipodean garnishes suggests dropping one blossom into a flute of bubbly, with or without a splash of its syrup. But even before I remembered Craig‘s choice for this month’s Mixology Monday theme, I knew that I wanted to avoid fruity flavors and move things more into the spice realm.
At first, I tried a simple Champagne and Ginger cocktail, using Domaine de Canton ginger liqueur. Although sweet and pleasant, it really didn’t have the oomph I was looking for. A few hearty dashes of super-spicy whiskey barrel-aged bitters helped a bit, but really didn’t carry the drink into fabulousness.
Then I remembered an experiment from two winters ago. In the days before Domain de Canton hit the shelves, I’d spent a few months trying different techniques to get a strong ginger flavor into a cocktail without using ginger beer, mostly unsuccessfully. But then a “so simple it couldn’t work” idea paid off, and I ended up with a batch of spicy, faintly sweet infusion with a true ginger flavor. A repeat batch of this crystallized ginger digestif turned out to be just the thing to make my holiday sparkler shine.
But back to the garnish: I sampled some of the syrup the blossoms were preserved in, so I had a good handle on their flavor. However, the jar of flowers only held 11 blossoms and I had 10 guests to serve, so I hoarded them all for party night. Little did I know that, instead of the pretty little flowers shown in all the marketing shots, the blooms would become translucent red aliens in the cocktail glass, wicked half-plant/half-animal mutants straight out of a sci-fi movie.
Luckily our hosts and friends were gracious enough to humor our cocktail folly; only one guest refused (vehemently, I might add) to sample the flower, which does indeed taste like a sweet-tart berry. And once the bizarre garnish was gobbled up, everyone asked for refills on their spicy Champagne.
Looking through the photos that DPaul graciously sent over (I managed to bring my camera, but forgot the memory card), I realized that the hibiscus blossom looks like the head of a snake, or a sandworm from the movie version of Dune… a story that’s — appropriately enough — all about spice.

Shai Hulud
1 oz homemade ginger liqueur
– or 1 oz Domaine de Canton plus 1/2 tsp ginger juice
5 dashes Fee Brothers Whiskey Barrel-Aged bitters
Champagne or other dry sparkling wine
candied hibiscus flowers
Measure the ginger liqueur and bitters into a coupe. Top with bubbly and garnish with a hibiscus flower.
Ginger Liqueur
3 oz crystallized ginger chunks
– available in the baking aisle or bulk foods stores
8 oz 80-proof vodka
Combine in a lidded jar. Let steep for two days, then shake; you should notice dark, syrupy threads diluting into the vodka. Continue to steep, shaking once a day, until you reach your desired level of spiciness.
drinks, Mixology Monday, recipes
8 Comments »


Posted by Anita on 12.14.08 10:39 AM
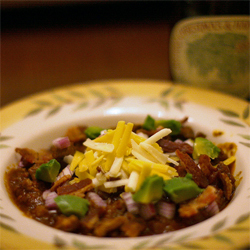 Between finishing up our Christmas shopping, getting our prize basket ready for Menu for Hope V, dealing with a rather scary veterinary emergency, and nailing down a few last details for our upcoming vacation, things have been a little chaotic around here. This morning as I sat down to write, I looked up in panic and realized that I had only photographed a single meal this week.
Luckily, it was our favorite chili, which — even though we eat it pretty much all the time — I’ve never blogged about. We love it because, unlike other chili recipes that we’ve been known to make, this one’s highly adaptable. Like our bolognese sauce and sloppy joes, it’s another one of the recipes that we make in giant batches and freeze for weeknight dinners. If we’re using it to make chilidogs — which we often do — we’ll leave the beans out and simmer it down until it’s all meaty and thick. If we’re eating it on its own, we’ll add some Rancho Gordo beans, and thin it down a little with a few cubes of frozen chicken stock.
We almost always garnish it with cheese, sour cream, and chopped onions, but if you happen to be lucky enough to have a strip of crispy bacon or a late-season avocado lurking in your fridge, either one makes a tasty and pretty addition. But this chili’s equally delicious when served all on its own, preferably with a pan of homemade cornbread and sweet butter. (We just discovered that Giustos, the local outfit that makes the all-purpose flour we buy, also sells locally milled cornmeal and polenta, which increases our Dark Days meal options significantly.)
 Adaptable Chili
– loosely inspired by ‘Venison Chile with Red Beans’
from Staff Meals at Chanterelle
3 pounds stew meat, cut into 1/2-in inch cubes
(or substitute coarse-ground beef)
1 medium onion, diced
2 large cloves garlic, minces
1 tsp ground ancho chile
1 tsp ground pasilla chile
1 tsp Rancho Gordo ground red chile
1 tsp ground cumin
1 tsp ground cinnamon
1 tsp cayenne pepper
1/2 tsp black pepper
1/2 tsp dried thyme
1/2 tsp dried oregano
1/2 tsp cocoa powder
2 bay leaves
4 cups chicken stock or unsalted broth
1/2 cup tomato puree
2 cups cooked heirloom beans, drained (see note)
shredded cheese, sour cream, chopped onion, bacon, and/or diced avocado, for garnish
Pour vegetable oil to a depth of 1/8 inch into a large heavy Dutch oven set over medium-high heat. When the oil just begins to smoke, add only enough meat to cover the bottom of the pan without crowding. Brown well on all sides, turning with tongs. As the pieces brown, transfer to a bowl and continue with more meat in batches.
When meat is all browned, reduce heat to medium-low. Drain the accumulated oil from the bowl back into the pan; add the onion and garlic, and sweat until transluscent. Return the browned meat to the pan, then add the chile powders and spices. Stir well to coat the mat, then add the stock, tomato, and salt to taste. Bring to a boil, then reduce heat to low and simmer, uncovered, until the meat is tender — 2 to 2-1/2 hours — stirring occasionally. Stir in the beans, if using, and cook until heated through, about 5 minutes. Taste and adjust seasonings.
Note: If freezing for later use, the chili takes up less space without the beans, which you can always add the night you plan to serve it.
Dark Days challenge, locavore, recipes
8 Comments »


Posted by Anita on 12.07.08 2:26 PM
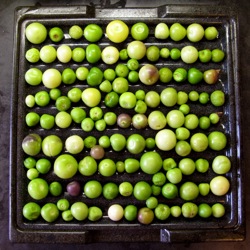 Last weekend, I went through both freezers — the little one in the kitchen, and the slightly larger one in the garage — and inventoried their contents. I didn’t discover any huge surprises in either location, thankfully, but I did turn up a few odds and ends that would be better to eat now rather than later. And since we needed to make room for half a turkey’s worth of meat, a little reorganization was in order.
In addition to the pickles and broth I put up last weekend, I also made a big batch of tomatillo-sauce base to freeze: I roast and puree chiles and tomatillos, then add onions and simmer it down. Right before I’d usually add poultry broth and re-reduce to make a sauce, I cool down the paste and portion it out for the freezer. When I want to make enchiladas or chile verde, I thaw a brick, add the missing liquid, and finish the recipe.
 The two big Dark Days meals we cooked at home took care of some freezer odds and ends, and used the last of the un-frozen Thanksgiving leftovers, too. On Monday night, we whipped up a batch of our favorite stacked enchiladas with a little of the tomatillo sauce I’d set aside, along with a half-packet of tortillas and container of Rancho Gordo beans from the freezer, and the last bits of meat left over from turkey sandwiches. Later in the week, Cameron made a delicious beef-and-ale stew using a pound of Marin Sun chuck we’d stashed away from an early CSA box. Topped with the last of the Thanksgiving mashed potatoes, the stewmade a very decadent sort of cottage pie.
We spent some time this weekend getting the garden ready for fall, pruning the fruit trees and cutting back the hardy herbs like rosemary. I ended up with enough cuttings to make a few rustic wreathes. Contrary to my romantic notions, wreath-making can be a messy, sticky job (your hands end up covered in a pine-like sap!) but I think the end result was worth it. I now have pretty holiday decorations with a lovely scent, and afterward the sprigs can be stripped to use in cooking.


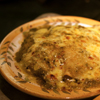
Where’s the recipe??
We’re experiencing some technical difficulties — our blog server is running painfully slow, and it was all we could manage to get this post up in time for the Dark Days roundup before running off to not one but two holiday parties this evening. If you’re interested in Cameron’s recipe for the Beef Braised in Ale, check back early next week.
Beef in Ale
– adapted from The River Cottage Meat Book
3# boneless chuck or stewing beef, trimmed and cut into 2-inch chunks
8 ounces pancetta or bacon, cut into 1-inch pieces
2 T butter or drippings
1 pound of onions (Hugh specifies baby onions, peeled and left whole. I used medium-sized yellow onions, quartered)
Up to 1/3 c all-purpose flour, seasoned with salt and pepper
4 cups ale (Hugh calls for stout)
2 bay leaves
1 sprig thyme
A few stems of parsley
8 ounces each of carrots and celery, cut into chunks
Heat the butter or drippings in a Dutch oven or other large stew pot and render the pancetta or bacon over medium heat, cooking until well-browned. Remove the bacon with tongs or slotted spoon and reserve on a plate. Fry the onions in the hot fat until they are lightly browned all over. Remove the onions and add to the bacon on the reserve plate. Turn up the heat to medium-high or high depending on your stove. Toss the beef in the seasoned flour and shake/pat off as much of the excess as possible, leaving only a fine layer of flour behind.
Working in batches, thoroughly brown the beef on all sides, removing it to the reserve plate when you dare not leave it in any longer. Here is where your diligence in flour removal will pay off. The browner you can make the beef chunks, the better your stew will taste, but extra flour will flake off and burn before you can get the beef where you want it.
Pour in some of the ale and deglaze the pot, scraping up the browned bits with a wooden spoon. Tip the contents of the reserve plate (bacon, onion, beef, and any juices that have collected) into the pot. Pour in the rest of the ale, adding water if necessary to just cover the meat. Add the herbs, tied into a bouquet garni. Taste and season lightly with salt and pepper, keeping in mind the saltiness of your bacon and the fact that you will be reducing the liquid. Bring to a boil and set to simmer gently with the lid on but slightly ajar.
The stew will need to cook roughly 2-1/2 hours. This can be done either on the stovetop or in an oven set to 250° F. If the meat starts to get exposed, add a little hot water. Approximately one hour before you expect the meat to be done, add the carrots and celery. You’ll know it’s done when the meat falls apart at the touch of a fork.
Remove the bouquet garni. Taste again for seasoning and serve under, over, beside, or puddled in potatoes that have been mashed with scandalous amounts of cream and butter.
Dark Days challenge, garden, locavore, recipes
8 Comments »


Posted by Anita on 12.06.08 9:03 AM
 When Cameron and I started blogging a few years ago, we were talking to ourselves. After walking away from the food message boards that had been our online home, we found ourselves adrift. A pair of food-obsessed writers can’t exist in a vacuum for long, so when our pal Sean suggested we should blog, it didn’t take us long to see the wisdom of his plan. We set up an account, bought a domain, and started writing.
An interesting thing happened along the way: People — strangers who we didn’t even know! — started reading the blog. Some of them even left us comments. And then we started visiting their blogs, leaving comments, and becoming intertwined with their lives. We celebrated their joys, cheered on their triumphs, cried at their losses, and consoled them in their grief… and they did the same for us. It’s funny to say this about people who I’ve (mostly) never met in person, but I’m closer with some of my food-blog pals than I am with people I see every day. To an outsider, perhaps this sounds odd, even a little loney… but to me, it’s one of the big blessings in my life, this circle of support and affection that literally crosses the oceans.
The most fabulous things happen in this little world of ours. Last week, I got an email from Bron, telling me that she and Ilva were planning a big surprise for our mutual friend Barbara, who’s been struggling with the side-effects of chemotherapy. Would I help them send a virtual hug to Barbara this weekend, in the form of a recipe? Oh, absolutely!
To me, nothing says love and comfort better than a bowl of soup. I know that bowl full of beef and chile sounds far too spicy and rich for someone struggling with the nausea and unpleasantness of chemo, but in truth this dish is clean, light, and flavorful, with just a hint of sweet spice. The broth base is chicken, not beef, so the flavors of the sprouts and scallions come singing through. Ginger is known to help with nausea, and if you seed the Fresno chile — which is already mild — you’re left with just the clean, fruity flavor and none of the heat. And because the meat is cooked separately and then used as a topping, you can adjust portions for varying appetites. Barbara doesn’t enjoy the taste of cilantro, so we substituted a sprig of flat-leaf parsley for the garnish; it’s mostly just for a splash of color, so feel free to leave it out entirely.
So here’s a hug to Barbara, across the oceans and miles. I wish we could come by and bring you a bowl of soup in person, but for now we’ll slurp a bowl of gingery noodles and keep you in our hearts.


 Ginger Beef Ramen
– adapted from The Wagamama Cookbook
5 oz (150g) mung bean sprouts
9 oz (250g) ramen noodles
12 oz (350g) sirloin steak, 3/4-inch thick
teriyaki or soy sauce, for brushing
4 cups (1l) chicken stock
2T ginger, peeled and slivered, or more to taste
2T ramen sauce (recipe follows), plus more for serving
3 scallions, trimmed and sliced on the diagonal
1 red Fresno chile, trimmed, seeded, and sliced lengthwise
1/2 small red onion, sliced very thin
1 lime, quartered
parsley (or cilantro) sprigs for garnish
Rinse the steak and pat dry. Season with salt and brush with oil; let sit 30 minutes to come to room temperature.
Cook the noodles in a medium pot of boiling water until al dente, about 2 minutes. (I recommend cooking 1 minute less than the package indicates, as the hot soup will continue to cook the noodles later.) Drain and rinse with cold water until cool; drain well and set aside. In the same pot, heat the stock to a simmer; reduce heat to low and cover until ready to use.
Grill, broil, or pan-sear the steak until medium rare. Remove from the heat and immediately brush with teriyaki or soy sauce. Keep warm to rest for at least 5 minutes.
Add slivered ginger and 2T of ramen sauce to the stock, and heat to a rapid simmer; adjust for saltiness with soy sauce or fish sauce, as desired. Meanwhile, divide the noodles among two bowls, and slice the rested steak on the bias. Top the noodles with the beef, sprouts, scallions, chile slivers, onion. Garnish with herb sprigs and serve with lime wedges and additional sauce to add at the table.
Ramen Sauce
1 scant tsp sugar
1T malt vinegar
3T Asian sweet chile sauce (or to taste)
3T fish sauce
Dissolve the sugar in the vinegar, then combine with other ingredients.
cooking, other blogs, recipes
14 Comments »


Posted by Anita on 11.18.08 9:30 PM
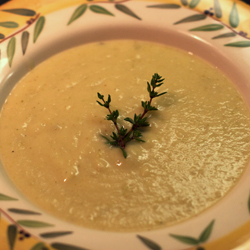 There’s some sort of culinary magic that happens in autumn, when even the homeliest of foods can be made beautiful and delicious. I’m convinced that there’s something in the air at this time of year — every foodie I know looks forward to fall, and it can’t just be because we’re all sick of tomatoes and mozzarella.
A case in point: We had a half-knob of rather unattractive celeriac left over from an earlier recipe, so we cobbled together a creamy soup by adding a potato, some celery, butter, stock, and thyme. A few shallots, admittedly gorgeous by anyone’s definition, gave the mixture a hint of sweetness.
You might think something this monochrome would taste as bland as it looks, but you’d be mistaken. It’s earthy and herbal, silken and almost meaty. Served in demitasse or small bowls, I think you could even call it pretty enough for company, should the occasion arise. But trust me, you won’t want to share.





Celeriac Bisque
– Serves 4 as a first course
2T unsalted butter
1/3 cup chopped celery (1 medium stalk)
1 medium shallot, minced
12 oz celeriac (also known as celery root), peeled and cut into 1/2-inch dice
1 medium starchy potato, peeled and cut into 1-inch cubes
3 cups unsalted chicken broth or stock (plus more as needed)
2 sprigs fresh thyme
–
2T whipping cream
herbs for garnish
In a heavy, medium-sized saucepan, melt the butter over low heat. Add the celery and cook, covered, until the celery just starts to soften (2 to 3 minutes). Add the shallots and saute, uncovered, 3 minutes more. Stir in celeriac, potato, stock, and thyme sprigs; lightly salt to taste. Bring to a boil, then reduce heat to a bare simmer. Cover and cook until vegetables are very tender, about 40 minutes.
Remove the thyme sprigs and, using a stick blender, puree the soup until smooth. (You can also use a standard blender: cool the soup a bit, work in batches, and then return the puree to the pan). Add additional stock as needed to achieve desired consistency. Stir cream into the soup and adjust seasonings with salt and pepper. Ladle into flat bowls, and garnish with chopped herbs or small tender sprigs, as desired.
cooking, locavore, recipes
4 Comments »


Posted by Anita on 11.16.08 10:44 PM
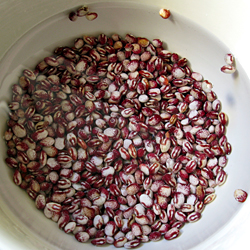 The irony of yesterday’s 80-degree excursion to the Ferry Plaza was that none of us wanted summery stuff. We waltzed right past stalls filled with tomatoes, artichokes, and strawberries(!) and gravitated toward the pork, beans, and greens we all craved despite the heat.
With the unseasonably warm weather and our un-air-conditoned house, we knew it would stay too hot to braise, so we headed over to the Marin Sun Farms stand and checked out their grillable options. Laura picked out a lovely slab of pork ribs, and I walked across the aisle for a bag full of Brussels sprouts from the Iacopi’s stand.
Since Laura’s only able to find pintos and cranberry beans at her local markets, she planned to load up her bag with lots of fun varieties from the Rancho Gordo stand. Little did we know that Steve Sando himself would be tending the stall on Saturday, training two new employees and charming the shoppers who were surprised to see the bean guru himself behind the baskets and bags. In addition to the four varieties Laura chose — old favorites Yellow Eye and Calypso, plus two others that escape me Pebble and Anasazi — we also bought a pound of Red Nightfall, for our Dark Days dinner that night. I had no idea how we’d serve them, but I knew we could find inspiration flipping through our just-bought copy of Steve’s new book, Heirloom Beans.
Cameron gave the ribs a simple rub (salt, pepper, dried sage, and pasilla), and we planned to serve them with a mustard-and-vinegar sauce, so we looked for a simple recipe that would showcase the beans’ natural flavors. It didn’t take us long to find a dish that we all agreed sounded delicious: What’s not to love about porky goodness topped with a drizzle of bright olive oil and a snowy dusting of cheese? We found a hunk of Fatted Calf pancetta in the freezer and snipped some fresh sage from the garden, swapped a red onion for yellow, and left out the original recipe’s carrot. The end result was delicious, if I do say so myself, and a perfect counterpoint to the smokiness of the ribs and the tart-bitterness of the shredded sprouts.
ps: For more great photos of our meal prep, don’t miss Laura’s set and post.





Beans with Pancetta and Sage
– adapted from Heirloom Beans
1/2 pound heirloom beans, soaked
– the original recipe calls for Jacob’s Cattle, but we used Red Nightfall
1/2 medium red onion, chopped
2 celery stalks, chopped
3 garlic cloves, minced
1/4 pound pancetta or slab bacon, diced
2T chopped fresh sage
dry Jack or other hard cheese, grated, for garnishing
Place the beans and their soaking liquid in a tall pot, adding enough cold water to cover by at least an inch. Bring to a boil for 5 minutes, then reduce heat to low. Simmer, partially covered, until beans begin to soften (about 30 minutes).
Meanwhile, heat a heavy skillet over medium heat. Add the olive oil and warm through, then add the onion, celery, garlic, pancetta, half of the sage, and a little salt and pepper. (Keep in mind your pork may be heavily salted.) Reduce heat to medium-low and sauté very slowly; do not allow the ingredients to brown. When very soft and aromatic, about 20 minutes, remove from heat and set aside.
Add the sauteed mixture to the beans and bring to a simmer, adding more water as needed. Taste the simmering liquid, and adjust for salt as needed. Simmer, partially covered, until the beans are tender, about another hour, keeping an eye on the water level. When beans are cooked through and no longer chalky, add the remaining sage and adjust seasonings; simmer for 5 minutes.
Serve the beans with a little of their pot liquor in shallow bowls, drizzled with olive oil and sprinkled with the grated cheese.
—-
Disclaimer: Cameron and I are big fans of pretty much everything Steve Sando does; the three of us are friends from the olden days on various food boards, and we’ve been known to babysit his market stall on occasion. There’s no way to say that I’m not biased, but I still think that the book is fabulous: The recipes go well beyond the usual things you think of making with dried beans; the photography is stunning; and the graphic design is trademark Rancho Gordo, with bold typography, clean lines, lots of white space, and judicious use of bright accent colors.
Although I’ve only cooked once from it, at the price ($15 on Amazon) it seems like a bargain. It’s got a fun foreword by Thomas Keller (yes, Food Jesus is one of Steve’s fans, too), great front matter that covers everything from Rancho Gordo history to equipment notes, and recipes from some of our favorite restaurants — like Range‘s Cellini Bean Soup with Chard and Poached Eggs. I’m looking forward to exploring it in more depth, and I’d say that even if Steve wasn’t a pal.
cookbooks, Dark Days challenge, farmers markets, locavore, other blogs, recipes
6 Comments »


Posted by Anita on 11.14.08 1:15 PM

I’m having a turkey day get-together and wanted an appropriate drink. I’d like something I can serve in a martini glass, fancy shmancy cocktail thing. A guest suggested, um, I can barely type this — pumpkin pie martini — and I immediately had to shoot that down.
Help!
– Pumpkin-Averse Party Instigator
Dear PAPI:
What is it with the onslaught of pumpkin drinks this year? I mean, I love me some pumpkin pie, but …gah! Leave the whipped-cream garnish for the dessert table, please.
Thankfully, there are plenty of festive drinks that fit the bill for Thanksgiving that do not involve canned squash. Two of our favorite options from the Drink of the Week archives would be perfect for your holiday bash. They’re both certified crowd-pleasers, full of holiday flavors, and relatively low on the booze — a good idea at parties so casual drinkers don’t end up face down in the cranberry sauce. Best of all, you should be able to find all of the ingredients at your local Beverages & More, or any other well-stocked liquor store.
Have a happy Thanksgiving, and do let us know how it goes!
– Anita & Cameron
—-
Oh, Henry!
– Originally blogged 11/23/07 — click for photos and details
1-1/2 oz bourbon
1-1/2 oz spicy ginger ale (we like Blenheim)
3/4 oz Benedictine
Stir all ingredients in an ice-filled mixing glass, and strain into a cocktail glass. Garnish with a piece of star anise or an orange twist.
Now, I know a lot of casual drinkers might be wary of the bourbon. But be strong: A cocktail is like a dog — you can show no fear! I had three bourbon-haters begging me for the recipe at the last party we served these at. But do try to find Blenheim or another spicy ginger ale; Canada Dry and its ilk is too chemical-y and even the lovely Fever-Tree is too tame.
Make sure you grab Benedictine and not B&B (which is pre-mixed benedictine & brandy). The bottles look nearly identical and they’re often shelved together.
—
Falling Leaves
– Originally blogged 10/6/06 — click for photo and details
1 oz Clear Creek pear eau de vie
– or substitute pear vodka; Clear Creek is tricky to find outside of the West Coast
2 oz Trimbach Riesling wine
1/4 oz honey syrup
– equal parts of honey and water, heated together and then cooled
1/2 oz Orange curacao (such as Cointreau)
a dash of bitters, preferrably Peychaud for the rusty color and spice
Measure all ingredients into cocktail shaker, add ice, and shake well. Strain into a cocktail glass, and garnish with a whole piece of star anise or a sage leaf.
Drink of the Week, drinks, holidays & occasions, recipes
9 Comments »


Posted by Anita on 11.10.08 12:35 PM
 We’re no strangers to homemade cocktail ingredients. We’ve been making limoncello (and other citrus liqueurs) for ages, along with nocino, alkermes, plum brandy, and plenty of other infusions. We’ve simmered up our own grenadine, brewed a batch or two of ginger beer, steeped jar after jar of cocktail cherries, and infused more flavored syrups than any reasonable person’s fridge can hold.
Last summer, we hit upon a new favorite: infused brandy using the excess pears from our friends’ tree. Since it’s an infusion, rather than distilled pear cider, our homemade drink is closer to a pear-brandy liqueur — like Belle de Brillet — than to a potent poire william eau de vie or the grappa-style Clear Creek pear brandy. We’ve mostly sipped it neat or mixed into bubbly, with or without a little simple syrup. But there’s no reason why it wouldn’t be a great mixing ingredient… especially as it doesn’t really improve with age, and in fact deteriorates fairly quickly after the initial infusion.
 There aren’t many cocktails that call for pear spirits, but there are plenty that use calvados and applejack to great effect. One such drink, the Jack Rose, dates to the pre-Prohibition era, and was especially popular in the Northeast where applejack was distilled in great quantity. Many theories abound as to the drink’s name origins, but it seems pretty likely that it’s Jack from booze and Rose from the color, as opposed to any gangster or bartender-nickname references.
The usual recipes for the Jack Rose are split fairly well between lemon and lime juice. When using applejack, I think either option is pleasant, though I will admit a small preference for lime when mixing the stronger Laird’s Bonded. But if you’re making the switch to pear brandy, definitely go with lemons — and Meyer lemons, if you can find them — as the subtler pear flavors are lost amidst lime’s extra tartness.
With a slight change to the more-Frenchified pear brandy, we christen our variation the Jacques Rose. It’s made with all home-made or home-grown ingredients, in honor of Mixology Monday “Made From Scratch,” hosted by The Pegu Blog.





Jacques Rose
2-1/2 oz pear brandy (or substitute 1-1/2 oz brandy + 1 oz poire william)
3/4 oz lemon juice
2-3 dashes grenadine
Shake with ice, and strain into a chilled cocktail glass. Garnish with a lemon twist.
drinks, Mixology Monday, other blogs, preserving & infusing, recipes
3 Comments »


 It must happen to everyone: That moment when you lose all ambition for trying new recipes and just fall back on the tried and true, the comfort foods that make your heart and belly happy, with a minimum of fuss.
 Unfortunately for you, and for my narrative, the two all-local meals we ate last week were both repeats: My mom’s famous meatloaf — with Dirty Girl romanesco and baked Little’s potatoes on the side — and a thrown-together lasagna using home-canned tomatoes, locally made cheeses and fresh pasta.


 Between finishing up our Christmas shopping, getting


 When Cameron and I started blogging a few years ago, we were talking to ourselves. After walking away from the food message boards that had been our online home, we found ourselves adrift. A pair of food-obsessed writers can’t exist in a vacuum for long, so when our pal


 Ginger Beef Ramen


