Posted by Anita on 06.21.09 8:31 PM
 A few weeks ago, we headed down to Los Angeles for a quick getaway. Ostensibly, the occasion was our seventh(!) wedding anniversary, but truthfully the real purpose of our trip was to eat at all the places we’d been adding to our ever-expanding “must-try” list.
At the very top of said list was Pizzeria Mozza, the newish joint venture from Mario Batali and Nancy Silverton. After hearing rave reviews from pretty much every newspaper, magazine, blog, and friend, we decided to schedule Mozza in a prime Friday-night slot, to make sure we were getting the A-team of cooks and servers.
I won’t bore you with the litany of every thing that went wrong that night — we’re over the tedious exercise of writing negative restaurant reviews — but here’s the short version: Unexciting food, abysmal service, and pacing so unbelievably rushed that we were back in our car just 29 minutes after our first (and only) glass of wine hit the table. Seriously.
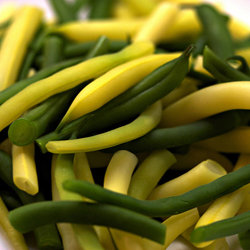
But every cloud has a silver lining. And at Mozza, that lining took the form of a fabulous melange of slender haricots verts, sweet shallots, crunchy hazelnuts, and creamy whole-grain mustard dressing (which, ahem, arrived in place of the roasted-cauliflower dish we’d actually ordered). Amid a menu of fair-to-decent dishes, this small plate stood out, and we quickly realized that we could easily duplicate it at home. We combed through every Batali and Silverton cookbook we own, but found nothing similar. However, Googling “beans + mustard + vinegar + hazelnuts” led us to a likely recipe — not from either of the Mozza chefs, but from Chef Dan Barber of New York’s Blue Hill restaurants.
Although we’re still a few weeks away from finding slim haricots at our market, their larger cousins are already becoming plentiful. And though hazelnuts aren’t grown in the Bay Area, we have plenty of other local options. We opted for walnuts, but made them a little more decadent by rubbing off their skins after toasting them lightly in a pan. After that, the rest of the dish comes together in a matter of a whisk here, a blanch there. And when served with a quick-brined pork chop and the first new potatoes of the year — as we did, for our One Local Summer meal this week — it makes for a great summer side-dish.

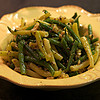

Summer Beans in Grainy Mustard Vinaigrette
— adapted from Dan Barber
1 T finely chopped shallots
2 T balsamic vinegar
12 oz trimmed green and yellow-wax beans (about 4 cups)
1/2 T whole grain mustard
1/4 cup good-quality extra-virgin olive oil
1 T chopped chives
1 T plus 1/4 tsp salt
1/4 tsp freshly ground pepper
2 T blanched nuts (we used walnuts) toasted, peeled if desired, and coarsely chopped
Soak shallots in balsamic vinegar in a small bowl for 30 minutes; set aside for later use.
Fill a saucepan with 2 quarts of water and 1T salt; bring to a boil. Meanwhile, fill a large bowl with water and ice.
When water comes to a boil, add beans and cook until just tender, about 3 minutes. Drain quickly and shock beans in the ice-water bowl. When fully chilled, drain beans well, pat dry, and set aside.
Stir mustard into balsamic-soaked shallots. Gradually whisk in olive oil until blended. (If you’d like a creamier dressing, buzz with a stick blender until well emulsified.) Add the chives, 1/4 teaspoon salt, and pepper; stir until combined.
Toss dressing with beans and nuts until evenly coated; serve immediately.
Farmers and food artisans who created the ingredients for this week’s meal: Marin Sun Farms
, Point Reyes: Pork chop
Fox Barrel, Fairfax: Hard cider (for brine)
Eatwell Farm, Dixon: New potatoes
Dirty Girl Produce, Santa Cruz: Shallots
Bariani, Sacramento: Olive oil and balsamic vinegar
Dwelley Farms, Brentwood: Green and wax beans
Boccalone, Oakland: Whole-grain mustard
Glashoff, Fairfield: Walnuts
…and our own
homegrown chives and homemade chicken stock
locavore, One Local Summer, recipes, restaurants, SoCal
12 Comments »


Posted by Anita on 06.13.09 8:34 PM
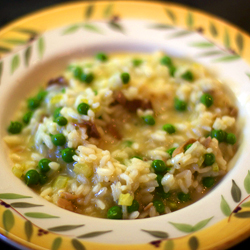 One of the greatest pleasures of growing your own food is standing next to your plot — preferrably while still in your pyjamas — and nibbling on the tenderest first bits of your harvest. I don’t think I’d be exaggerating if I said that Cameron and I probably ate a quarter of our shelling-pea crop in just that way. And even though it cut down dramatically on the number of peas that actually made it to the kitchen, I wouldn’t change a thing.
For this week’s One Local Summer meal, we enjoyed the last of our pea harvest in one of our favorite recipes, a risotto so deliciously savory that we’ve made it three times already this year. We’ve got another batch of peas already slinking their way up the trellis — courtesy of our mild summers, we get to enjoy spring crops nearly all year long — and already I am counting the days until we can make this simple supper again. Because although it’s fine with the regular farmers-market ingredients, it truly becomes its very best when made with tiny, super-sweet, just-picked baby peas.


Risi e Bisi (Venetian Style Pea Risotto)
– adapted from Molto Italiano
2T extra-virgin olive oil
1 shallot, chopped
1 celery rib, chopped
1 oz prosciutto, cut into in 1/8-inch dice
3/4 cup Arborio or Carnaroli rice
1 quart chicken stock, warmed
1 cup shelled fresh peas
2T butter
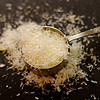
1/4 cup grated hard cheese, such as dry Jack or Parmesan
salt and pepper
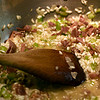
Heat the olive oil in a tall-sided 10-inch skillet or saucier pan. Saute the shallots, celery, and prosciutto over medium heat until soft, about 8 minutes. Add the rice and stir for 2 minutes, until the grains become opaque. Add enough stock to just cover the rice, and stir until stock is absorbed. Continue to add stock a ladleful at a time, waiting until most of the liquid is absorbed before adding the next bit. Taste the rice, and season with salt and pepper. Add peas and cook for 4 minutes, until peas are just tender. Remove from heat, add butter and cheese, and stir until just melted. Serve in warmed shallow bowls.
Farmers and food artisans who created the ingredients for this week’s meal: Bariani
, Sacramento: Olive oil
Dirty Girl Produce, Santa Cruz: Shallots
Catalán Family Farm, Hollister: Celery
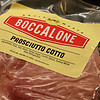
Boccalone, Oakland: Proscuitto cotto
Lundberg Family Farms, Richvale: Eco-farmed white Arborio rice
Spring Hill Cheese Company, Petaluma: Butter and Dry Jack cheese…plus our own homemade chicken stock, made from
Marin Sun Farms and
Soul Food Farm chicken bones and our own homegrown English shelling peas
locavore, One Local Summer, recipes
9 Comments »


Posted by Anita on 06.03.09 6:19 PM
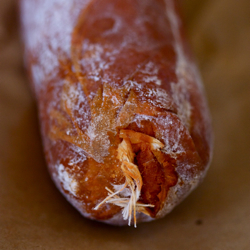 I first read about ‘nduja — a red-hot Italian meat paste that’s pronounced “en-DOO-ya” — in Saveur magazine, ages ago. Despite being the sort of foodstuff that’s right up my alley (hello, chiles and pork… together?!), I never seemed to be able to put my hands on the stuff. We’d heard rumors of a stall at London’s Borough Market selling ‘nduja, but our travels there never seemed to line up with their production. It seemed we’d have to make a trip to Calabria for the real thing, or go without.
All that changed last month, with the introduction of locally made ‘nduja from Chris Cosentino’s Boccalone Artisan Meats. This spicy, spreadable salami’s quickly become the darling of the Bay Area carnivores, complete with an adorable nickname and mouth-watering coverage in all the hip spots.
But as delicious as it is when simply spread on a slice of baguette or a cracker, it seemed sacrilegious to snarf down such a long-sough treasure as an appetizer. Searching for other options, I came up with Gina DePalma’s very loose recollection of an ‘nduja-centric pasta dish she whipped up in her Roman kitchen. Despite not being much of a recipe — it lacked both measurements and timing cues — our first attempt at reproducing it turned out incredibly well, if I do say so myself. (You don’t have to take my word for it: Our friend Matthew, a former restaurant critic for the Seattle Times, pronounced it “as good as anything I had in a restaurant” during his visit to San Francisco.)
Now, I’m not sure I’d pick this humble pasta over an evening at SPQR or Contigo, but the dish was far more delicious than the effort it took to whip together. We nearly always have some dried pasta and a frozen container of leftover beans in the freezer; if I just keep a package of ‘nduja around, we’ll never lack a quick, weeknight supper.
The hardest part of the recipe may be getting your hands on the ‘nduja, which isn’t hard at all if you live in or near San Francisco: They sell it at the Boccalone Salumeria at the Ferry Building. For those of you farther afield, there’s always mail order (or a trip to Calabria?). Once you get your hands on the necessary ingredients, free to wing it with the ratios, just as we did. With such flavorful ingredients, I’m sure it’ll be just as good.


Pasta e Fagioli with ‘Nduja
– adapted from Gina DePalma
1 cup dry white beans
1 small onion, diced
olive oil
1 sprig rosemary
1 bay leaf
salt and pepper, to taste
1 carrot, peeled (if needed) and diced
1 stalk celery, chopped
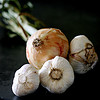
2 cloves garlic, minced coarsely
4 oz (1/2 chub) cured ‘nduja, broken into chunks
8 oz dry small pasta, such as shells or ditalini
more olive oil, for garnish
hard Italian-style grating cheese, such as Pecorino
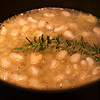
Soak the beans in enough water to cover by double their height, overnight if possible. When beans are soaked, heat a medium saucepan over medium-low heat; saute the onion in a good amount of olive oil until soft but not brown. Add the beans, their soaking liquid, rosemary, and bay. Bring to a hard boil for a few minutes, then reduce heat to a gentle simmer and cook until beans are beginning to become tender, but still firm. (This will take anywhere from 45 minutes to 3 hours, depending on the age of your beans and the length of their soaking.) Add the salt and pepper to taste, and simmer for another 10 to 15 minutes. At this point, you can discard the herbs and cool the beans in their liquid for later use.
When ready to bring the dish together: If you’ve made the beans ahead, gently warm them in their liquid in a small saucepan. Cook the pasta, stopping a minute or two before the cooking time on the package; drain and set aside. Meanwhile, heat a large skillet and add 2T olive oil. Saute the carrots and celery until soft; add the garlic and saute another minute. Add the ‘nduja, pressing to break it up and melt it as it heats. Add the beans and a small amount of their cooking liquid to the ‘nduja pan, along with the cooked pasta. If the mixture is dry, add more bean liquid until it’s wet; simmer a few minutes to allow the flavors to come together.
Divide the pasta into two or three warmed bowls. Drizzle with olive oil and top with shredded cheese.

This recipe is our entry for the inaugural week of
One Local Summer 2009, hosted by
Farm to Philly, with Western Region posts graciously recapped by
Columbus Foodie. Just like
last year, we’ll be exploring and honoring the foods from our local farmers and producers with at least one meal each week made from 100% local ingredients. We’re not declaring any exemptions this time — other than salt and spices — and our radius will be 100 miles.
Farmers and food artisans who created the ingredients for this week’s meal:
Iacopi, Half Moon Bay: Italian butter beans
Catalán Family Farm, Hollister: Onions
Bariani, Sacramento: Olive oil
Star Route, Bolinas: Carrots
Chue’s Farm, Fresno: Celery and garlic
Boccalone, Oakland: ‘Nduja
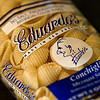
Eduardo’s, San Francisco: Pasta shells
Joe Matos, Santa Rosa: St. George cheese
….plus rosemary and bay leaf from our garden
cooking, locavore, meat, One Local Summer, recipes
11 Comments »


Posted by Anita on 03.16.09 8:45 PM
 Daylight Saving Time arrived this week, and with the longer days come the final few nights of the Dark Days Challenge. We’re also deep into the second full week of our “no new meat” freezer clean-out plan, which is going remarkably well.
Work’s been keeping us both insanely busy, so it’s a treat to be able to eat a home-cooked meal even on the nights when we don’t make it home until well after dark. And, as a side benefit, we’re finally able to see our freezer shelves again.
This week’s dinners included successful renditions of cassoulet, spaghetti and meatballs, and posole verde. But lest you think it’s been an endless buffet of effortless delights, I’ll admit that one night’s dinner — reputedly lasagne — resembled nothing more than a watery bowl of soggy, sausage-flecked dough. (Not sure what happened there; baked pasta always freezes well… or at least always has in the past.) It didn’t taste bad, but it certainly doesn’t count as one of the successes.
As nice as it is to work our way down the freezer inventory and pull a ready-to-heat meal out of storage, it does feel a little anticlimactic. After a few days of thaw-and-reheat, I begin to miss the prep, not to mention the actual cooking. Happily, most of the stuff in the freezer is bits and pieces, not entire prepared dishes, which means that there are plenty of chances to create a dish out of old leftovers or combine assorted remnants with a fresh ingredients to make a dinner that’s more than the sum of its parts.
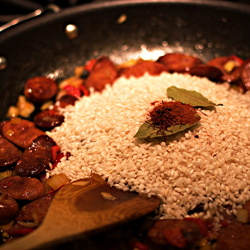
 Our favorite meal this week: A simple paella that used up some orphaned chorizo, leftover roast chicken, and red pepper strips we froze last summer. It’s not the most authentic Spanish dish, but it’s easy enough to get on the table for a midweek meal, and undeniably delicious. And, as an added bonus, we got to sample the season’s first fava beans — a little dash of spring in our final Dark Days meal. With the exception of the pimentón and the saffron, everything came from within our 100-mile radius.
When it comes to paella, the sausage you want is firm Spanish chorizo — the refrigerated sort that’s a similar texture to andouille, definitely not the soft Mexican kind, nor the dry charcuterie style. The Spanish Table in Berkeley sells an assortment of brands; we used the locally made Neto’s.




Weeknight Paella
– makes 6 to 8 servings
1 tablespoon vegetable oil
1 pound Spanish chorizo, cut into 1/2 inch slices on the diagonal
1 small onion, chopped
1 red bell pepper, chopped or 1/2 cup bottled red-pepper strips
2 cloves garlic, chopped
1/2 teaspoon pimentón, or to taste
2 cups short-grain rice
1 pinch saffron threads
2 bay leaves
4 cups chicken stock
8oz roast chicken, skinned, deboned, and torn into chunks
1/2 cup peas or shelled fava beans
Salt and freshly ground black pepper, to taste
Heat oven to 400°F.
Heat oil in a very large skillet (ours is 14″) or paella pan over high heat. Add chorizo and cook until browned and fragrant. Drain off most of the chorizo fat, leaving just enough to saute the vegetables. Add onion, red bell pepper, and garlic. Cook, stirring occasionally, until vegetables are tender, about 3 minutes.
Add rice, pimentón, saffron, and bay leaves. Stir to combine and coat the rice, about 1 minute. Add chicken stock and bring to a boil. Add chicken, peas (or favas); stir to combine.
Transfer skillet to oven. Cook uncovered until rice is tender and no liquid remains, about 20 minutes. Remove from the oven. Fluff with a fork and serve immediately.
Dark Days challenge, locavore, recipes
15 Comments »


Posted by Anita on 03.11.09 11:49 AM
 Two weekends ago, I nearly lost a toe.
I’d been rooting around in the upstairs freezer (yes, we have two — doesn’t everyone?), looking for some mysterious recipe ingredient, when the Jenga pile that is the meat shelf gave way. Luckily, I jumped back just in time to avoid an avalanche of frozen bricks, but it was a near thing.
With no time to spare, I shoved everything back in as neatly as I could, and added “re-organize the freezer” to my to-do list. It took me a while to get there, but one cold and cloudy morning, I tackled this long-overdue task. I took everything out of both freezers, inventoried the contents, and put it all back in the least-precarious and most-logical way possible. Admiring my newly tidy spaces, I felt so virtuous.
But as I surveyed the inventory list, that virtuous feeling vanished. How in the world had we managed to squirrel away enough food to fill two standard freezers? Just the list of our frozen fodder filled an entire letter-size page!
Happily, this is one embarrassing problem we can literally eat our way out of.
 I sat down and quickly mapped out 14 meals we could easily make by combining two or more components of the freezer. (Beef plus chorizo plus buns equals Sloppy Joes. Beans plus pork plus sausage equals Cassoulet.) And that wasn’t even counting the dozen or so ready-to-eat meals — like beef stew, coq au vin, and chili — that we’d set aside. I quickly realized we could go for weeks, eating very well without buying anything but fresh vegetables.
So, just in time for Lent — which we don’t celebrate, but definitely respect — I floated a new house rule: No new meat until we eat down our glut. Which, if we’re diligent, I predict will happen right about Easter Sunday. Cameron happily agreed, with one exception: Bacon. There will be bacon. Because it’s just not the weekend without everyone’s favorite cured meat.
So far, I have to say that our experiment’s been a wild success. We’re clearing out the freezers — I can see shelves! — while we save time and money, which are never abundant, but seem to be in even shorter supply this month. The oldest thing we’ve eaten so far? A bag of Rick Bayless’s ancho beef chili dated 6/07, which tasted surprisingly fine.
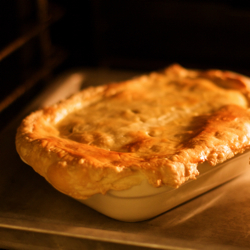
One of the winningest put-togethers so far is a new variation on an old favorite: chicken pot-pie. With a bag of pie-crust scraps begging to be used, we decided to take a break from our usual biscuit-topped recipe. I’m glad we did, because the rich, warm flavor of the sherry and the savory pop of mushrooms in this version make it a worthy variation.


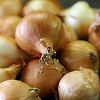
Chicken Pot Pie
— adapted from Kitchen Sense
3-1/2 cups cubed cooked chicken (a generous pound by weight)
1/2 cup (1 stick) unsalted butter
1 medium onion, chopped
1 medium carrot, sliced
1 celery stalk, chopped
6oz small mushrooms, quartered
1 tsp thyme leaves (stripped from the stem)
1/3 cup peas (not in season yet, so we omitted)
freshly ground black pepper
1/2 cup sherry or dry white wine
5T all-purpose flour
2 cups poultry stock
1 bay leaf
1T chopped flat-leaf parsley
1/2 recipe of your favorite pie crust (enough to cover a 9-inch pie pan)
1 small egg, beaten with 1 T cold water
Preheat the oven to 425°F.
Melt 3T of the butter in a large skillet over medium heat. Saute the onion until soft, the add the carrot and celery and continue cooking for another 3 to 5 minutes, until soft. Add the mushrooms and thyme and cook until the mushrooms give up their liquid. Add the peas, 1 tsp of salt, and pepper to taste; stir and cook for a couple of minutes. Deglaze the pan with half of the sherry; remove the cooked vegetables and their juices to a bowl and set aside.
Melt the remaining butter in the skillet, then whisk in the flour to make a roux. Cook for 3 to 5 minutes until the paste takes on a blonde color, Whisk in the stock and the remaining sherry, then add the bay leaf, thyme, 1 tsp salt, and pepper to taste. Simmer until thickened.
Add the cooked chicken and sauteed vegetables to the sauce. Transfer the mixture to a 1-1/2 quart baking dish (such as a deep-dish pie pan) and set aside in a warm spot near the oven.
Roll out the pie dough about 1 inch larger than the diameter of the baking dish and about 1/4-inch thick. Place the dough atop the pie filling, and press the overlap to the outside of the dish. Place the filled and covered pie on top of a rimmed baking sheet. Brush with the beaten egg, then make a few slits to allow steam to escape.
Bake for 20 minutes at 425°F until the crust has risen and begun to take on color. Reduce the heat to 350°F and bake for another 15 to 20 minutes, until the crust is a deep golden brown. Remove from the oven and serve.
Dark Days challenge, locavore, recipes
16 Comments »


Posted by Anita on 02.24.09 9:40 PM
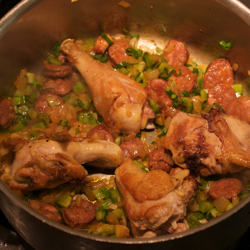 Now, I don’t know where you go for good Cajun and Creole recipes, but my first (and last) source is Chuck Taggart’s fabulous Gumbo Pages. Chuck’s site covers a whole lot more than just food. It’s a true mélange of everything that’s wonderful about the culture of New Orleans and the surrounding area — recipes, dining recommendations, cocktails, music, and so much more.
A native New Orleanian, Chuck saved our collective asses at Tales of the Cocktail last year: You pretty much couldn’t leave the Monteleone without running into a cocktail blogger clutching a printout of Chuck’s French Quarter restaurant recommendations; it was the most-viewed page on the Tales Blog, gathering more hits than all the other pages put together. Uh-huh.
 But back to the food. Over the years — even before we’d had the pleasure to make his acquaintance — we’ve used Chuck’s recipes for everything from turkey gumbo to creole hot sausage to dirty rice, all with uniformly excellent results.
For our Mardi Gras celebration, we made Dee Gautreau’s World Championship Jambalaya. Because we just don’t feel complete without pork, we took the liberty of adding andouille sausage. (A quick chat with Chuck revealed that sausage was likely in the original, but somehow disappeared from the printed recipe.)
No offense meant to the original recipe, but we’ve made a few minor tweaks to make things a little clearer. I’m sure any Louisiana native would know exactly what Dee meant, but there’s a fair bit of ambiguity there for anyone who wasn’t lucky enough to grow up watching jambalaya being made on a regular basis. You’ll see in the photos that I’ve halved the recipe; it still made four exceptionally generous servings.


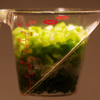
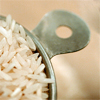
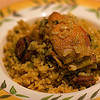
Championship Jambalaya
– adapted from Gumbo Pages
3-to-4 pound chicken, cut into 8 serving pieces (with neck, back, and wingtips reserved)
6-1/2 cups water
1/4 cup cooking oil
3/4 pound andouille sausage, sliced 1/2-inch thick
3 medium white onions, chopped
1 tablespoon salt, or to taste*
2-1/2 teaspoons granulated garlic
1 cup sliced green onions
1/2 cup chopped green peppers
1/2 cup chopped celery
1/4 teaspoon black pepper
Red pepper to taste*
2 tablespoons Louisiana hot sauce (such as Crystal)
3 cups uncooked long-grain rice
Place the chicken neck, back, and wingtips in a saucepan with 6-1/2 cups of water. Bring to a boil, then reduce heat and simmer, covered, while prepping the rest of the jambalaya.
Heat the oil in a heavy Dutch oven over medium heat. When the oil is hot but not smoking, add the chicken parts, skin side down. Fry, without disturbing the chicken, until the skin is a nice golden brown, then turn to brown the other sides equally well. Remove the chicken from the pan and set aside in a warm place near the stove.
Pour off the oil, leaving just enough to coat the bottom of the pan. Add the chopped onions and cook until golden brown, adding a little water if necessary to keep sticking to a minimum. Add the andouille and saute until the fat begins to render. Return the chicken to the pan with the sausage and onions.
Remove the neck, back, and wingtips from the quick broth. Measure the remaining liquid in a heatproof measuring cup, add enough water to make 6 cups, and add this liquid to the sausage/chicken pan. Note the liquid level in the pan; this will be important later.
Add the remaining ingredients except the rice to the pot, and simmer, well covered, until the chicken is cooked through (10 to 15 minutes). Check the liquid level, and add water to return it to the same point it was before simmering, if necessary. Bring back to a rolling boil, and add the rice. Reduce heat to a slow simmer and cook, uncovered and without stirring, for 10 to 15 minutes, until the water level is below the rice. Turn the rice (see notes below), reduce heat to low, and cover with a tight-fitting lid; cook for 15 minutes until the rice is tender. Turn the rice again, turn off the heat, and let the rice steam on the warm burner for 10 minutes more.
* The amount of salt and red pepper needed will depend on the age and strength of your spice, as well as the seasoning in your andouille. I used 1/2 tsp of cayenne pepper for a medium-hot result.
———
Chuck’s jambalaya notes:
– This recipe produces a brown-style jambalaya rather than the red tomato-based jambalayas you see in New Orleans.
– Jambalaya should never be stirred. Turn, rather than stir, to prevent the grains of rice from breaking up, scooping from the bottom of the pot.
Dark Days challenge, holidays & occasions, other blogs, recipes
7 Comments »


Posted by Anita on 02.22.09 8:54 PM
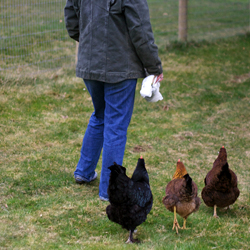 It’s such a treat to travel around the country (and the world), enjoying all sorts of things that we don’t get here in San Francisco, so we usually put our locavore ways on hiatus when we’re on the road. Occasionally, we’re able to enjoy the best of both worlds, either by visiting a restaurant where the chef sources his ingredients locally, or by shopping for local ingredients and cooking our own meal.
But during our Seattle trip over President’s Day weekend, we did one better: We wrangled an invitation up to the (Not So) Urban Hennery for dinner with Laura and her husband Mike.
Despite a persistent drizzle that followed us up I-5 from the city, we arrived in Arlington with just enough sunlight left for a quick farm tour. We put on our boots and headed out to visit the hens. As soon as they saw us (or, really, Laura… she’s definitely at the top of their pecking order!), the girls started up with such a symphony of cackles, chortles, and clucks that we couldn’t help but laugh. They know that the bag in Laura’s hand is full of kitchen scraps, and I suspect they have an idea that there’s cracked corn on offer, too.
As the light waned, we watched Jake and Sam play in the yard as the chickens devoured the goodies Laura had brought them. (Talk about sustainability! Table scraps in, eggs out.) We talked about the plans for the rest of the acreage behind the house, admired Mike’s new fence, and then retreated into the warm kitchen for a snack of local cheeses and a basket of homemade crackers, along with some locally produced hard cider.
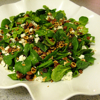
 We gathered around the table in the stylishly cozy dining room for an all-local — and pretty much all-homegrown — supper of home-farmed chicken (naturally!) grilled to golden perfection by Mike, along with local wines, pan-braised purple carrots, and a stunning salad of garden spinach topped with local hazelnuts and dried cranberries. It was all delicious, but my favorite part was an amazingly simple potato gratin that showcased Laura’s earthy home-grown potatoes.
The recipe — which Laura’s adapted over the years from Nigel Slater’s Appetite — calls for what the author rightly calls an “almost obscene quantity of cream”. Laura says she’s had relatives refuse to eat it after they watched her make it! But really, without any cheese or extra butter, it’s probably not much more decadent than the gratin that you likely already call your favorite. The recipe serves 6 at least, maybe 8 (unless they’re shameless potato gluttons like me).
Back home amid the rain and the beginnings of our spring-cleaning project, we decided to make a whole batch just for the two of us — they’re that spectacular. “They’re even better left over,” says Laura, “Especially if you warm them back up in the oven with a bit of foil over the top.”


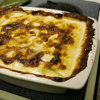

Dreamy Potato Gratin
– adapted from Appetite
2 pounds potatoes (about 3 large)
1/2 medium onion (or a leek), sliced very thin
4 cloves garlic, minced
salt & pepper to taste
1 to 2 pints heavy cream, as needed*
Preheat the oven to 400°F.
Peel potatoes and slice thin (about 1/8-inch or 3mm). Toss with the sliced onion and minced garlic, and salt and pepper to taste. Layer the mixture in a well-buttered 9×9 pan and top with enough cream to come halfway up the top layer of potatoes but not submerge them completely. Sprinkle with a little more salt and pepper.
Put the baking pan on top of a rimmed cookie sheet as insurance against a huge oven mess in case of bubbling over. Bake in the preheated oven, pressing the potatoes down into the liquid when the cream starts to expand. At the 20-minute mark, press the potatoes into the cream again and reduce the oven temperature to 350°F.
When the gratin starts to color and smell good — about the hour mark — check the potatoes for doneness by inserting a knife into the center. Continue to bake until the potatoes are no longer at all crunchy but not yet mushy. If the top begins to get too brown, move the gratin to a lower rack and turn the temperature down to 300°F. When done, remove from the oven and let sit for a few minutes to allow the gratin to set.
* The quantity of cream needed will depend on how close you’re able to get your potatoes to the 2-pound mark, how much potato you lose to peeling and trimming, and the exact dimensions of your pan. Laura’s dish is closer to 10×10 and fairly deep, so she uses 2 whole pints. 1 pint was perfect in my standard 2-quart 9×9 pan.
Dark Days challenge, locavore, other blogs, recipes, Seattle
9 Comments »


Posted by Anita on 02.17.09 11:46 PM
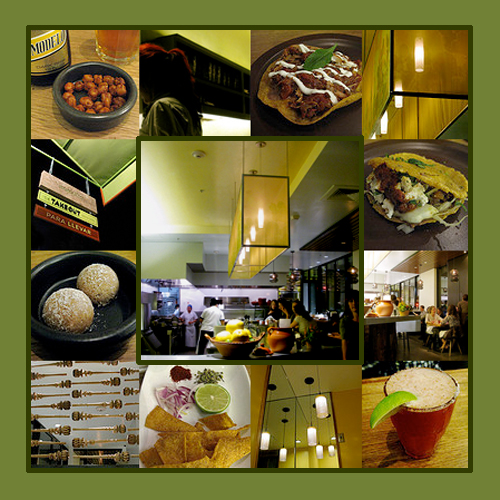
I don’t think it’s any secret here that we’re big fans of puns, wordplay, and other clever banter, so you’ll probably guess that I’ve been gaga about the wittly named Nopalito — the casual Mexican offspring of our beloved Nopa — since the day I first learned it was coming to town.
It’s also no great surprise that an authentic Mexican restaurant would be a huge draw for me, the girl who would happily scarf chilaquiles for breakfast, tortas for lunch, and a big cheesy combination platter for dinner. But here’s the icing on the cake: Nopalito follows the same local-seasonal-sustainable-organic-ethical blueprint as its older sibling, and it does it in style.
Now, we’re not much for restaurant reviews these days, but I will say this: Nopalito is off to a running start, and we’re looking forward to many return trips. As Cameron said: “This place is pretty much the restaurant you’ve been waiting for… forever.” He’s right: There’s very few places like Nopalito in the Bay Area — Doña Tomas is about the nearest equivalent — and certainly nothing of its type within The City proper.
 Do I like the hour-long waits? No. (But I’m soothed by being able to call ahead and put my name on the list.) Do I like perching on barstools, elbow-to-elbow with perfect strangers at a communal table? Not one bit. (But on the other hand, it’s prime Eatsdropping territory, and a not-bad way to decide what you want to order next.) Am I enthralled with everything I ate on our first visit? Not by a long shot.
But there were enough promising tastes on our first visit — the gordita de picadillo first among them — that absolutely transported me. I’m looking forward to seeing what else they have in store, especially once the weather warms up enough to enjoy a Michelada or two on the covered patio.
Nopalito
306 Broderick Street
(x Fell/Laguna)
San Francisco, CA
415-437-0303
Dark Days challenge, locavore, Mexican, restaurants
5 Comments »


Posted by Anita on 02.09.09 10:52 PM
 I keep teasing you about the pig roast, and — I’m sorry — this isn’t going to be that post, either. I’d like to say that it was such an epic event that I’m still wrapping my brain around it, or maybe that I am still trying to choose among the fabulous photos our friends took to illustrate the post.
In truth, my only excuse is that we had a rather… dramatic weekend, including one night that didn’t end until 4:30 the next morning — for entirely not-fun reasons. We’re all fine now, but all the drama meant there wasn’t a lot of time for rest, reflection, or anything resembling creativity, either in the kitchen or at the computer.
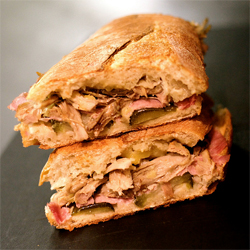
Luckily, there was a freezer full of pig-roast leftovers, which is like money in the bank as far as I’m concerned. Even with sleep-deprived brains, we knew well enough to thaw out a bag of pulled pork to feed our weary bones. On Sunday morning, Cameron pulled together another one of his famous hash-and-eggs brunches with part of the meat; later on, we dug up a couple of Acme grinder rolls and made Cubanos with the rest.
These Cuban-style pressed sandwiches — roast pork, ham, cheese, pickles, and mustard, all smooshed together into a crunchy-soft-chewy miracle — are just the sort of thing we want to eat when we need a little cheering up. If you happen to have some cabbage and carrots and onions around, I can vouch that Cubanos are pretty tasty with a quick slaw; all you need is mayo, cider vinegar, salt and pepper. Otherwise, a cup of black-bean soup would not be out of place, nor would a handful of banana chips.
 If you don’t have a freezer full of pulled pork (pobrecito!) you can substitute leftover roast chicken, or even leave out the roast meat completely. To compensate, add a little extra ham and cheese and you’ve got the makings of another venerable Cuban sandwich: the Medianoche — named, so they say, for the midnight hours when many are consumed, to fuel up for another round of late-night dancing or drinking.
You may read otherwise elsewhere, but you don’t need any special equipment to make a Cubano — though I am sure a panini press would be handy, if you happen to have one. Once you have all the ingredients on hand, a Cubano is simple to make, and it’s comfort food of the highest order. And really, couldn’t you use a little coddling?

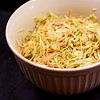
Cuban Sandwiches
– adapted from Kitchen Sense
2 rustic sandwich rolls, about 6″ (or half a wide-ish baguette)
2-4T mustard
2T mayonnaise (optional)
1 whole kosher dill pickle
4 slices ham
4oz roast pork (or chicken), shredded
2 slices mild cheese (such as Jack or a mild Swiss)
Preheat a large cast-iron skillet or a griddle over medium heat.
Slice the pickle lengthwise into four pieces, and set aside. Cut the rolls lengthwise, leaving the back side attached as a hinge. Open the rolls up and spread a light layer of mustard on the inside bottom. If using mayonnaise (which I recommend unless your pork is very juicy), spread an even layer on the inside top half of each roll.
For each sandwich: Place two pickle slices on top of the mustard, then top with a slice of ham and half of the pulled pork. Top with a slice of cheese, and close up the sandwich.
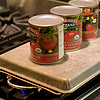
Place the sandwiches on the preheated skillet or griddle, and press down with a wide spatula. Top the sandwiches with a cookie sheet or a second skillet, and weight down (big tomato cans work well). Cook for 4 minutes, pressing down firmly on the weights every minute or so.
Using hotpads, remove the cookie sheet. Turn the sandwiches over and replace the sheet and weights, again pressing down firmly. The liquid from the pickles and ham will sizzle a little bit; this is a good sign. Cook for another 4 to 5 minutes, until the top of the roll is crispy and the cheese is melted. Remove from the pan and cut each sandwich in half; serve immediately while hot.
Dark Days challenge, locavore, meat, recipes
6 Comments »


Posted by Anita on 01.26.09 2:25 PM
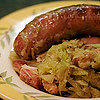
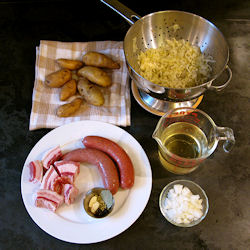 Along with our annual cassoulet, one of our favorite mid-winter traditions is simmering up a big pot of choucroute garnie — literally, garnished sauerkraut — in the Alsatian tradition. (Leave it to the French to come up with the brilliant idea of taking a delicious-but-homely pile of fermented cabbage and garnishing it with a pile of pork products.)
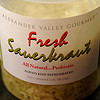
Every French traiteur worth his salted pork products keeps a giant crock of choucroute cru on hand, and it’s to this raw mixture that cooks will add their preferred mix of meats, wine, and seasonings. Here in the States, we have to look a little harder for the good stuff. At a minimum, start with refrigerated kraut — often found in bags or tubs near the chilled pickles at larger supermarkets. Even better would be to find a deli or artisan who sells fresh-fermented ‘kraut by the pint or the pound. However you source it, though, you want to start with crispy, bright shreds, not a mushy mash of greenish sog.
 Once you’ve found the appropriate vegetable matter, you need to consider your garnishes. Nearly every choucroute recipe calls for white wine, potatoes, bay leaf, and juniper berries; meaty additions typically include multiple kinds of sausage, as well as either ham or pork belly. Variations include apples, slices of smoked pork loin, and even duck confit. Like most home-style dishes, the exact ingredients are a matter of regional and personal preference; it’s almost impossible to go wrong.
There’s really only one problem with traditional choucroute: Its size. Don’t get me wrong: It’s a lovely thing to make when you’re feeding a crowd, and like so many peasant foods, leftovers are possibly even better than the original meal. But for a midweek supper, the usual cocotte trés grande is a bit of overkill. But if you find yourself with a some sauerkraut hanging around — perhaps after making a flight of Reuben sandwiches? — you can make a smaller, simpler version with a small bag of easily-sourced market goodies.
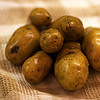

Petite Choucroute
– loosely adapted from Anthony Bourdain’s Les Halles Cookbook
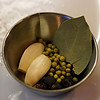
1 pound good-quality sauerkraut (we like Alexander Valley Gourmet)
4 fingerling potatoes
2T lard or bacon fat
1 small onion, diced
5 juniper berries
2 small garlic cloves
1 small bay leaf
1/2 tsp coriander seed
1/2 bottle (1.5 cups) dry-but-fruity white wine, such as Riesling
2 sausages, approximately 1/2 pound (* see note)
8oz pancetta (or slab bacon, pork belly, etc.), cut into 2-inch chunks
Rinse the sauerkraut in cold water and drain well. Boil the potatoes until slightly firm; cut in half and set aside.
Heat the pork fat in a medium saucepan over moderate heat. Saute the onion until softened. Add the sauerkraut, aromatics, and wine, plus salt and pepper to taste. Cover and bring to a simmer. Add the pancetta; recover and simmer over lowest heat for 90 minutes. Place the potatoes on top of the choucroute, cut side down, and tuck into the simmering liquid. Put the sausages on top of the choucroute; cover again and simmer gently until the potatoes and sausage are warmed through.
To serve, spoon the choucroute into two warmed, shallow bowls, dividing the meats and potatoes evenly. Serve with spicy mustard on the site.
—
* We typically use Fatted Calf knockwurst to complement Boccalone pancetta. Feel free to improvise with the sausages you’re able to find locally, or even to choose different meats. Bear in mind you want some contrast between the flavors, but that they should play well together. If you’re using slab bacon, try a sausage that isn’t smoked or heavily salted, like a mild bockwurst. Other winning combos include garlic sausages with duck confit (add the latter at the end instead of simmering it), or ham hocks with boudin blanc. If you’re using unsmoked sausages, you’ll need to poach them before adding to the choucroute for the final simmer.
Dark Days challenge, locavore, meat, recipes
5 Comments »


 A few weeks ago, we headed down to Los Angeles for a quick getaway. Ostensibly, the occasion was our seventh(!) wedding anniversary, but truthfully the real purpose of our trip was to eat at all the places we’d been adding to our ever-expanding “must-try” list.


 Two weekends ago, I nearly lost a toe.


 Now, I don’t know where you go for good Cajun and Creole recipes, but my first (and last) source is Chuck Taggart’s fabulous


