Posted by Anita on 07.20.07 7:08 AM
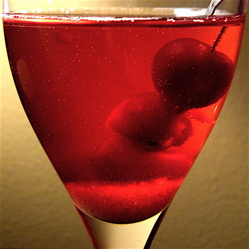 It seems like all of the hip kids are doing it: Tossing out their radioactive-looking cocktail cherries in favor of home-steeped alternatives. Hell, even the New York Times jumped on the bandwagon in this week’s food section — a sure sign that a trend has hit the mainstream.
For those of us in the Bay Area, the wave is breaking a touch too late. The cherries at the farmers markets are pretty darned ripe, not to mention enormous… far from ideal specimens when it comes to their intended task. But, if you get a wiggle on, you just might find a few last baskets of not-overripe cherries this weekend. (If they’re huge, you can always halve them.)
Making your own maraschino cherries is as simple as pitting a pint of cherries (or not, if you’re a pit-loving purist), and letting them steep in enough warmed Maraschino liqueur to cover them well. They’re pretty good right out of the pan, but leaving them a few days in the fridge is well worth the wait. If you prefer brandy’s woodsy overtones to the fruit-meets-nuts essence of the traditional liquor, then feel free to make that very acceptable substitution. If you go that route, you may want to add some sugar to the pan when warming your steeping liquor, but it’s certainly not necessary.
Even easier still — and a perfect option when cherry season is but a memory — is the method we’ve been using for the last year or so: Simply soak dried cherries in moderately decent brandy until they’re rehydrated. Or, head to the gourmet grocer: The fresh-brandied La Parisienne cherries sold in small containers at the Whole Foods deli counter are quite nice, and some of our Seattle friends swear by the preserved maraska cherries they buy at a local import store.
In short, there’s really no excuse for choosing a zombie cherry.
The non-neon model is, of course, the perfect garnish for your everyday Manhattans and what have you. But if you’d like to bring its cherri-licious essence to the fore, you might prefer a cocktail like this little number featured a few months ago in Food & Wine’s 2007 cocktail preview. I’ve dispensed with the original’s sugared rim, but feel free to add it back if your palate runs to the sweet side.



Marasca Fizz
3 true Maraschino cherries
1/4 oz cherry-steeping liquid
(use half simple syrup for unsweetened brandied cherries)
2 brown sugar cubes
3 dashes Angostura bitters
1/2 ounce Cherry Heering
4 oz chilled sparkling wine
Put the sugar cubes in a Champagne flute. Add the Angostura, Cherry Heering, cherries and cherry liquid; top with the bubbly and serve.
Drink of the Week, drinks, locavore, other blogs, preserving & infusing, recipes
9 Comments »


Posted by Anita on 07.13.07 7:04 AM
 When I read Jeffrey Morgenthaler’s recent post outlining his list of Dos and Donts of Mojitos, I found myself nodding in vigorous agreement. When I got to this entry, I broke into a wide grin:
“Do not order a mojito when the weather is below 70°F. This is almost as bad as ordering a Bloody Mary after the sun has gone down.”
Hear, hear.
I can’t tell you how many winter nights I’ve spent at the Zig Zag watching Murray Stenson painstakingly craft mojitos for some clueless clown. The phenomenon became so epidemic a few years ago that Cameron and I were moved to concoct an alternative, off-season rum drink for Murray to offer. (It’s an amateurish thing called the Wonderland — as in “Walking in a Winter…” and Murray graciously humors us by keeping the recipe in the box behind the bar.)
It’s hard to fault a mojito aficionado from defying the seasonal mandate at the Zig Zag, because when it comes to mojito-making, Murray’s method is a sight to behold. Cameron likes to remark that Murray puts more love into a single cocktail than most restaurants put into a whole meal, and I am convinced that he was witnessing a mojito-muddling marathon for the first time when he coined that oh-so-true aphorism.
As Morgenthaler correctly cautions, a mojito is no drink to order when your fellow tipplers are three-deep at the bar. Even the most slap-dash mojito is a time-consuming order. But making ‘Mojitos a la Murray’ elevates the procedure to high art.
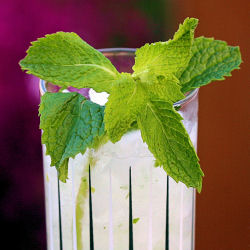
Murray starts out by cutting half a lime into quarters, placing the pieces in a pint glass with half a dozen mint leaves and simple syrup. Crushed ice is added, and muddling commences. Six more mint leaves join the party, along with another dose of syrup and more ice. More muddling. Another dose of mint — this time sans syrup — and still more muddling. Then the rum, and a purposeful stir while surveying the bar. Tasting for balance, he tinkers with his creation until he achieves the ideal balance of sweet, sour, and strength; it rarely needs much to bring it to perfection. Out of his pile of mint, he chooses one more perfect sprig, dusting it with a flurry of powdered sugar before placing it jauntily in the glass, and handing the drink over to the suitably awed customer.
Both Murray and Jeffrey adhere to the unstrained school of mojito mixology: “I leave the ‘salad’ in place,” says Mr. Stenson. My muddling technique must be a bit weak; I haven’t yet mastered the fine art of extracting sufficient mint flavor without creating a pulpy mess, even when using Murray’s step-by-step directions and the prescribed copious amounts of greenery. So, as a compromise, I follow the ‘Murray Method’ right up to the end, but then strain the muddled mixture into an ice-filled cooler glass. A few small bits of mint find their way through the strainer, creating a pleasantly herb-flecked drink with plenty of punch.
Murray also dispenses with the traditional top-up of soda water; his masterful muddling provides the just the right opportunity for dilution. I like a bit of fizz, myself (as does Morgenthaler), but let your cocktail conscience be your guide on this point, as always.

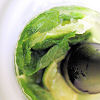


Mojito
1/2 lime
1T simple syrup, or to taste
18 medium mint leaves, plus a sprig for garnish
2 oz silver rum
good-quality soda water (optional)
confectioners sugar (optional)
Cut the lime-half into quarters, and muddle in a 16-oz glass along with 6 medium mint leaves and 1/4 ounce (1-1/2 tsp) simple syrup. Add crushed ice to one quarter of the way up the glass. Add 6 more mint leaves and another 1/4 ounce simple syrup; muddle again. Add crushed ice to a level about 2/3 up the glass, plus remaining 6 mint leaves (no simple syrup this round); muddle yet again. Add the rum and stir until the glass begins to frost. Adjust to taste, then strain the chilled mixture into an ice-filled 12-ounce highball or cooler glass. Top up with a splash of soda water, if desired. Garnish with a sprig of mint, dusted with confectioners sugar, if desired.
bar culture, Drink of the Week, drinks, Mixology Monday, other blogs, recipes
17 Comments »


Posted by Anita on 07.10.07 1:14 PM
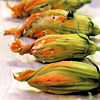
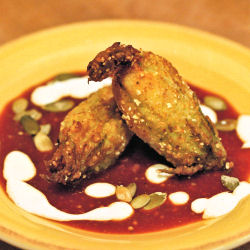 Every summer, I walk by baskets of squash blossoms at the farmers market, longing to find a use for them. Stuffing fragile flowers seemed like a tedious task for a weeknight meal, so I’d always given them a pass. But once I saw Jen’s fritters — which were in turn inspired by a course at Derrick and Melissa’s much-discussed dinner party — I knew I couldn’t put it off any longer.
The basic idea seemed simple enough: Stuff the blossoms with cheese, dredge them in dairy and starch, and fry until golden. But I wanted to dress them up a bit — make them nice enough to serve as a light supper, alongside a simple salad — so I turned to my new favorite cookbook, Big Small Plates. The text of this popular title is written by Cindy Pawlcyn (of Mustards Grill fame) but the recipes themselves are largely the work of her two partners: Pablo Jacinto, the chef at Cindy’s Backstreet Kitchen, and his brother Erasto, who holds the same title at Mustards.
The book’s tapas-style approach draws inspiration from around the globe. There are plenty of straight-up California-American preparations, and Asia is well represented: A Vietnamese mini-burger salad we tried was especially delicious. But — and here I must admit to being biased — it’s the book’s Latin-influenced dishes that really shine. We’ve tackled a glorious mole casera, two batches of perfectly wonderful empanadas, and a handful of other Mexican-tinged dishes that hit the mark both in taste and in appearance.
The book’s a delight to use, aside from a few scale issues: the empanada recipe yields twice as much filling as wrappers to enclose it, and the original squash-blossom dredge made easily three times as much as I needed (I’ve corrected the proportions below). Most of the recipes serve six as an appetizer course or side dish, but many can serve as two or even four entree-size portions. Some dishes involve prepping multiple sub-recipes, but the auxiliary instructions usually revolve around simple garnishes like the lime-infused crema here. Ingredient lists can seem daunting, but the end results come together with minimal fuss. And they look as good on the plate as they do in the photos — no small compliment in the realm of chef-written cookbooks.
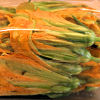
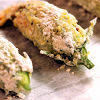
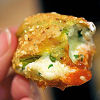
But back to those blossoms. I was worried that I’d waited too long between market day and making the dish: The flowers had started to wilt and the petals were sticking together. But despite their tissue-thinness, and warnings in nearly every recipe I read about the perils of tearing the flowers, the squash blossoms proved surprisingly resilient. Pulling two petals apart at the seam between them, I could split the blossom (much like you would when making a chile relleno) to remove the pollen and stuff the interior. The petal’s own natural moisture combined with the stickiness of the filling meant that I could patch the petals back together after stuffing; the batter held in any remaining leaks during frying.
It was a fiddly process, to be sure, but a highly rewarding one. Once the blossoms are stuffed, you can hold them in the fridge for a few hours. The dredging and frying comes along quite quickly after that, and if your garnishes are prepped and waiting, you’re 90 percent done with a spectacular summer appetizer. (Or one very decadent supper.)
Crisp-Fried Squash Blossoms
adapted from Big Small Plates
2 ears fresh corn
1 tsp olive oil
1/2 cup grated Monterey Jack cheese
1/2 cup fresh ricotta
2 T minced cilantro leaves
—
1/4 cup cornstarch
1/4 cup cornmeal
1/4 cup all-purpose flour
1/2 tsp salt
1/4 tsp freshly ground black pepper
1/4 tsp cayenne pepper
—-
1/2 cup buttermilk
vegetable or canola oil, for frying
—
12 to 18 very fresh squash blossoms
1/4 cup toasted pumpkin seeds
1/4 cup sour cream, mixed with the juice and zest of 1/2 lime
1 cup tomatillo red-chile salsa (homemade or a good store-bought brand), warmed
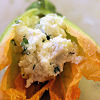
Cut the kernels off the cobs. Heat the olive oil in a skillet over medium-high heat and saute the corn 2 to 3 minutes. Set aside and allow to cool, then combine with the Jack cheese, ricotta, cilantro.
Open each blossom as gently as possible, and remove the stamen. Stuff each blossom with a spoonful of the cheese-corn mixture; the amount will vary with the size of your blossoms, but don’t be afraid to stuff them well. The flowers seem delicate, but they’re surprisingly resilient. If you need more room to work, peel the flower apart at one of the ‘seams’ between the petals; you’ll be able to pinch everything back together (within reason) using the filling as glue. Leave enough room to twist each blossom shut.
Set the stuffed blossoms on a wax-paper-lined cookie sheet and place in the fridge to set. Meanwhile, combine the cornmeal, cornstarch, flour, and seasonings in a shallow bowl; put the buttermilk in another shallow bowl. Dredge each stuffed blossom, first in the buttermilk, then in the flour mixture, shaking off the excess at each step. Return them to the wax paper, then refrigerate again briefly.
Set up a cooling rack topped with two layers of paper towels next to the frying area. Add oil to a shallow skillet to a depth at least half as high as the average stuffed blossom. (I used 2 cups in a 10-inch pan.) Heat oil to 375 degrees. Slowly lower the blossoms into the pan, four or so at a time to prevent crowding, turning each over as soon as the bottom side is golden brown. It will go rather fast, but if the coating turns dark brown immediately, back off on the heat a bit; you need enough time to melt the cheese. With a spider or slotted spoon, remove the crispy blossoms to the paper towels. Repeat until all blossoms are fried.
Spoon a bit of the warmed salsa on each plate, then top with 2 or 3 blossoms. Drizzle with the lime crema, and scatter toasted pumpkin seeds for garnish.
cookbooks, cooking, farmers markets, Mexican, other blogs, recipes
6 Comments »


Posted by Anita on 07.04.07 7:33 PM
 Summertime is finally upon us! Even here in San Francisco — where our summer months are notoriously cold and foggy — the sun is shining high and bright, the skies are a precise shade of coastal blue, and everyone’s outside enjoying the weather. We know it’s merely a respite from the gray gloom that will descend again, without fail; Three days of sun are all San Franciscans ever expect.
Another sure sign of the season: Ice cream and sorbet stories are everywhere. Today’s food section turned up as crammed full of ice cream as an apartment freezer: Make it, buy it, stand in line for it… the Chron‘s got us covered in the frozen-confection department.
As if that’s not enough, not one but two blog events this month are dedicated to scoopable sweets: Laura picked sorbet as this month’s “Hay Hay, It’s Donna Day” theme, and Meeta’s Monthly Mingle 12 focuses on ice cream. So I was already flipping through the recipe file when I got an email from the library, telling me that my copy of David Lebovitz‘s new ice-cream book — the darling of the blogosphere — is ready to be picked up, at long last.
OK, wow. Really, I can take a hint: Time to get churning.
I won’t bore you with another gushing post describing what a treat it is to read The Perfect Scoop — I’m too late to the ice-cream social for that, and I couldn’t possibly come up with any more synonyms for “mmmmm!” than you’ve already read elsewhere. Suffice to say that I was bowled over (har har) by all the delectable-sounding options — hello, chartreuse ice cream? — and picking just one recipe proved impossible. I compromised: One ice cream, one sorbet.
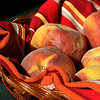
Sultry summer weather at the Ferry Plaza Farmers Market seduced us into buying more stone fruit than two people could possibly eat, so we opted to sacrifice a few pounds’ worth for the apricot variation on David’s peach sorbet. Not wanting to overwhelm their perfect ripe essence, we substituted St-Germain liqueur for the recipe’s standard kirsch. The color was vibrant and the flavor sublime, but the texture turned a tad bit grainy for my taste. A beautiful scoop, nonetheless, but nothing to make me abandon my old standby ice-cream book.
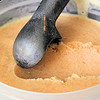
Our second trial, though, helped me understand what all the swooning reviews were about. A perfect coconut ice cream doesn’t just toss a cup of shreds into a vanilla custard and freeze them up. Instead, it starts by infusing warm dairy with freshly-roasted coconut, steeping to extract subtle flavors. Then we strain the solids out of the coconut-scented cream, which is used to finish a rich, not-too-sweet custard base (and which I could barely restrain myself from eating with a spoon).
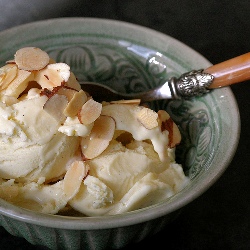
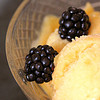
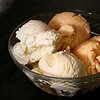
After churning and freezing, the mixture emerged as a beautiful, smooth off-white velvet, redolent with coconut but minus the “pencil shavings” texture that some (including Cameron) find unappealing. We loved it equally on its own and topped with toasted almonds for added crunch. But our favorite treat of all — sure to be the hit of the summer — paired the luscious toasted coconut ice cream with the icy apricot sorbet to make a Creamsicle-style treat to brighten even the cloudiest day.
Bring it on, summer. We’re ready for you.

Toasted Coconut Ice Cream
adapted from The Perfect Scoop by David Lebovitz
1 cup unsweetened coconut flakes
1 cup whole milk
2 cups heavy cream (not ultra-pasteurized)
3/4 cup granulated sugar
1 vanilla bean, split and scraped
5 large egg yolks
1 teaspoon dark rum
Toast the coconut on a baking sheet in a moderate (350°) oven for 5 minutes or until golden and fragrant, stirring occasionally to toast evenly.
Warm the milk, half of the cream, and the salt and sugar in a heavy saucepan over medium-low heat. Add the toasted coconut and the vanilla seeds and pod. Cover the pan and remove from the heat to steep.
After an hour, rewarm the infused mixture. Strain through a medium-mesh strainer into another saucepan, pressing down on the solids to extract all the liquid. Discard the solids, reserving the vanilla-bean pieces for another use, if desired.
Combine the remaining cream with the rum in a large bowl. In a separate large bowl, whisk the egg yolks together. While whisking constantly, slowly add the coconut cream to the egg yolks.
Return the custard to the pan and place over medium heat, scraping the mixture to avoid scorching. Cook until the custard coats the back of the spatula. Pour the custard through the strainer into the cream-rum mixture, and cool over an ice bath.
Cover the bowl of cooled custard, and place in the refrigerator until well chilled, preferably overnight. Freeze according to your ice-cream machine’s directions for custard-based recipes.
cookbooks, dessert, other blogs, recipes
11 Comments »


Posted by Anita on 06.11.07 11:43 PM
 In my youth, I was actually something of a photo geek: I built a darkroom in my parents’ garage, I worked for my Dad all summer between 8th and 9th grade to buy my first SLR, and I won a school-wide award for photography a year later. I was, even then, a tinkerer, a collector of gadgets and gizmos.
By all rights, you’d think an equipment geek like me would have some big, black, long-lensed monstrosity… when instead I actually tote a cute, shiny, pocket-sized snapshot-maker. I’ve looked longingly at the gorgeous shots created by those who own the real deal, all the while coaxing my poor little PowerShot into giving up decent photos.
Cameron — who hails from a photo-obsessed clan — hasn’t helped matters. He’s been egging me on to purchase a dSLR for months, reminding me of the old adage that equipment should always be better than the human behind it. I knew he was right, but I felt like I couldn’t justify the expense: I’d just upgraded my point-and-shoot last November, a purchase that set me back far more than I really wanted to spend. And ultimately, the blog’s just a hobby… it’s not like anyone cares whether the image is a little noisy, or the lens distortion gets a little distracting.
Early last week, my equipment envy reached a peak. A friend who just started blogging mentioned that he’d splashed out for some gear to help improve his online shots. I replied covetously, saying something to the effect of “I wish I could buy a dSLR, but it’s not like I have a spare grand sitting around.”
And then, two very interesting things happened.
I got home, opened the mailbox, and found a check — a completely unexpected payment for something I did on a lark more than a year ago — for $945. Not quite a grand, it’s true, but you could say that the universe had succeeded in grabbing my attention.
The next morning, I noticed a lot of inbound blog traffic from a link called “DMBLGiT: The Winners!” I clicked the tracking URL, and my jaw hit the keyboard. Holy cats: I’d tied for first place in this month’s Does My Blog Look Good in This?, the food-bloggers’ photo contest! I’d never even entered before, and I’m up there on the big screen with DPaul & Sean, and Ilva, and plenty of other talented folks whose blogs I read regularly and whose photos make me swoon. It’s so ridiculous, I still don’t really believe it. But does that stop me from celebrating? No, it most certainly does not. Celebrating is something I understand very, very well.
The rather obvious end of this little tale: I am now the proud owner of a brand-spanking new Canon 30D. At last, a real camera. Interchangeable lenses! A usable viewfinder! And best of all, as Cameron says, “It makes that Girls on Film noise!”
We took the new toy up to Napa this weekend, and both of us captured a surprising number of lovely shots, considering we hadn’t even read the manual yet. (No, I didn’t haul this behemoth out at The French Laundry. Shuh… even I have my limits!) I know it’ll take a while before I dial in the seemingly limitless new features at my disposal — no film camera was ever this confusing …or have I just gotten old? But in the meantime, if you keep an eye on my photostream, you’ll get to see me take my first baby steps back from the point-and-shoot realm.


equipment, geekery, other blogs, other stuff
10 Comments »


Posted by Anita on 05.28.07 6:22 PM
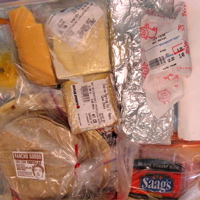 No doubt you’ve seen inside the fridges of dozens of bloggers over the past couple of weeks, ever since Sam opened her refrigerator to our prying eyes and then invited us to follow suit. Curious sort that I am, I’ve been enchanted by all of them, but perhaps none so much as Matt’s tour — complete with diagrams!
Those of you who lack the snooper gene can skip this link to all our photos, with annotations of what’s what. I’ve documented the contents of my main fridge and freezer — all shelves, all doors and drawers. (The garage fridge is more of the same: stock and pasta sauce in the freezer, beer and wine in the fridge.)
I’m not sure whether I’m proud or ashamed to admit I didn’t do any tidying before taking these shots — it’s always staged like this. I clean and organize the fridge every Friday night, as part of my weekly meal planning. I toss out anything old, rotate items up from the downstairs freezer as needed, and then work on my recipes and shopping list without having to run back and forth to see what I have on hand.
Feel free to give me grief about the carbon footprint of my Peruvian white asparagus or the sloth implied by pre-sliced cheese… but I’ll defend my Clearman’s spread to the death.


geekery, other blogs
1 Comment »


Posted by Anita on 05.27.07 5:51 PM
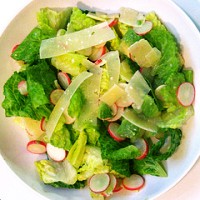 Although it’s a mainstay of American restaurants — one might even say it’s a cliché in eateries of a certain sort — the original Caesar salad was created in Mexico. The classic combination of romaine lettuce, croutons, Parmesan cheese, and a garlic-laden, egg-emulsified dressing has remained popular since its invention in the 1920s, enduring more than its share of variations throughout the years.
Such are the indignities that this venerable ensalada has suffered that pretty much any creamy, romaine-based salad can be called a Caesar nowadays. On the other end of the spectrum, there are purists who hold that an anchovy-free Caesar isn’t a Caesar at all (although Caesar himself used Worcestershire sauce, no little fishies at all). Adding some bacon or grilled chicken makes a Caesar suitable for a light lunch or simple supper… and that’s just the beginning of all the ways you can tinker with this highly adaptable recipe.
No doubt that sort of flexibility was what Katie at Other People’s Food had in mind when she selected Caesar salad for this month’s ‘Hay, Hay It’s Donna Day’ celebration. She even mentions Caesar wraps and Caesar pizzas — Ay, Dios mÃo, what would Señor Cardini make of that?
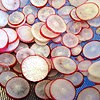
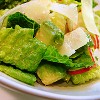
I set to thinking about a way to honor the salad’s historical birthplace, without going too far over into caricature — no multicolored tortilla confetti or salsa-spiked dressing, please. I played around with the basic method, adding a few south-of-the-border notes: A little chile, some avocado cubes, and a few sliced radishes in place of the croutons’ crunch.
This recipe yields a fair bit of dressing — certainly more than we ever need for just the two of us. It keeps for at least a week in the fridge, and if you prep a whole head of romaine on the night you make the dressing, the remaining lettuce will keep as long, provided you treat it right.
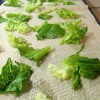
Here’s a trick we picked up from Alton Brown: Cut (or better yet, tear) the romaine into bite-sized pieces. Rinse and briefly soak the lettuce pieces in cold water in a salad spinner, then lift up the basket and dump out the water. Replace the basket and spin the lettuce in the usual fashion. Put half of the spun lettuce in the salad bowl, and set aside. Roll out a length of paper towels on the countertop, and sprinkle the lettuce along its length, keeping a single layer as much as possible. When you’ve laid out all the lettuce, roll up the paper towels loosely, and slide the roll into a plastic produce bag. Put the bag gently into your crisper drawer, but do not close the bag.
It’s a pretty neat trick: The paper towel wicks moisture away from the lettuce, but keeps the bag relatively humid. I’m not saying the romaine will be as good as new a week later, but it sure beats the pants off of those overpriced, half-wilted “salad in a bag” thingies.
Señor Caesar
4 cloves of garlic, unpeeled
1/2 fresh jalapeno pepper
1/4 tsp. anchovy paste, or a few dashes Worcestershire sauce
1 egg yolk
3/4 cup mild olive oil
1/4 cup lemon juice
salt & pepper to taste
—
1/2 head romaine lettuce
6 to 8 radishes
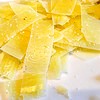
2 oz Dry Jack (or other hard cheese, such as Parmesan)
1 small, ripe avocado
Roast the garlic and chile in a small, dry skillet, turning frequently until soft and blistered. Cool briefly, then peel the garlic, and roughly chop both the chile and garlic. (Split and seed the chile before chopping, if you prefer a milder heat.) Place the chopped garlic and chiles in the mini-bowl of a food processor with the anchovy paste (or Worcestershire), and process until smooth, adding as much of the oil as needed to form a paste. Add the lemon juice and the egg yolk to the paste, and process briefly to combine. Then slowly add the remaining oil, with the processor running, until combined. Be careful not to overprocess, or you’ll get mayonnaise. Taste, and season with salt and freshly-ground black pepper.
(Alternately, you can crush the solids with a mortar and pestle and then whisk with the remaining ingredients in a medium bowl, or use an immersion blender. Either way, be sure to follow the same steps; don’t just dump everything in together or you’ll end up with a broken mess.)
Tear or cut the romaine into bite-sized pieces; wash and dry. Slice the radishes into thin rounds, discarding the stem and end pieces. Shave the cheese with a vegetable peeler into wide, thin strips. Halve the avocado, and remove the pit. With the skin on, score the avocado flesh at 1/2-inch intervals in both directions, all the way down to the skin. With a soup spoon, scoop the avocado flesh from the skin; it should separate into neat cubes.
In a large serving bowl, toss the lettuce with a few tablespoons of dressing, until just coated. Toss in the radishes, half the avocado cubes, and half the cheese. Add more dressing if needed, but be careful not to overdress. Serve on chilled salad plates, garnished with the remaining avocado and cheese.
cooking, Mexican, other blogs, recipes
6 Comments »


Posted by Anita on 05.24.07 10:13 PM
 Sometimes, we just don’t post because we’re not eating anything interesting, and there’s just nothing to talk about. But I can assure you, that has NOT been the case these last couple of weeks. We’ve been eating our way around the bay, scheduled to the breaking point: Out of the last 11 evenings, we’ve had nine social engagements. No wonder I’m exhausted!
Our little foodie death march all started back on Tuesday the 15th, with my second of four sessions in Kasma Loha-unchit’s Thai cooking classes. I’ll post a complete wrap up at the end of the series, but suffice to say that if you’re looking to learn more about Thai cooking, look no further.
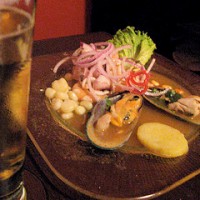
Then that Wednesday, we met up with DPaul and Sean to say farewell to our mutual friend Matt (who’s taking a sabbatical from San Francisco for a while) over a sangria-soaked supper at Piqueo’s, Bernal Heights’ new Peruvian cevicheria and small-plates joint. Although the impossibly long menu was nearly entirely different from our first visit a month or so ago, we enjoyed almost everything we’ve tried there so far.
Thursday of the same week found us stuck in traffic on the Bay Bridge approach, on our way to The Blue Door at Berkeley Rep. A car-snarl from hell — more than an hour from SoMa to the Bridge, thanks — meant we missed our Downtown reservations by more than an hour (we called!) and our consolation snack at North Beach Pizza was grim in every way possible. Truly, we were expecting mediocre but fast, and ended up with slow and barely edible.
Saturday we hit the Ferry Building market in the morning, running into Tea at the Rancho Gordo stand. Farmer Steve’s sure the popular boy these days, with dozens of folks stopping by to congratulate him on his much-publicized (and bilingual!) defense against Carlo Petrini’s ill-mannered slagging of the FPFM’s farmers and customers alike. Everyone must’ve bought a bag or three of beans as they stopped by to say “Good on yeh!” to Mr. Sando — many varieties were already sold out by the time we strolled up.
That same afternoon, we hosted two sets of friends and their 2-year-olds for a summer supper of bacon-cheeseburgers, mac salad, and red cabbage slaw, with complete strawberry crisp for dessert. The junior guests had as much fun as their mommies and daddies: Little Toby rocked out on guitar with Cameron, and Miss Martha endeared herself to everyone with sweet hugs and adorable curiosity.
 Monday night, an impromptu get-together chez nous. Tea was in town for the week, so we invited her, plus DPaul and Sean (are they sick of us yet?) — and their sweetie-pie girl Reese — over for dinner. We snacked on pencil-thin asparagus dipped in homemade aioli while we tried out yet another recipe for grilled pizza. I’m still not convinced we’ve found a keeper in the pizza department, but the season’s first peach cobbler proved a hit all around. And when we saw Tea later in the week, she declared that the chopped salad we served with the pizza had earned a slot on the menu of foods she expects to find in heaven. (Flattery like that will get you invited back!)
Tuesday was Thai cooking class again, and Wednesday another dinner to-do: Cameron’s cousins and their 2-year-old (we’re toddler magnets!) were in town from Houston, on their way to Yosemite for the long weekend. Little Camden gobbled a Prather Ranch hot dog while the grownups feasted on tri-tip grilled up Santa Maria style (rubbed with an equal mixture of salt, pepper, and garlic powder moistened with oil), sliced thin and served with guacamole on Rancho Gordo tortillas, with a side of beans a la charra. And yes, another quickie dessert: Pear-rosemary crumble, and vanilla ice cream.
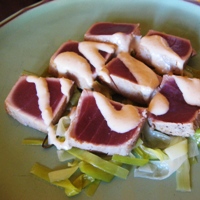 Tonight we met up with a gaggle of cool food bloggers from SF, the East Bay and beyond for dinner at Berkeley’s stalwart O Chame. We loved every appetizer we shared — especially the seared ahi cubes and their lovely horseradish drizzle, the grilled shiitake mushrooms with fresh asparagus, and the snackalicious green-onion pancake blocks. Our soba and udon bowls were so-so (flavorful broth, but overdone noodles) but scoops of balsamic vinegar caramel ice cream were hauntingly good… and rapidly gone.
A short stroll down 4th Street led us to Cody’s Books, where we listened to the charming Clotilde speak about her progression from software developer to food blogger to published cookbook author. She gave us all a chuckle when she spoke of the oddness of being a Frenchwoman writing an English-language food blog — to the consternation of some of her compatriots, she confessed — and her passion for ‘dangerous’ recipes like souffles and gougeres, where a cook never knows whether she’s destined for dinner or disaster. (Clotilde’s signing books Saturday afternoon in San Francisco, in case you’d like to meet her and get a copy of her lovely new book.)
Tomorrow? Ugh. I’m more than a little bit sick of cooking, and yet I don’t think I could bear the pressure of going out somewhere new, or even someplace fancy. So… we have reservations at Range, our delightful standby, where they know us just well enough that we can all relax, but not so well that we have to be social. I’m liking that idea a lot. I wouldn’t have missed a single night of the last 2 weeks, but I am sure glad that it’s done.
I’m half hoping that the bounty of the farmers market on Saturday snaps me out of my apathy, but I won’t be surprised (or even too sad) to find that I’ve burned out on planning, prepping, and putting food on the table… at least for a while. We’ve got a freezer full of incredible leftovers from the last six weeks of new-kitchen cooking frenzy, so it’s not like we’ll go hungry.
As we slow down a bit, I’m aiming to do a better job posting here on a more-regular basis. I’ve got a backlog — five posts’ worth and counting — of recipes, photos and stories that should last through a week of diminished cooking capacity. In the meantime, I’ll tide you over with a recipe for an simple (but apparently impressive) salad that’s quick enough for everyday, but with a just enough company-class touches for a weeknight dinner party on the fly. You can vary the vinegar, the cheese, the herbs, and even the olives to complement your main course.
Heavenly Chopped Salad
(adapted from Food & Wine, September 2006)
2 T mild vinegar (such as cider, champagne or sherry)
1 tsp. fresh lemon juice
1 small shallot, chopped fine
1/4 cup extra-virgin olive oil
Salt and freshly ground pepper
—–
2 cups chopped lettuce or baby greens
4-5 small Belgian endive (preferably red) halved, cored and coarsely chopped
1 English or Japanese cucumber, peeled and cut into 1/2-inch dice
1 pint grape tomatoes, halved
2T to 1/4 cup coarsely chopped chives (or other herbs, as you prefer)
3/4 cup pitted kalamata olives, halved (or other olives)
1/2 pound feta (or bleu) cheese, crumbled
Whisk the vinegar, lemon juice, and shallot in a medium bowl. Whisk in the oil until emulsified, and season the dressing with salt and pepper.
Combine the remaining ingredients together in a large bowl. Add half of the dressing, season to taste with salt and pepper, and toss. Add the remaining dressing (or less, to taste) toss again, and serve.
serves 6
Bernal, cookbooks, cooking, East Bay, entertaining, other blogs, restaurants, Thai
3 Comments »


Posted by Anita on 05.07.07 5:41 PM
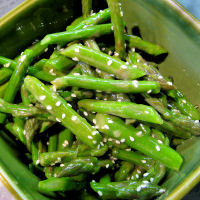 I’m slightly obsessed with my tattered copy of Big Bowl Noodles and Rice by Asian food guru Bruce Cost. It’s my first choice when I need a comforting stir-fry or noodle dish, especially when I’m in the mood for Eastern flavors without a lot of fuss. But last week, while staring down a bunch of asparagus and looking for a suitable stir-fry side-dish, I came across one recipe that, shockingly, I’d never tried.
Like so many Big Bowl recipes, this salad manages to achieve a completely authentic flavor without any oddball ingredients. (Don’t get me wrong: I love the bottom shelf of my pantry, stocked with goodies from Uwajimaya and 99 Ranch, but sometimes even adventurous cooks don’t want another sticky bottle of imported exotica.) The simple dressing allows the natural beauty of perfectly fresh asparagus — one of my true springtime delights — to shine through, complementing and highlighting the fresh crispness without muddying flavors with overwhelming ingredients.
Asparagus Salad with Sesame Seeds
1 T sesame seeds
1 bunch (approximately 1 pound) fresh asparagus
2 tsp. rice-wine vinegar
3/4 tsp. red-wine vinegar
3/4 tsp. soy sauce or fish sauce
3/4 tsp. sugar
3/4 tsp. Dijon mustard
1 T fine peanut oil
2 tsp. sesame oil
In a small skillet, toast the sesame seeds until golden, shaking the pan so they don’t burn.
 Remove any woody ends of the asparagus, cut the stalks into 2-inch lengths. Parboil them in 6 cups of heavily salted water for 2 to 3 minutes, depending on their thickness. Drain and run under cold water to stop cooking. Dry thoroughly. (Once perfectly dry, the asparagus may be chilled, overnight, in a loosely covered container. If you leave any moisture, it will make the spears mushy.)
Mix together the vinegars, soy or fish sauce, sugar, and mustard. Whisk in the oils, as you would for a vinaigrette. Toss the dressing with the asparagus, and sprinkle with the toasted sesame seeds.
cookbooks, cooking, other blogs, recipes
3 Comments »


Posted by Anita on 05.06.07 11:00 PM
 If you’ve spent any time on food blogs, I’m sure you know Barbara of Winos & Foodies — the creator of one of my favorite blog events, Hay Hay, It’s Donna Day. Barbara asked her food-blogging friends to participate in a new blog event called A Taste of Yellow by preparing a dish containing some type of yellow food. On May 16 — in honor of the Lance Armstrong Foundation’s LIVESTRONG Day — Barbara will post a roundup of the Taste of Yellow posts. She’s collected almost 30 so far!
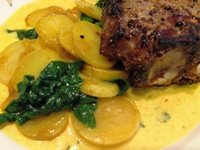
Our entry for A Taste of Yellow has languished in my “to try” file for a while, and I wish we’d made it sooner. It turned out to be so easy and tasty, it’s sure to become a standby in our house. In honor of Barbara’s New Zealand locale, we served the yellow potatoes alongside grilled lamb chops (in a yellow curry sauce, just to be double-sure we had the theme covered). Both the curry and the potato recipe came from the Vij’s cookbook, which you may remember from the gorgeous paneer dish we mentioned last month.
Turmeric offers many health-giving effects. The ginger-like rhizome has been used medicinally in traditional Asian and Indian practice for centuries. It acts as an anti-inflammatory and antibacterial agent, and its antioxidant properties have been shown to prevent free-radical damage that’s been linked to cancer. In laboratory tests, turmeric’s active ingredient has decreased symptoms of skin cancers, and reduced the incidence of chemically caused breast cancer in laboratory animals. Three current clinical trials at the US National Institutes of Health are targeting pancreatic cancer, multiple myeloma, and colorectal cancer using turmeric’s main compounds.
And, of course, it’s a gorgeous shade of yellow.
 Vij’s Turmeric Potatoes
1 pound yellow new potatoes
2 T canola oil
3/4 cup chopped onion (1/2 large onion)
1/2 tsp turmeric
1-1/2 tsp salt
1/4 tsp cayenne pepper
2 T water
3 oz baby spinach
Wash and scrub the potatoes, but do not peel them. Cut each potato in 1/4-inch rounds using a food processor or mandoline.
Heat oil in a heavy frying pan on medium heat for 1 minute. Add onions and saute for 5 minutes, or until golden. Add turmeric, salt, and cayenne; stir well and cook for 1 minute.
Add potatoes and water, and bring to a light boil. Gently stir the potatoes. Reduce heat to low, cover, and cook for about 10 minutes. If the potatoes stick or begin to burn, add another 2 T water. Gently stir the potatoes again. Cover and cook another 4 minutes, or until potatoes are almost done, but not too soft. Add the spinach, cover, and cook for 1 minute longer.
cookbooks, cooking, other blogs, recipes
6 Comments »


 It seems like all of the hip kids are doing it: Tossing out their radioactive-looking cocktail cherries in favor of home-steeped alternatives. Hell, even the New York Times jumped on the bandwagon in this week’s food section — a sure sign that a trend has hit the mainstream.


 When I read Jeffrey Morgenthaler’s recent post outlining his list of


 Every summer, I walk by baskets of squash blossoms at the farmers market, longing to find a use for them. Stuffing fragile flowers seemed like a tedious task for a weeknight meal, so I’d always given them a pass. But once I saw


 Summertime is finally upon us! Even here in San Francisco — where our summer months are


 In my youth, I was actually something of a photo geek: I built a darkroom in my parents’ garage, I worked for


 Although it’s a mainstay of American restaurants — one might even say it’s a cliché in eateries of a certain sort — the original


 Sometimes, we just don’t post because we’re not eating anything interesting, and there’s just nothing to talk about. But I can assure you, that has NOT been the case these last couple of weeks. We’ve been eating our way around the bay, scheduled to the breaking point: Out of the last 11 evenings, we’ve had nine social engagements. No wonder I’m exhausted!
 Monday night, an impromptu get-together chez nous. Tea was in town for the week, so we invited her, plus DPaul and Sean (are they sick of us yet?) — and
  Tonight we met up with a gaggle of
  I’m slightly obsessed with my tattered copy of
 If you’ve spent any time on food blogs, I’m sure you know
  Vij’s Turmeric Potatoes