Posted by Anita on 07.30.07 12:48 PM
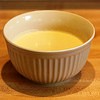
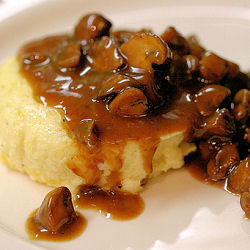 In my new favorite cookbook, Big Small Plates, author Cindy Pawlcyn names her savory corn custard as a brunch favorite. I have no problem believing that this dish flies out of the kitchen, no matter the time of day: We served this recipe a recent dinner party, and our guests all but licked the plates.
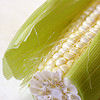
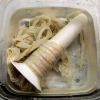
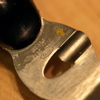
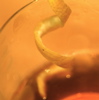
The first time I made the custard, I used a standard box grater to remove the kernels from their cobs — a messy proposition when dealing with super-fresh farmer’s market corn that spurts milk everywhere. After reading about the Kuhn-Rikon corn zipper in a magazine, I decided to invest in one of these $12 gadgets. Remarkably, it works just like its namesake: Wedge its little crown-shaped tooth at the end of an ear, give a gentle tug, and watch in amazement as two rows of corn unzip right off the cob in perfect alignment.
Does the corn zipper really make this custard better? Given that you end up whizzing the corn to a puree, the answer’s a definite NO. But it certainly makes the prep a lot less messy, and far more amusing. I’d even go so far to say that the corn zipper’s a must-have item if you’re you’re making corn relish or succotash, or any other recipe where whole kernels are a plus, or even if you’re cooking for anyone who loves fresh corn but can’t handle the cob. Yes, Alton acolytes, it’s a unitasker. (But then again, so’s my citrus squeezer, and you’d have to pry it out of my cold, dead hands.) On the plus side: It doesn’t take up much room in the prep drawer, and it’s so freaking cheerful that you just have to smile back — who could resist its happy little face? And as a side benefit, once you own a corn zipper, you’ll have no trouble deciding what to enter into a crazy kitchen gadget event (EDIT: like the one Kathy’s hosting here).
Like other Big Small Plates recipes we’ve tried, this one yields a serious mismatch of sauce and custard quantities. I doubled the sauce on my second attempt, and still ended up with just enough to garnish six servings (albeit rather generously). Either prepare for scantier saucing, or consider doubling the recipe — or at least the stock portion — yet again.


Sweet-Corn Custard with Mushroom Sauce
— adapted from Big Small Plates
Custard
3 ears fresh corn (to yield 2 cups kernels)
2 cups heavy cream
4 large eggs
1 cup (4oz) loosely packed grated Monterey Jack cheese
1 T Dijon mustard
1/2 tsp. salt
1/4 tsp. white pepper
Sauce
4 cups rich stock (beef, chicken, or veal)
2-4 T olive oil
1 pound mushrooms, stemmed and quartered
2 T butter
2 shallots, minced fine
Salt and freshly ground black pepper
Minced fresh chives, for garnish
Using a corn zipper or the coarse side of a box grater, cut the kernels off the cobs. Heat the corn and cream together in a medium saucepan. Bring to a gentle simmer and cook 5 to 10 minutes until the corn is tender. Cool slightly, then puree with a stick blender. (If using a traditional blender, let mixture cool further.) Strain the puree through a fine sieve into a large mixing bowl, pressing well to extract all the liquids. Add the eggs, cheese, mustard, salt, and pepper to the bowl, and stir gently to combine.
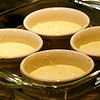
Preheat the oven to 325F, and butter eight 6-to-8 oz ramekins. Measure an equal amount of custard into each dish, leaving at least 1/4-inch of headspace. Place the ramekins in a large, shallow pan and carefully fill the pan with enough hot water to reach 2/3 of the way up the side of the ramekins. Cover the pan with aluminum foil, punching a few holes in the top with a skewer, to help prevent condensation drips. Bake the custards in the water bath until just set; start checking at 45 minutes. (The time will depend on the thickness and size of your ramekins, and the size of your water bath.)
To make the sauce, rapidly simmer the stock in a saute pan over high heat until reduced to a sauce-like consistency. Meanwhile, heat the olive oil in another saute pan over medium-high heat. Add the mushrooms and cook, stirring, until they have released their juices and the pan has dried out a bit, 10 to 15 minutes. When the mushrooms are done, salt them to taste and increase the heat to high and pour the stock into the mushroom pan. Bring the stock to a simmer and cook 2 minutes. Just before serving, add the butter and shallots, swirling into the sauce. Season to taste with salt and pepper.
Turn the custards onto individual plates. Pour some sauce over or around each of the warm custards and garnish with the minced chives.
Note: Custards can be kept warm in their water bath for about 20 minutes; if you need to wait longer, refrigerate and gently reheat in a water bath for 10 to 15 minutes before serving. The texture will suffer slightly, but the taste is undiminished.
cookbooks, equipment, other blogs, recipes
12 Comments »


Posted by a Special Guest on 07.27.07 7:04 AM
 Editor’s note: Inspired by our recent mojito post and his Kentucky-bred husband’s birthday this week, Sean returns to Drink of the Week guest-bartender duties. By featuring this classic, I think it’s safe to say that he’s absolved of any trauma inflicted by his last stint behind the bar. [wink]
——
I don’t remember just how I started
I only know that we should have parted
I stole a kiss, and then another
I didn’t mean to take it further
One mint julep was the cause of it all
— “One Mint Julep,” Rudy Toombs
Few cocktails are as storied, as fraught with history and tradition in America, as the mint julep. The very word “julep” evokes a paradoxical domestic exoticism: nostalgic visions of the Old South, of white-bearded men in linen suits coddling dogs named Belvedere. But when was the last time you ordered one in a bar?
Somehow, despite its technical similarities to the fashionable mojito, juleps have yet to catch on as a hipster sipper. Perhaps bourbon’s star has not yet risen as the booze of choice in the way that rye, gin and even cachaça have. (Mind you, bourbon is always in vogue at our household.) Maybe its Southern connotations render it undesirable for the too-cool-for-school crowd. Or could it be the special glassware?
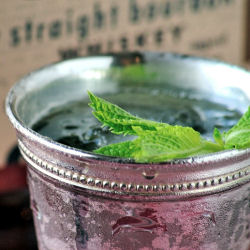
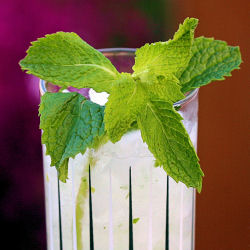
Whatever the case, I am here to tell you that nothing is more refreshing than an ice-cold mint julep, condensation sweating down its sides, on a hot, muggy day. Heck, even on a foggy summer’s day here in San Francisco, they’re downright delish.
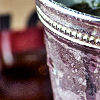
And then there’s those cups. While you don’t absolutely need julep cups, they do serve a practical purpose beyond merely being stylish and sophisticated (not that those are not reasons enough to use them). Optimally made from sterling silver, the julep cups’ metal sides chill quickly and help keep your drink cool as a cucumber. And let’s face it — the very sight of condensation on the side of the cup makes your mouth water in Pavlovian anticipation.
Like many Southern things — biscuits, fried chicken — mint juleps are simple enough, requiring few ingredients but also a light hand. Though it’s nothing more than mint, sugar, water and bourbon, balance is key. You don’t want a drink that’s too cloyingly sweet, chewing-gum minty or Molotov-cocktail strong. None of those things is particularly refreshing.
Like the mojito, the julep begins with a muddle, and this is where things begin to get complicated. Some recipes call for granulated sugar, others powdered sugar, others still simple syrup. Most recommend muddling the mint first and letting it steep for a few minutes. Yet Robert Duvall as the julep-sipping Captain in Thank You For Smoking extolled the virtues of crushing the mint on the ice.
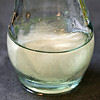
I don’t know about you, but I’m a busy man. I’m not going to take the time to pluck only the most nubile leaves, to mill my sugar to the right grain or to hand-chisel my ice to a perfect consistency. I prefer to keep things simple — as in simple syrup. (Good thing I have a bunch on hand.)
Just muddle the mint in the syrup, cover with crushed ice and pour the bourbon over. Stir until well chilled, and then sip with an audibly refreshed “ah!”
But if all this is just too rich for your blood, you can still enjoy a proper julep at my new favorite watering hole, The Alembic. They feature the mint julep in their J Peterman-esque menu of cocktails old and new, and they serve it in a proper julep cup and everything. Just one mint julep is guaranteed to inspire spontaneous conversation from your neighbors. And who knows where it could go from there?
I do declare, I believe I’m getting the vapors!


Mint Julep
Several fresh mint leaves, preferably organic, plus sprigs for garnish
3/4 oz simple syrup
2 oz bourbon
crushed ice
club soda (optional)
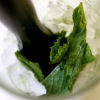
Place mint leaves in the bottom of a julep cup and add the simple syrup. Muddle the mint leaves just enough to bruise them all over — you don’t want to crush them into a paste, just to release their minty goodness. Let stand for a minute or two to steep. Fill the cup with crushed ice. Pour the bourbon over the ice. Stir to combine and chill, until the cup is good and cold. If there’s room in the cup and you are so inclined, feel free to add a splash of club to lighten it up. Garnish with mint sprig.
If you want to make juleps for a crowd, muddling is too time-consuming. You can make a whole batch of mint-infused simple syrup by steeping a combination of fresh mint and mint tea bags in your syrup for a few minutes, then straining it well, squeezing the mint and teabags to release the maximum mint flavor. Pour the cocktail with the same proportions, minus the muddled mint.
Drink of the Week, drinks, other blogs, recipes
8 Comments »
Posted by Anita on 07.25.07 9:21 PM
 Otto von Bismarck reportedly quipped that “The less the people know about how sausages and laws are made, the better they sleep at night.” Although the ol’ Prussian was undoubtedly right about legislation, when it comes to wurst, I’d beg to differ. Not only is sausage-making entertaining and educational, it’s also much easier than you might think.
It can even be fun, especially if you divvy up the work among a crew of like-minded friends. One recent Sunday, we rounded up Sean and DPaul plus our new pals Jon and Karen, classmates from Kasma’s Thai cooking series. Everyone brought a dish to share and a five-pound pork shoulder; Cameron and I provided the recipes, the seasonings, the casings, and other miscellaneous bits. In a matter of hours, the six of us created a spectacular assortment of sausages to stock our freezers.
Between us, we amassed four KitchenAid mixers, three meat grinder attachments, two pairs of sausage-stuffing tubes, and one very porky kitchen. All told, we ended up cranking out more than 25 pounds of sausage. We stuffed a French-style garlic saucisse — courtesy of Michael Ruhlman’s acclaimed Charcuterie — into stout links, curled Kasma’s recipe for spicy sai oa into a hog-casing spiral, squeezed delectable Kentucky-style breakfast sausage into petite sheep casings (plus a few patties), and parceled out our spicy Mexican chorizo in bulk. Even after a hearty sampling, everyone went home with a bit more than a pound of each flavor, with no more effort than making a single batch on their own.
Although we had a blast with the grind-and-stuff method, don’t let a lack of specialized equipment hold you back from making great sausage. Most good butchers will grind any roast to order. Choose a nice, fatty pork shoulder — also known as a Boston butt or simply pork butt, even though it comes from nowhere near the hind end of the pig — and ask for a coarse grind. Mix the ground pork with your seasonings, shape into patties, and voilá: You’ve just made sausage.
Folks were pretty evenly divided about which of our creations they loved best. For me, the winner of the day was the Kentucky breakfast sausage. There’s no stronger compliment that I can pay it than it just tasted right… something like your Southern grandmaw would have made, if you’d been so blessed.
Go on, don’t be shy: Be your own Southern grandmaw. It’s much easier than getting a bill through Congress, I promise.


Kentucky Breakfast Sausage
– adapted from Bruce Aidells’ Complete Sausage Book
4 pounds well-marbled pork shoulder, cubed
1-2 pounds pork back fat, cubed
— quantity varies depending on the fattiness of the meat
2 T kosher salt
4 tsp freshly ground black pepper
1/4 cup ground, dry sage
2 tsp ground cayenne pepper
2 tsp ground coriander seeds
1 tsp freshly grated nutmeg
1 cup water
sheep casings (optional)
Cut the pork and fatback into cubes. Place in a metal bowl in the freezer for 30 minutes to chill well, along with the grinder parts. When thoroughly chilled, grind the pork and 1 pound of fatback through the coarse plate of the grinder.
In a large bowl, mix all the ingredients (except casings), kneading and squeezing until well blended. Fry a test patty and taste for seasonings and fat content; adjust as needed.
For links, stuff the sausage into casings and tie or twist at three-finger-width intervals. If making patties, shape the meat into large rolls, 2 inches in diameter. Wrap them in waxed paper, and refrigerate until ready to use; slice into patties as needed.
(Sausage keeps refrigerated for 3 days, or frozen for 2 to 3 months.)
cookbooks, cooking, equipment, meat, recipes
14 Comments »
Posted by Anita on 07.20.07 7:08 AM
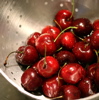
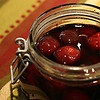
 It seems like all of the hip kids are doing it: Tossing out their radioactive-looking cocktail cherries in favor of home-steeped alternatives. Hell, even the New York Times jumped on the bandwagon in this week’s food section — a sure sign that a trend has hit the mainstream.
For those of us in the Bay Area, the wave is breaking a touch too late. The cherries at the farmers markets are pretty darned ripe, not to mention enormous… far from ideal specimens when it comes to their intended task. But, if you get a wiggle on, you just might find a few last baskets of not-overripe cherries this weekend. (If they’re huge, you can always halve them.)
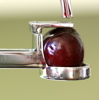
Making your own maraschino cherries is as simple as pitting a pint of cherries (or not, if you’re a pit-loving purist), and letting them steep in enough warmed Maraschino liqueur to cover them well. They’re pretty good right out of the pan, but leaving them a few days in the fridge is well worth the wait. If you prefer brandy’s woodsy overtones to the fruit-meets-nuts essence of the traditional liquor, then feel free to make that very acceptable substitution. If you go that route, you may want to add some sugar to the pan when warming your steeping liquor, but it’s certainly not necessary.
Even easier still — and a perfect option when cherry season is but a memory — is the method we’ve been using for the last year or so: Simply soak dried cherries in moderately decent brandy until they’re rehydrated. Or, head to the gourmet grocer: The fresh-brandied La Parisienne cherries sold in small containers at the Whole Foods deli counter are quite nice, and some of our Seattle friends swear by the preserved maraska cherries they buy at a local import store.
In short, there’s really no excuse for choosing a zombie cherry.
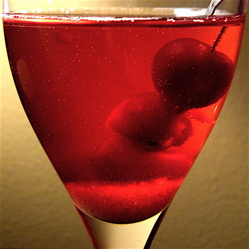
The non-neon model is, of course, the perfect garnish for your everyday Manhattans and what have you. But if you’d like to bring its cherri-licious essence to the fore, you might prefer a cocktail like this little number featured a few months ago in Food & Wine’s 2007 cocktail preview. I’ve dispensed with the original’s sugared rim, but feel free to add it back if your palate runs to the sweet side.


Marasca Fizz
3 true Maraschino cherries
1/4 oz cherry-steeping liquid
(use half simple syrup for unsweetened brandied cherries)
2 brown sugar cubes
3 dashes Angostura bitters
1/2 ounce Cherry Heering
4 oz chilled sparkling wine
Put the sugar cubes in a Champagne flute. Add the Angostura, Cherry Heering, cherries and cherry liquid; top with the bubbly and serve.
Drink of the Week, drinks, locavore, other blogs, preserving & infusing, recipes
9 Comments »
Posted by Cameron on 07.18.07 11:22 PM
 Welcome to part two of our garden tour! A little over a year ago, we landscaped the dirt-and-weed festival behind our house, using edible (or fruit-producing) plants wherever possible. This summer, our patch is coming to life, and we’re giving you a virtual look around.
During our last visit, we met Unruly Lavender and Lazarus the Lemon Verbena. Today, we venture into the Northside Fruit Preserve.
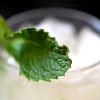
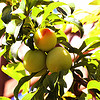
Just past Lazarus, at the corner of the deck (which marks the northwest corner of the garden) is our Santa Rosa plum tree. We have been advised by wise people that fruit production won’t really kick in until next year, but we’re getting a few this year, and they’re really tasty.
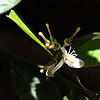
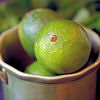
As we step away from the deck, we meet the next member of the Northside Preserve: a makrut (kaffir) lime tree that is far happier in our dry, cool Mediterranean climate than I would have thought possible. We know of at least one other person with a successful makrut lime who lives not far from us, but I am still bemused by this enthusiastic little refugee from the tropics. We will never lack for leaves in our Thai culinary adventures and it’s starting to look as if we may see some limes this year. They’re not much as fruit, but the zest is useful.
Tucked far too close to the fence in the northeastern corner is our bergamot tree. It seems to be doing well, although it hasn’t decided to go all lush with the fruit yet. I’m torn between a desire to prune it and the feeling that I should just let it do its thing. I’ll probably nip it a bit to give it some shape the next time I’m wandering around with the appropriate implements.
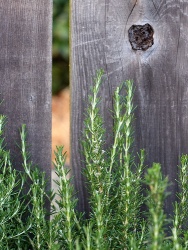
Around the base of our mini-orchard, we have two rosemary plants that are doing their best to imitate kudzu. I can’t say that I’m surprised, as rosemary grows absolutely everywhere in San Francisco. These specimens have contributed spears and leaves to everything from the Rosemary Five and Gin-gin Cooler to steak fiorentina.
Along much of the eastern wall of the garden, there is really nothing to eat, although that will change if the fennel that I just planted takes hold. In the meantime, a line of lilies and the magnolia tree are the lone survivors from the yard’s previous incarnation. The magnolia turned out to be beautiful once it got a haircut, with a main trunk sporting white blooms next to a cluster of volunteer shafts that produce purple flowers. They all seem like they’re from the same root structure down underneath the ground, but I’m not entirely sure how that’s possible, given the combination of blossom colors.
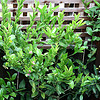
In the southeastern corner (again, too close to the wall), a Meyer lemon tree is holding its own against the magnolia. This tough trooper started delivering fruit practically as soon as it was planted and bids fair to give a repeat performance this year. I can’t wait. For a boy raised on New England summers and snows, there are few things as satisfying as nipping out to the garden for a fresh lemon.
Next: Dog-eating vines? Thyme will tell!


garden
2 Comments »
Posted by Anita on 07.13.07 7:04 AM
 When I read Jeffrey Morgenthaler’s recent post outlining his list of Dos and Donts of Mojitos, I found myself nodding in vigorous agreement. When I got to this entry, I broke into a wide grin:
“Do not order a mojito when the weather is below 70°F. This is almost as bad as ordering a Bloody Mary after the sun has gone down.”
Hear, hear.
I can’t tell you how many winter nights I’ve spent at the Zig Zag watching Murray Stenson painstakingly craft mojitos for some clueless clown. The phenomenon became so epidemic a few years ago that Cameron and I were moved to concoct an alternative, off-season rum drink for Murray to offer. (It’s an amateurish thing called the Wonderland — as in “Walking in a Winter…” and Murray graciously humors us by keeping the recipe in the box behind the bar.)
It’s hard to fault a mojito aficionado from defying the seasonal mandate at the Zig Zag, because when it comes to mojito-making, Murray’s method is a sight to behold. Cameron likes to remark that Murray puts more love into a single cocktail than most restaurants put into a whole meal, and I am convinced that he was witnessing a mojito-muddling marathon for the first time when he coined that oh-so-true aphorism.
As Morgenthaler correctly cautions, a mojito is no drink to order when your fellow tipplers are three-deep at the bar. Even the most slap-dash mojito is a time-consuming order. But making ‘Mojitos a la Murray’ elevates the procedure to high art.
Murray starts out by cutting half a lime into quarters, placing the pieces in a pint glass with half a dozen mint leaves and simple syrup. Crushed ice is added, and muddling commences. Six more mint leaves join the party, along with another dose of syrup and more ice. More muddling. Another dose of mint — this time sans syrup — and still more muddling. Then the rum, and a purposeful stir while surveying the bar. Tasting for balance, he tinkers with his creation until he achieves the ideal balance of sweet, sour, and strength; it rarely needs much to bring it to perfection. Out of his pile of mint, he chooses one more perfect sprig, dusting it with a flurry of powdered sugar before placing it jauntily in the glass, and handing the drink over to the suitably awed customer.
Both Murray and Jeffrey adhere to the unstrained school of mojito mixology: “I leave the ‘salad’ in place,” says Mr. Stenson. My muddling technique must be a bit weak; I haven’t yet mastered the fine art of extracting sufficient mint flavor without creating a pulpy mess, even when using Murray’s step-by-step directions and the prescribed copious amounts of greenery. So, as a compromise, I follow the ‘Murray Method’ right up to the end, but then strain the muddled mixture into an ice-filled cooler glass. A few small bits of mint find their way through the strainer, creating a pleasantly herb-flecked drink with plenty of punch.
Murray also dispenses with the traditional top-up of soda water; his masterful muddling provides the just the right opportunity for dilution. I like a bit of fizz, myself (as does Morgenthaler), but let your cocktail conscience be your guide on this point, as always.


Mojito
1/2 lime
1T simple syrup, or to taste
18 medium mint leaves, plus a sprig for garnish
2 oz silver rum
good-quality soda water (optional)
confectioners sugar (optional)
Cut the lime-half into quarters, and muddle in a 16-oz glass along with 6 medium mint leaves and 1/4 ounce (1-1/2 tsp) simple syrup. Add crushed ice to one quarter of the way up the glass. Add 6 more mint leaves and another 1/4 ounce simple syrup; muddle again. Add crushed ice to a level about 2/3 up the glass, plus remaining 6 mint leaves (no simple syrup this round); muddle yet again. Add the rum and stir until the glass begins to frost. Adjust to taste, then strain the chilled mixture into an ice-filled 12-ounce highball or cooler glass. Top up with a splash of soda water, if desired. Garnish with a sprig of mint, dusted with confectioners sugar, if desired.
bar culture, Drink of the Week, drinks, Mixology Monday, other blogs, recipes
17 Comments »
Posted by Cameron on 07.11.07 11:46 AM
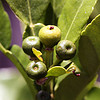
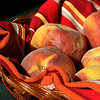
 All spring, we watched the stone fruit come in at the Ferry Plaza farmers market. This year I noticed the cherries first, followed by peaches and what seems like a ridiculous bumper crop of apricots. Meanwhile, our young Santa Rosa plum tree poked lazily through its growth cycle. Flowers came and went, followed by small green globes that grew slowly and eventually blushed yellow.
Looking back, I had a very funny reaction. Even as the fruit passed through red on their way to purple, I didn’t think, “Those will be ready to eat soon.†Instead, I marveled at how impossibly bright they seemed and wondered if there was any way to capture the ghostly neon luminescence with a camera. The branches of our bergamot and lemon trees had been bare for so long that fruit was something that we bought at the Ferry Plaza. I had unwittingly come to see our own plum tree as a pretty abstraction.
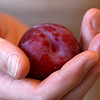
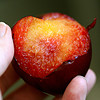
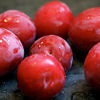
Then I walked out into the yard last week and found that a plum had dropped to the ground. I didn’t think too much of it. The plum didn’t really look ripe and it felt a bit hard, but it did smell good. I took it up to the kitchen and called Anita to look. We took a few pictures, and then I cut into the fruit with a small knife and everything changed.
The juice ran out over the blade of the knife and my hand and dripped on the floor. Startled, I moved over to the sink, finished cutting a wedge, and ate it. The flesh was sweet, and tart near the skin, and it was as juicy and wonderful as any plum that I had ever eaten. Anita and I shared the rest of the plum through big goofy smiles. This was what we had to look forward to. We had loved our tree and it was becoming real.
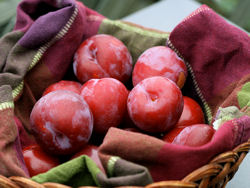
The next day, there were more drops. I gathered three, and then a fourth and a fifth. Cradling them against my chest, I reached up and pulled gently on another likely candidate. It whispered free into my hand. I ran upstairs, deposited my load and returned with a bowl, circling the tree and tugging gently on the ripe fruit, until I had 13 in all.
We never thought that we’d eat them all before they went soft — we don’t usually keep fresh fruit for snacking. But these little devils are scandalously fragrant and once I smell one, I have to eat it. Anita has plucked more while I’m traveling in NYC, and we’ll soon have enough for a batch of brandied plums.
I still can’t believe that we’re growing fruit in our back yard. I left town on Sunday, but Saturday morning we were at the market as usual. I stopped at one of the stalls where we’d bought peaches, picked up one of their Santa Rosa plums, sniffed it, and then tasted a sample wedge. It was good. I like mine better.

garden
6 Comments »
Posted by Anita on 07.10.07 1:14 PM
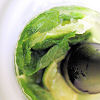
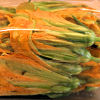
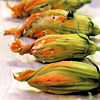
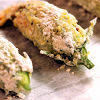
 Every summer, I walk by baskets of squash blossoms at the farmers market, longing to find a use for them. Stuffing fragile flowers seemed like a tedious task for a weeknight meal, so I’d always given them a pass. But once I saw Jen’s fritters — which were in turn inspired by a course at Derrick and Melissa’s much-discussed dinner party — I knew I couldn’t put it off any longer.
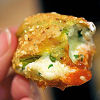
The basic idea seemed simple enough: Stuff the blossoms with cheese, dredge them in dairy and starch, and fry until golden. But I wanted to dress them up a bit — make them nice enough to serve as a light supper, alongside a simple salad — so I turned to my new favorite cookbook, Big Small Plates. The text of this popular title is written by Cindy Pawlcyn (of Mustards Grill fame) but the recipes themselves are largely the work of her two partners: Pablo Jacinto, the chef at Cindy’s Backstreet Kitchen, and his brother Erasto, who holds the same title at Mustards.
The book’s tapas-style approach draws inspiration from around the globe. There are plenty of straight-up California-American preparations, and Asia is well represented: A Vietnamese mini-burger salad we tried was especially delicious. But — and here I must admit to being biased — it’s the book’s Latin-influenced dishes that really shine. We’ve tackled a glorious mole casera, two batches of perfectly wonderful empanadas, and a handful of other Mexican-tinged dishes that hit the mark both in taste and in appearance.
The book’s a delight to use, aside from a few scale issues: the empanada recipe yields twice as much filling as wrappers to enclose it, and the original squash-blossom dredge made easily three times as much as I needed (I’ve corrected the proportions below). Most of the recipes serve six as an appetizer course or side dish, but many can serve as two or even four entree-size portions. Some dishes involve prepping multiple sub-recipes, but the auxiliary instructions usually revolve around simple garnishes like the lime-infused crema here. Ingredient lists can seem daunting, but the end results come together with minimal fuss. And they look as good on the plate as they do in the photos — no small compliment in the realm of chef-written cookbooks.
But back to those blossoms. I was worried that I’d waited too long between market day and making the dish: The flowers had started to wilt and the petals were sticking together. But despite their tissue-thinness, and warnings in nearly every recipe I read about the perils of tearing the flowers, the squash blossoms proved surprisingly resilient. Pulling two petals apart at the seam between them, I could split the blossom (much like you would when making a chile relleno) to remove the pollen and stuff the interior. The petal’s own natural moisture combined with the stickiness of the filling meant that I could patch the petals back together after stuffing; the batter held in any remaining leaks during frying.
It was a fiddly process, to be sure, but a highly rewarding one. Once the blossoms are stuffed, you can hold them in the fridge for a few hours. The dredging and frying comes along quite quickly after that, and if your garnishes are prepped and waiting, you’re 90 percent done with a spectacular summer appetizer. (Or one very decadent supper.)

Crisp-Fried Squash Blossoms
adapted from Big Small Plates
2 ears fresh corn
1 tsp olive oil
1/2 cup grated Monterey Jack cheese
1/2 cup fresh ricotta
2 T minced cilantro leaves
—
1/4 cup cornstarch
1/4 cup cornmeal
1/4 cup all-purpose flour
1/2 tsp salt
1/4 tsp freshly ground black pepper
1/4 tsp cayenne pepper
—-
1/2 cup buttermilk
vegetable or canola oil, for frying
—
12 to 18 very fresh squash blossoms
1/4 cup toasted pumpkin seeds
1/4 cup sour cream, mixed with the juice and zest of 1/2 lime
1 cup tomatillo red-chile salsa (homemade or a good store-bought brand), warmed
Cut the kernels off the cobs. Heat the olive oil in a skillet over medium-high heat and saute the corn 2 to 3 minutes. Set aside and allow to cool, then combine with the Jack cheese, ricotta, cilantro.
Open each blossom as gently as possible, and remove the stamen. Stuff each blossom with a spoonful of the cheese-corn mixture; the amount will vary with the size of your blossoms, but don’t be afraid to stuff them well. The flowers seem delicate, but they’re surprisingly resilient. If you need more room to work, peel the flower apart at one of the ‘seams’ between the petals; you’ll be able to pinch everything back together (within reason) using the filling as glue. Leave enough room to twist each blossom shut.
Set the stuffed blossoms on a wax-paper-lined cookie sheet and place in the fridge to set. Meanwhile, combine the cornmeal, cornstarch, flour, and seasonings in a shallow bowl; put the buttermilk in another shallow bowl. Dredge each stuffed blossom, first in the buttermilk, then in the flour mixture, shaking off the excess at each step. Return them to the wax paper, then refrigerate again briefly.
Set up a cooling rack topped with two layers of paper towels next to the frying area. Add oil to a shallow skillet to a depth at least half as high as the average stuffed blossom. (I used 2 cups in a 10-inch pan.) Heat oil to 375 degrees. Slowly lower the blossoms into the pan, four or so at a time to prevent crowding, turning each over as soon as the bottom side is golden brown. It will go rather fast, but if the coating turns dark brown immediately, back off on the heat a bit; you need enough time to melt the cheese. With a spider or slotted spoon, remove the crispy blossoms to the paper towels. Repeat until all blossoms are fried.
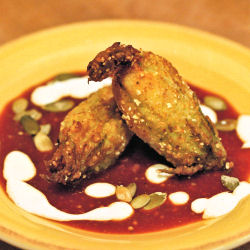
Spoon a bit of the warmed salsa on each plate, then top with 2 or 3 blossoms. Drizzle with the lime crema, and scatter toasted pumpkin seeds for garnish.
cookbooks, cooking, farmers markets, Mexican, other blogs, recipes
6 Comments »
Posted by Cameron on 07.06.07 7:01 AM
 Not too long ago, we got together with our neighbors Erik and Mrs. Flannstad for an absinthe tasting. We cracked open our new bottle of Lucid, the first true absinthe to be sold legally in the United States in nearly 100 years. Our guests generously offered to share tastes of two absinthes that they had brought back across the pond: Jade 1901 and Fougerolles.
As we dripped cold water over sugar cubes and watched the clear green fluid louche, I was struck by the historic nature of our ceremony: It is no small thing to be a party to the greatest snake-oil scam of the last three centuries.
Like many of today’s cordials, absinthe was first promoted as a medicinal elixir. The benefits supposedly arose from the combination of anise, fennel, and grande wormwood, and it was given to French troops as a fever preventative. When the drink became spectacularly popular in France by the late 1800s, it captured the palates and imaginations of several well-known artists, and the allure of the liquor shifted shape. Absinthe, no longer medicine, acquired a reputation as a mind-altering hallucinogen. By 1915 it was considered so dangerous that it was banned in several countries, including France and the United States.
Alas, recent studies have proven that absinthe does not cause hallucinations. I wasn’t able to find anything written on its efficacy as a fever remedy, but I don’t anticipate absinthe putting aspirin or ibuprofen manufacturers out of business any time soon. Nevertheless, the legend, mystique, and flim-flam continues, thoroughly documented by the Wormwood Society and La Fee Verte Absinthe House. The story of a humble patent medicine that grew into a potion so potent as to be banned on two continents is one that would bring a tear to any huckster’s eye.
Happily, absinthe also makes a pleasant drink, and we had fun tasting and comparing the three examples. Of the three, the Lucid was the sweetest and least complex. Despite bringing up the rear in our taste test, Lucid has two strong points in its favor. First, it strikes far closer to absinthe’s correct flavor profile than any of the current substitutes. Second, its modest price and local availability means that absinthe once again becomes fair game for mixological experimentation.
Sources tell us that many cocktails made with pastis (a la Ricard or Pernod) were originally made with — you guessed it — absinthe in the days before the ban. One such recipe, the venerable New Orleans staple known as the Sazerac, looks on paper like a shot of whiskey with some incidental flavorings. But a well-made Sazerac honors its pedigree: One of the oldest of all cocktails, it’s a parade of enchanting flavors that starts with lemon and ends with an herbal snap. Make it with the original American whiskey — rye — in place of that johnny-come-lately bourbon, and you’ve got a taste of cocktail history in an old-fashioned glass.


Vieux Sazerac
1/2 tsp absinthe
1/2 tsp simple syrup
2 dashes Peychaud bitters
2 oz rye whiskey
lemon twist, for garnish
Add the absinthe to a well-chilled old-fashioned glass, and roll it around to coat the inside of the glass. Pour out the excess, leaving a small puddle in the bottom of the glass. Add syrup, bitters, and rye; stir, and garnish with lemon twist.
Note: As this drink lacks ice, think “extra frosty” when chilling the glassware.
Drink of the Week, drinks, recipes
8 Comments »
Posted by Anita on 07.04.07 7:33 PM
 Summertime is finally upon us! Even here in San Francisco — where our summer months are notoriously cold and foggy — the sun is shining high and bright, the skies are a precise shade of coastal blue, and everyone’s outside enjoying the weather. We know it’s merely a respite from the gray gloom that will descend again, without fail; Three days of sun are all San Franciscans ever expect.
Another sure sign of the season: Ice cream and sorbet stories are everywhere. Today’s food section turned up as crammed full of ice cream as an apartment freezer: Make it, buy it, stand in line for it… the Chron‘s got us covered in the frozen-confection department.
As if that’s not enough, not one but two blog events this month are dedicated to scoopable sweets: Laura picked sorbet as this month’s “Hay Hay, It’s Donna Day” theme, and Meeta’s Monthly Mingle 12 focuses on ice cream. So I was already flipping through the recipe file when I got an email from the library, telling me that my copy of David Lebovitz‘s new ice-cream book — the darling of the blogosphere — is ready to be picked up, at long last.
OK, wow. Really, I can take a hint: Time to get churning.
I won’t bore you with another gushing post describing what a treat it is to read The Perfect Scoop — I’m too late to the ice-cream social for that, and I couldn’t possibly come up with any more synonyms for “mmmmm!” than you’ve already read elsewhere. Suffice to say that I was bowled over (har har) by all the delectable-sounding options — hello, chartreuse ice cream? — and picking just one recipe proved impossible. I compromised: One ice cream, one sorbet.
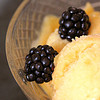
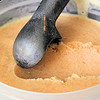
Sultry summer weather at the Ferry Plaza Farmers Market seduced us into buying more stone fruit than two people could possibly eat, so we opted to sacrifice a few pounds’ worth for the apricot variation on David’s peach sorbet. Not wanting to overwhelm their perfect ripe essence, we substituted St-Germain liqueur for the recipe’s standard kirsch. The color was vibrant and the flavor sublime, but the texture turned a tad bit grainy for my taste. A beautiful scoop, nonetheless, but nothing to make me abandon my old standby ice-cream book.
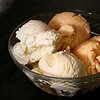
Our second trial, though, helped me understand what all the swooning reviews were about. A perfect coconut ice cream doesn’t just toss a cup of shreds into a vanilla custard and freeze them up. Instead, it starts by infusing warm dairy with freshly-roasted coconut, steeping to extract subtle flavors. Then we strain the solids out of the coconut-scented cream, which is used to finish a rich, not-too-sweet custard base (and which I could barely restrain myself from eating with a spoon).
After churning and freezing, the mixture emerged as a beautiful, smooth off-white velvet, redolent with coconut but minus the “pencil shavings” texture that some (including Cameron) find unappealing. We loved it equally on its own and topped with toasted almonds for added crunch. But our favorite treat of all — sure to be the hit of the summer — paired the luscious toasted coconut ice cream with the icy apricot sorbet to make a Creamsicle-style treat to brighten even the cloudiest day.
Bring it on, summer. We’re ready for you.
Toasted Coconut Ice Cream
adapted from The Perfect Scoop by David Lebovitz
1 cup unsweetened coconut flakes
1 cup whole milk
2 cups heavy cream (not ultra-pasteurized)
3/4 cup granulated sugar
1 vanilla bean, split and scraped
5 large egg yolks
1 teaspoon dark rum
Toast the coconut on a baking sheet in a moderate (350°) oven for 5 minutes or until golden and fragrant, stirring occasionally to toast evenly.
Warm the milk, half of the cream, and the salt and sugar in a heavy saucepan over medium-low heat. Add the toasted coconut and the vanilla seeds and pod. Cover the pan and remove from the heat to steep.
After an hour, rewarm the infused mixture. Strain through a medium-mesh strainer into another saucepan, pressing down on the solids to extract all the liquid. Discard the solids, reserving the vanilla-bean pieces for another use, if desired.
Combine the remaining cream with the rum in a large bowl. In a separate large bowl, whisk the egg yolks together. While whisking constantly, slowly add the coconut cream to the egg yolks.
Return the custard to the pan and place over medium heat, scraping the mixture to avoid scorching. Cook until the custard coats the back of the spatula. Pour the custard through the strainer into the cream-rum mixture, and cool over an ice bath.
Cover the bowl of cooled custard, and place in the refrigerator until well chilled, preferably overnight. Freeze according to your ice-cream machine’s directions for custard-based recipes.
cookbooks, dessert, other blogs, recipes
11 Comments »
