Posted by Anita on 09.27.07 8:04 PM
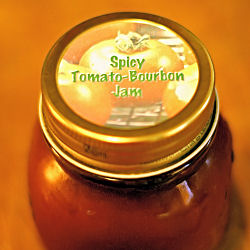 Making your own preserves may not exactly be the world’s simplest kitchen task. But if you limit yourself to a relatively small batch, and pick the right recipe — preferably one that avoids the canning process altogether — it can be a lot of fun. A lot more enjoyable than say, the back-breaking labor and knuckle-biting stress of processing 100 pounds of San Marzano tomatoes. (Details on that soon… promise.)
Tomato jam may seem like an odd beast, but it’s really not too far removed from ketchup. My favorite use for this spicy-savory preserve is spread liberally onto good Acme white bread, topped with Fatted Calf bacon and a wedge of Will’s avocado — a sort of post-summer BLT substitute. (We served tea-sized versions of these exact sandwiches at our housewarming party, and they disappeared faster than I could assemble them.) The jam also makes a glorious glaze for meatloaf, a dipping sauce for empanadas… really, the possibilities seem endless.
If you want to simplify even further, omit the seeding and straining. It won’t hurt the flavor of the final product, and it shaves another 15 or 20 minutes off your prep. Myself, I prefer the seedless version. But then, I am all about gilding the lily.
Need more bright ideas for preserving summer’s veggie bounty? Over at The Passionate Cook, Johanna’s hosting this month’s edition of “Waiter, there’s something in my…. [Savoury Preserves]”. Check back here in a few days for a link to the roundup in the comments.

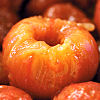
Spicy Tomato-Bourbon Jam
3/4 cup sugar
3/4 cup bourbon
3/4 cup cider vinegar
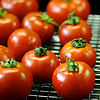
3 pounds tomatoes (preferably dry farmed)
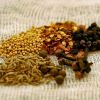
1 tsp black peppercorns
8 whole allspice berries
8 whole cloves
1 tsp red-pepper flakes
1/2 tsp mustard seeds
1/2 tsp whole cumin seeds
Combine the vinegar, sugar, and bourbon in a glass or ceramic bowl. Stir to dissolve sugar, then set aside.
Prepare an ice-bath. Stem the tomatoes, but do not score them or remove their cores. Working in batches, blanch the tomatoes in boiling water until their skins start to split — a step beyond what you’d normally do if you wanted the tomatoes to stay firm. The timing will depend on each tomato’s size and ripeness, so keep tongs or a slotted spoon handy to check them regularly. As soon as each tomato splits, remove it and plunge into ice water. Peel off tomato skins and discard.
Make a spice sachet by placing all of the spices in the center of a square of cheesecloth and tying into a bundle with a piece of kitchen string.
Set a wide-mesh strainer over a medium bowl. Pull open each tomato gently, and use your fingers to remove the seeds and seed jelly from each pocket, letting them fall into the strainer. Place the seeded tomato pulp onto a cutting board set over a rimmed cookie sheet.
When all tomatoes are seeded, rough-chop them and place them in a large saucepan along with any juices from the cutting board. Add the vinegar-sugar-bourbon mixture and the spice sachet, and bring to a boil. Do not leave unattended, as the mixture will greatly expand as it comes to a boil.
 Using a spatula or wooden spoon, push the liquid surrounding the seeds through the strainer as much as possible. (This is where much of the flavor hides, so don’t stint here.) When you’re left with a dryish mass of seeds, discard them and add the liquid in the bowl to the saucepan, along with any puree on the underside of the strainer.
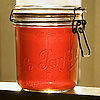
Reduce the heat to medium and, stirring occasionally, cook the tomato mixture 45 minutes or until it reaches a jammy consistency. Discard spice bag and divide tomato jam among sterilized jars or transfer to a container with tight-fitting lid. Let cool on countertop, then refrigerate until ready to use.
Note: Because this jam is not processed for storage, it must remain refrigerated. It will keep for about a month, provided you use a clean spoon every time.
farmers markets, locavore, other blogs, preserving & infusing, recipes
6 Comments »


Posted by Anita on 09.11.07 9:43 PM
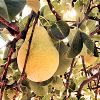
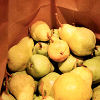
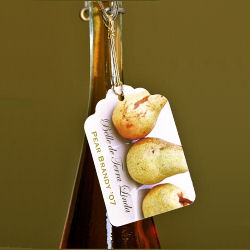 When a friend sends you home from a dinner party with a grocery bag full of her surplus fruit, there’s bound to be a bowl of pears you can’t quite devour before they get too ripe. This fact remains true no matter how many salads, croustades, soups, canapes, or batches of ice cream you make. Pear butter makes good use of these softies, of course, but there’s only so much toast — and so many hostess-gift occasions — in a year.
Preserving fruit in liquor is a time-honored way of extending its shelf life; we’ve made brandied plums many times. They’re incredibly simple to make, and they’re fabulous served warm alongside good vanilla ice cream, or baked in a boozy clafoutis. But here’s the dirty little secret: When all is said and done, the steeping liquid might even be better than the plums themselves.
One of my favorite fruit liqueurs is a pear cognac called Belle de Brillet, a spicy-sweet nip of autumn in a glass. It’s lovely all on its own, and it makes a glorious addition to Champagne (with or without candied-ginger vodka). So deep is my affection for the Belle, and so cher its pricetag, I have to ration my doses; if I sipped to my heart’s content, we’d be in the poorhouse by year’s end.
You see where all this is going, clever reader?
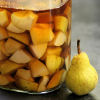
My homemade, locavore pear brandy is one of those “so-simple-there’s-no-recipe” recipes: Cut your ripe pears in half, and remove the core. Chop the unpeeled fruit into large chunks, and put them into a scrupulously clean glass or ceramic container. Top with a decent brandy — Korbel‘s based in Guerneville, if you’re keeping things close to home — and let sit, covered, for 3 or 4 days.
At the end of the steeping period, drain the brandy through a colander into a scrupulously clean glass or ceramic bowl; contrary to your frugal desires, do not press on the pears to release more juice. (If you absolutely cannot resist, press them into a separate container and drink this cloudy stuff first.)
Filter the drained brandy through successive layers of cheesecloth (one layer first, two layers the next time, etc) until the mixture looks reasonably clear. Clean out your steeping jar — scrupulously, of course — and store the filtered liquid in it. Refrigerate, resisting the urge to pick up the jar and peek at it, at least overnight.
After resting the infusion, ladle the liquid through a coffee filter set into a small sieve; I complicate things by placing the filter + sieve contraption on top of a metal funnel, and draining everything directly into a large storage bottle. You may prefer to keep things simple by first straining into a bowl. (You know what kind and how clean, right?) You’ll probably want to change filters at the end of each funnel-full of brandy; the microscopic pieces of pear that you’re removing will clog the filter and slow process considerably if you re-use the filters, especially as you get to the bottom of your jar, where the sediment has collected. The more times you filter, the longer the brandy will last before developing ‘off’ flavors. I always re-filter when making smaller gift-sized bottles.
Once you get the brandy filtered, taste your final product. I found my batch to be quite drinkable right out of the bottle, but Cookie’s pears were so ripe we had to cover them with a towel to keep the fruit flies at bay. If you prefer something sweeter, feel free to add simple syrup, agave syrup, or honey to taste.
I don’t usually store my infusions in the refrigerator — alcohol acts as its own preservative — but pear brandy goes south more quickly than other fruit liqueurs. Unlike limoncello that will last virtually unchanged for a year or more, pear brandy experiences a noticeable loss of flavor by the third day. It will be delicious for weeks and drinkable for months, but it loses its evanescent crispness by the end of the first week. Enjoy it (or, better yet, share it) right away.

drinks, locavore, other blogs, preserving & infusing
12 Comments »


Posted by Cameron on 08.14.07 9:58 PM
 Sometimes, my palate is a live illustration of the law of unintended consequences. The combination of our sausage-making party and the constant talk about preserving food that comes with summer rattled around in my subconscious for weeks.
Then, on a Saturday morning as we did our shopping, we passed by Shogun Fish at the market. They were advertising the first local wild salmon of the season and a relay closed somewhere in my head. Suddenly, I wanted gravlax, and I wanted to make it myself.
On the hunt for a recipe, I turned to Tom Douglas’ Seattle Kitchen. Tom is my first stop when I need wisdom about salmon, and his advice mostly lined up with other recipes and random commentary that I found around the InterWebs. I guess. The big differences were the addition of ground juniper berries (possibly traditional) and the absence of dill (definitely untraditional), and the presence of some other spices.
Fennel? Cayenne? Okay, whatever.
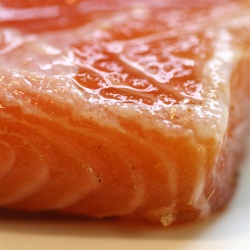
In theory, I knew that the process wasn’t difficult: just a simple salt/sugar cure. But I had no idea how dead-freakin’-easy it would be. Just pack the dry cure over and around the fish, weight the whole pile down with cans or what-have you, refrigerate, wait a few days and POW! Instant gravlax. Seriously, the hardest thing about this whole project was picking the juniper berry flecks out of the finished product. Obsess much? No! Yesssss. (Who said that?)
I love this stuff. I eat it for breakfast — with soft scrambled eggs, yum — for lunch, for a snack, whenever. For my next batch I’m going to try vacuum-sealing and freezing some to see how it holds up.


Gravlax
1-1/4 pound salmon fillet, preferably skin on, pin bones removed
Cure
2/3 cup kosher salt
2/3 cup granulated sugar
1/4 cup firmly packed brown sugar
1 1/2 teaspoons paprika
1 teaspoon ground juniper berries
1 teaspoon fennel seeds, ground
1/4 teaspoon cayenne
Combine the cure ingredients in a small bowl. Sprinkle the bottom of a non-reactive baking pan with about 1/2 inch of the cure and place the fish in the pan, skin side down. Blanket the fish with the remaining cure, creating a layer about 1-1/2 inches thick.
Cover the salmon with a piece of wax paper and top with another smaller pan, then weight the top pan down with a few cans. Store in the refrigerator for two to three days until the salmon is quite firm to the touch; the exact amount of time will depend on how thick your piece of salmon is. Remove the wax paper and the cans, and then use a rubber spatula to scape the cure from the salmon. Remove the salmon from the pan and briefly rinse it, then pat it dry with paper towels. To serve, slice the gravlax very thinly on the bias.
Cook’s note: I was not shy at all about rinsing the gravlax under cold running water until the cure was gone, daddy gone.
breakfast, meat, preserving & infusing, recipes
5 Comments »


Posted by Anita on 07.20.07 7:08 AM
 It seems like all of the hip kids are doing it: Tossing out their radioactive-looking cocktail cherries in favor of home-steeped alternatives. Hell, even the New York Times jumped on the bandwagon in this week’s food section — a sure sign that a trend has hit the mainstream.
For those of us in the Bay Area, the wave is breaking a touch too late. The cherries at the farmers markets are pretty darned ripe, not to mention enormous… far from ideal specimens when it comes to their intended task. But, if you get a wiggle on, you just might find a few last baskets of not-overripe cherries this weekend. (If they’re huge, you can always halve them.)
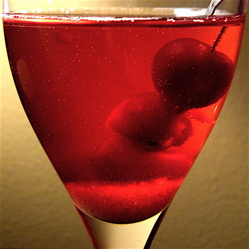
Making your own maraschino cherries is as simple as pitting a pint of cherries (or not, if you’re a pit-loving purist), and letting them steep in enough warmed Maraschino liqueur to cover them well. They’re pretty good right out of the pan, but leaving them a few days in the fridge is well worth the wait. If you prefer brandy’s woodsy overtones to the fruit-meets-nuts essence of the traditional liquor, then feel free to make that very acceptable substitution. If you go that route, you may want to add some sugar to the pan when warming your steeping liquor, but it’s certainly not necessary.
Even easier still — and a perfect option when cherry season is but a memory — is the method we’ve been using for the last year or so: Simply soak dried cherries in moderately decent brandy until they’re rehydrated. Or, head to the gourmet grocer: The fresh-brandied La Parisienne cherries sold in small containers at the Whole Foods deli counter are quite nice, and some of our Seattle friends swear by the preserved maraska cherries they buy at a local import store.
In short, there’s really no excuse for choosing a zombie cherry.
The non-neon model is, of course, the perfect garnish for your everyday Manhattans and what have you. But if you’d like to bring its cherri-licious essence to the fore, you might prefer a cocktail like this little number featured a few months ago in Food & Wine’s 2007 cocktail preview. I’ve dispensed with the original’s sugared rim, but feel free to add it back if your palate runs to the sweet side.



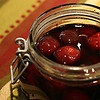
Marasca Fizz
3 true Maraschino cherries
1/4 oz cherry-steeping liquid
(use half simple syrup for unsweetened brandied cherries)
2 brown sugar cubes
3 dashes Angostura bitters
1/2 ounce Cherry Heering
4 oz chilled sparkling wine
Put the sugar cubes in a Champagne flute. Add the Angostura, Cherry Heering, cherries and cherry liquid; top with the bubbly and serve.
Drink of the Week, drinks, locavore, other blogs, preserving & infusing, recipes
9 Comments »


Posted by Anita on 06.24.07 8:07 PM
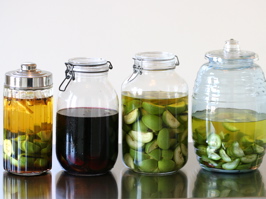 Every June 24, Catholics around the globe celebrate the feast-day of John the Baptist. And every year, on that same day, traditional-minded Europeans head into their local walnut orchards, filling baskets and bags with unripe nuts in order to make nocino, an Italian walnut liqueur, or its French cousin vin de noix.
We’ve made nocino every summer for the past three years, usually a bit later than the traditional saint’s day due to trouble in our local supply chain. Suffice to say that we lack the necessary ferme, fattoria, or bucolic farmhouse of any sort, and we’ve relied either on nuts shipped from afar or the whimsical schedule of a certain vendor at the Alemany market.
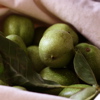
This year, we not only avoided our usual delay, we even jumped the gun a bit. But I hope you’ll agree our motives were good: We were off to Yountville for our anniversary, and I’d remembered reading Shuna’s story last fall about Hoffman Farm, a Napa u-pick with a vast walnut orchard. The idea of making liqueur with nuts we’d plucked ourselves from local trees was simply too attractive to pass up, no matter the date was a tad early.
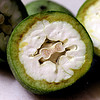
It took me days to work up the nerve to call John Hoffman and explain what I had in mind. He’d never heard of anyone wanting green walnuts before. “You do know they’re incredibly bitter?” he asked me on the phone. But he graciously allowed that we might stop the coming weekend and pick some nuts, as long as we didn’t come on Sunday morning during church. I assured him that we’d work around his schedule, and would be sure to call before we came, in any case.
Saturday rolled around, bright and sunny. We called Mr. Hoffman to make sure he was home, then donned hats and sunscreen and pointed the car toward Silverado Highway. Just past the intersection with Trancas, we spied the farm’s little sign, a blink-and-miss-it affair. We pulled up the gravel drive and found Mr. Hoffman waiting for us in the shade near his farmhouse garage.
We introduced ourselves and chatted a bit, and he asked me to remind him about what I would do with my early harvest. I explained about splitting the nuts and soaking them in alcohol for most of the summer, then setting aside the strained, sweetened infusion until Christmastime. I marveled that a walnut farmer — and one with Italian in-laws, at that — had never tasted what I’d always assumed was a relatively common homebrew. Not only had he never made it, he’d never even heard of it. Chuckling, he quipped: “Sounds like a waste of a good bottle of vodka,” and winked at Cameron.
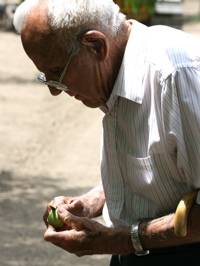 Then he picked up his cane and strolled us out into the orchard. A sun-dappled canopy of walnut boughs stretched as far as the eye could see, all the way back to the crossroads. Mr. Hoffman showed us how to avoid the nuts that suffered from blight — they were few, this early in the season — and how to spy the telltale bore holes of caterpillar infestation. He reached for his pocketknife and cut open one of the few rotten nuts he could find, to show me how the fungus penetrates the hull and works its way to the developing meat.
It was a botany tutorial, a history lesson, and a glimpse at a disappearing way of life. The Hoffmans have worked this land since the end of World War II. Now, they’re farming one of Napa’s few remaining diversified acreages, as vineyards squeeze out the fruits and nuts that once were the valley’s pride. As Shuna mentions, although the Hoffman land is protected for agricultural use, there’s nothing to prevent these noble trees from being torn out in favor of yet another mass of wine grapes.
After a half hour of picking nuts and snapping photos in the late-morning glow, we brought our canvas sack back to the garage. Mr. Hoffman discussed how to price our unusual transaction while he weighed our haul on his weathered scale. When all was said and done, he refused to take more than a fraction of what we’re used to paying, even when we told him that the going rate was much, much higher. He shook his head like we were citified fools, then added: “You can keep the quarters if you tell me that recipe again.” I smiled broadly and promised to send him prints of the photos we’d taken, plus a few different recipes to try.
We grinned all the way home, amazed at our good fortune in finding Mr. Hoffman — all thanks to Shuna.
After stopping by the local liquor depot for bottles of 100-proof vodka, I quickly set to work halving and quartering the green nuts, measuring sweeteners and spices, and sterilizing my infusing jars. Never had I had the luxury of using nuts picked within hours of infusing, much less 7 pounds worth gathered with my own two hands. Unsurprisingly, we had sufficient nuts for two different batches of nocino — my usual recipe, plus an experiment — as well as a version of Abra’s traditional vin de noix and Lucy’s lighter recipe made with white Burgundy and maple syrup.
I left my quartet of crockery on the new breakfast table for a day or two; they caught the light so beautifully that I wanted to see them (and sneak a sniff of them) all the time. Once the liquids steeped to a black-hole opacity, I followed tradition and put them out in the garden — in this case, the back deck — where they’ll commune with nature for the next 40 days and 40 nights. Then we’ll filter them, bottle them, and wait for the other end of the year, when midwinter brings us yet another celebration of the natural cycle disguised as a religious feast.

Hoffman Farm
2125 Silverado Trail
Napa, CA 94558
707 226-8938
drinks, holidays & occasions, Italian, locavore, Napa & Sonoma, preserving & infusing
13 Comments »


Posted by Anita on 12.15.06 6:49 AM
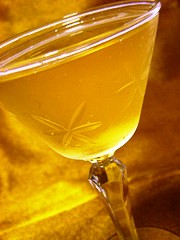 I’ve had the idea in my head for this drink for a while, but never got around to putting it together. For one thing, I was at a bit of a loss as to how to get all the various flavors I wanted to combine into alcoholic form.
I wanted to create a drink that offered the lushness of pears with the punch of ginger — a classic combo, to be sure. Although I knew I could make (or buy) ginger-flavored simple syrup, I was worried that so much sugar would push the cocktail in a sicky-sweet direction… definitely not my style, especially as I wanted to build off the flavors of my favorite Belle de Brillet pear cognac.
I consulted with my friend Sean — who knows his way around infusions — but he confessed that his sole attempt at ginger vodka turned out rather blah.
While browsing the baking aisle in the last few weeks before Christmas, an idea struck me: What about infusing vodka with candied ginger, rather than fresh? The flavor’s already concentrated by the candying process, and the little bit of sugar coating the chunks would dilute in the final mix.
So, I took about 3 ounces of candied ginger chunks, and covered them with a cup of vodka in a lidded jar. After the first day, I was worried — the ginger smelled like pine-scented kitchen cleaner, and the vodka tasted sharp and acid. Ugh. I set the jar aside, and resolved to try another route, after the holidays.
The next morning, I shook the jar, mostly out of idleness. And what do you know: As I rattled the ginger against the glass, I noticed dark, syrupy threads diluting into the vodka. Hm! A quick taste test showed we were definitely making progress. By yesterday morning — 3 days after starting the infusion — the mixture actually tasted like something you’d want to drink.
Last night, I decided to try a test run: Belle de Brillet and candied-ginger vodka stirred with ice, then strained into a tasting glass. Both the pear and the ginger seemed overpowering… but what about that bottle of bubbly in the fridge? I poured the mixed liquors into a small cocktail glass, and topped them with a float of the sparkling wine. Success! The dryness and effervessence neatly cut the sugar and the strong flavors, making for a lovely cocktail with a hint of sweetness and a kick of spice.
The Gilded Pear
1-1/2 oz. Belle de Brillet pear-cognac
1 ounce candied-ginger vodka
sparkling wine
Stir the cognac and the ginger vodka in a bar glass with ice; then strain into a small cocktail glass. Top with the sparkling wine.
Drink of the Week, preserving & infusing, recipes, wine & bubbly
10 Comments »


Posted by Anita on 08.02.06 8:23 AM
 In addition to selling her luscious marmalades, conserves and fruit butters at the San Francisco Ferry Plaza Farmers Market on Saturday mornings, June Taylor now also opens her warehouse/kitchen for retail sales on Fridays, and on select weekend days for classes.
I took a class back in late winter that featured three-fruit marmalade, which I loved. Last weekend, I followed up with June’s summer preserves class, which focused on peaches and nectarines; we made a preserve with “Summer Sweet” white peaches. Was it good? Let’s just say the jar I brought home is already gone — it was the most gorgeous rose color.
The classes are pricey ($125) but you go home with a good understanding of how to create your own preserves, plus a jar of the goodies that you and your classmates make in class under June’s direction. And you’ll never balk at paying $9 a jar again after you see what goes into it.
June Taylor Company/The Still-Room
2207 4th Street
Berkeley, CA 94710
510.548.2236
Update 08.14.06: June’s classes got an endorsement today from Shuna at eggbeater.
classes, East Bay, farmers markets, preserving & infusing, shopping
2 Comments »


Posted by Anita on 07.09.06 6:18 PM
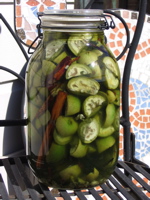 On Saturday, we harvested our first bergamot from the new tree. It was very light and probably overripe, so I didn’t think it’d be worth juicing it, and frankly we have plenty of bergamocello (from commercial bergamots) this year, so no need for the zest. I decided to make a quarter-batch of Lucy’s belle-mere’s Vin d’Orange with it.
I also found green walnuts at the Alemany Farmers Market, and bought 4 pounds of them to make nocino. It turned out I had a few extras, so I also made a small batch of Paula Wolfert’s vin de noix.
Now I just have to wait 40 days to find out how they come out.
drinks, farmers markets, preserving & infusing, recipes
Comments Off on Steeped in tradition


Posted by Anita on 04.22.06 1:44 PM
 I started out canning just to see how it was done, mostly dill pickles and pickled beets, and the occasional fruit preserve. Then I started pickling and preserving a few batches of produce from my friends’ gardens, as a way of helping them cope with overabundance — 2 years ago, in Seattle, it was a huge batch of brandied plums, and a batch of pickled serranos and carrots.
Last year was a tough year, as we were moving long distance from Seattle to SF, and living in a furnished apartment without access to our own kitchen gear. I did manage a very small batch of tomato-bourbon jam, and my first batch of nocino (green walnut liqueur).
Now I’m hooked: I preserve at home now mostly to get flavors I can’t get from retail products. And a lot of what I preserve ends up being holiday presents and hostess gifts.
I just took a marmalade class this past weekend with June Taylor, a local preserving maven — unfortunately, the citrus season is almost spent, but I may put up a batch of something simple, just so I don’t forget what I learned.
And we’re about to plant a bunch of fruit-bearing trees and plants with the express intention of preserving and infusing. It was fun coming up with all kinds of different plants, from trees to shrubs to vines to groundcover, that will give us something to eat. Most of our yard will be edible in one form or another.
As far as books go, I like Georgeanne Brennan’s The Glass Pantry, which you can get used online for about $2, and Linda Amendt’s Blue Ribbon Preserves. I just recently purchased Putting Food By, which many consider the bible of preserving, but I found the authors’ writing style horrifically pedantic… it set my teeth on edge and I slogged my way through it wondering what people see in this book. It is remarkably complete, so if you need a recipe for somethings really specific and unusual, it may be the only way to go (as ad-libbing in preserving is a definite no-no — you really want an expert to have sussed out all the biohazard stuff, and changing from one fruit or vegetable to another can throw that all out of whack).
cookbooks, drinks, preserving & infusing, recipes, Seattle
Comments Off on The joys of preserving


Posted by Anita on 09.27.05 6:11 PM
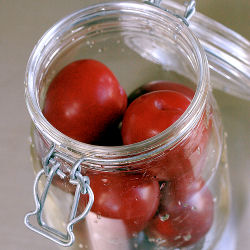 Last year, we used Italian-style prune-plums, as they’re abundant (to say the least) in our old Seattle neighborhood; we used to get giant bowls full from neighbors who begged and pleaded with us to take more. This year, we used more typical round plums — both red and black varieties — that came in our CSA produce box.
They’re good right away, but better after a couple of weeks. Honestly, the plums are fine — they make a great substitute for cherries in clafoutis — but the real draw is the plum-infused brandy cordial.
Leftover infused brandy is great in soda water or champagne, or over ice cream.
Madison Valley Brandied Plums
3 pounds plums
1-inch-long stick of cinnamon
2 cups sugar
1 cup water
1/4 tsp salt
2 cups brandy
Boil a stockpot of water as deep as the shoulder of your canning jar. (I use a 2-quart hinged-lidded jar for a full recipe — you can always portion into smaller jars for giving away once they’re done.)
Wash and stem plums. Prick several holes around stem ends. Pack plums into the canning jar. Quarter and pit remaining plums and re-pack, placing quartered/halved pieces in gaps that form between whole plums. Add cinnamon stick.
In a 2-quart saucepan, bring sugar, salt, and 1 cup water to a boil, then turn to low and simmer 10 minutes, stirring occasionally. Let cool for 10 minutes, then stir in brandy. Immediately pour liquid into jar up to 1/2 inch from the rim.
Partly close jar, leaving room for steam to escape, and place in boiling water for 5 minutes. Carefully remove jar with a jar-lifter or 2 sets of tongs, and close the lid. Cool to room temperature, then refrigerate.
preserving & infusing, recipes, Seattle
1 Comment »


 Making your own preserves may not exactly be the world’s simplest kitchen task. But if you limit yourself to a relatively small batch, and pick the right recipe — preferably one that avoids the canning process altogether — it can be a lot of fun. A lot more enjoyable than say, the back-breaking labor and knuckle-biting stress of processing 100 pounds of San Marzano tomatoes. (Details on that soon… promise.)
 Using a spatula or wooden spoon, push the liquid surrounding the seeds through the strainer as much as possible. (This is where much of the flavor hides, so don’t stint here.) When you’re left with a dryish mass of seeds, discard them and add the liquid in the bowl to the saucepan, along with any puree on the underside of the strainer.


 Sometimes, my palate is a live illustration of the law of unintended consequences. The combination of our


 It seems like


 I’ve had the idea in my head for this drink for a while, but never got around to putting it together. For one thing, I was at a bit of a loss as to how to get all the various flavors I wanted to combine into alcoholic form.
 On Saturday, we harvested our first bergamot from the new tree. It was very light and probably overripe, so I didn’t think it’d be worth juicing it, and frankly we have plenty of bergamocello (from commercial bergamots) this year, so no need for the zest. I decided to make a quarter-batch of
 Last year, we used Italian-style prune-plums, as they’re abundant (to say the least) in our old Seattle neighborhood; we used to get giant bowls full from neighbors who begged and pleaded with us to take more. This year, we used more typical round plums — both red and black varieties — that came in our CSA produce box.