Posted by Anita on 03.17.10 9:46 AM
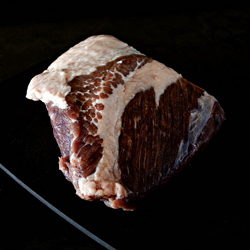 Every St. Patrick’s day we wonder: How did we let another year go by without making corned beef with all the trimmings? It’s simple, affordable, and delicious — too good to save for the holiday celebrations.
Sure, you can buy your corned beef at the market, but if you’d rather make your own using local meat and ingredients you can trust, it’s not difficult to brine it yourself. All it takes is a few minutes of measuring, a week of waiting, and a bit of refrigerator space.
We’ve made a number of recipes over the years, but the one we keep coming back to is the simplest. Hugh Fearnley-Whittingstall’s corned beef recipe serves 10 in its original ratios, so we’ve scaled it down to a more manageable size. If you do end up with extra meat, you’re in luck: In my book, corned-beef hash and Reubens are right up in leftovers heaven alongside the meatloaf sandwich.
Many recipes call for curing salt, but its only purpose is to maintain the pink-red color of the meat; it doesn’t serve any preservative purpose in corned beef, so we usually leave it out. (In charcuterie, it’s a necessary ingredient, but here it’s just for looks.) If you prefer the traditional blush, add 2 tsp of pink curing salt — also known as sodium nitrite or Insta Cure #1 — to the brine.


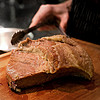
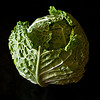

Corned Beef and Cabbage
– adapted from The River Cottage Meat Book
3 to 3-1/2 pounds well-marbled brisket
—
* for the brine:
2-1/2 quarts water
8oz demarara or light brown sugar
1-1/2 pounds coarse sea salt
1/2 tsp black peppercorns
1 tsp juniper berries
3 cloves
2 bay leaves
a sprig of thyme
—
* for cooking:
bouquet garni
1 carrot, chopped
1 onion, chopped
1 stalk celery, chopped
4-6 cloves garlic
—
* at the end:
3-5 large carrots, cut into large chunks
1 medium head cabbage, quartered, leaving core intact (or 4 small heads, halved)
5-10 potatoes, halved
2-3 turnips (optional), halved or quartered
Put all the brine ingredients in a medium saucepan and stir well over low heat until the sugar and salt dissolve. Bring to a boil, then remove from heat and let cool to room temperature.
Place your brisket in a large, non-metallic container (we use a large zip-top bag, but a deep casserole works well, too). Cover the meat with the cooled brine; weigh it down with a saucer or other non-reactive object if it floats (not necessary with the bag). Leave in the refrigerator for 5 to 7 days, turning every couple of days.
The day before you want to cook the corned beef, remove the brisket from the brine and soak it in cold water for 24 hours, changing the water at least once.
After the soak, place the brisket in soup pot with the bouquet garni, chopped vegetables, and garlic. Cover with fresh water and bring to a gentle simmer. Poach gently on top of the stove (or in a 275°F oven) until tender, about 3 to 3-1/2 hours. (A good test is to run a metal skewer through the meat; if it slides in easily, your brisket is done.) About 30 minutes before the brisket is done, add the remaining vegetables and simmer along with the meat.
Serve the hot corned beef cut into thick slices, along with the simmered vegetable chunks. (You can discard the smaller chopped vegetable bits in the broth.) Serve with fresh horseradish cream at the table.
 Farmers and food artisans who created the ingredients for this week’s meal:
Prather Ranch, MacDoel: brisket
Catalán Family Farm, Hollister: onion, celery
Dirty Girl Produce, Santa Cruz: carrots, cabbage
Little Organic Farm, Marin: potatoes
Iacopi, Half Moon Bay: garlic
Happy Girl Kitchen Co., Big Sur: prepared horseradish
Clover Organic, Petaluma: sour cream
…and our own homegrown bay and thyme
Exemptions: sugar, peppercorns, juniper berries, cloves
Dark Days challenge, holidays & occasions, locavore, meat
8 Comments »


Posted by Anita on 03.15.10 9:48 PM
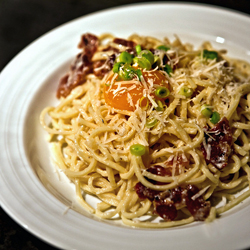 When you stock your larder with good quality staples, you’re able to create some amazing, quick weeknight meals. We’re lucky to live in a part of the country with access to a year-round supply of pastured eggs, a wide assortment of local artisan-made cheeses, and some truly excellent dry pasta, all from local sources.
We’re also blessed to have good friends with amazing food-crafting skills. A case in point: Our friend Sean made his own house-cured guanciale, and generously gifted us with a chunk of the most delicious pork product we’ve tasted in recent memory.
Although Laura’s birthday dinner last Sunday could technically have been my Dark Days Challenge dinner for the week, I felt pretty happy knowing we’d be able to throw together an all-local meal, even though I’d missed the weekly farmer’s market during my Seattle trip. With Sean’s home-cured guanciale in our stash, along with a fresh dozen eggs from last week’s Soul Food Farm CSA delivery, we were only a few ingredients away from one of Cameron’s favorite simple suppers.
Two things set this pasta carbonara recipe apart from the usual. First, we added slivered green garlic as a garnish, an embellishment that’s sure to be frowned upon by carbonara purists, but one we’ll keep making as long as Knoll Farms keeps supplying our weekly fix. The second innovation is simple but revelatory: Separating the eggs and stirring the hot pasta with just the whites, then topping each serving with its own yolk to be stirred in at the table. This small trick lends the sauce a silky quality, and adds a little flair to the proceedings — just the trick for making a quick midweek supper worthy of an ingredient that took weeks to make.

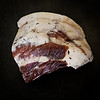


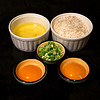
Spaghetti alla Carbonara
— adapted from Molto Italiano
1-1/2 T extra virgin olive oil
4oz guanciale (or pancetta)
1/2 pound spaghetti
3/4 cup freshly grated Parmesan
2 large eggs, separated
1 green garlic, white and light green parts, sliced thin
freshly ground black pepper
In a large pot, bring 4 quarts of well-salted water to a boil. Meanwhile, cut the gianciale into flat pieces, then combine the olive oil and guanciale in a large skillet over medium heat. Cook until the guanciale has rendered its fat, and becomes juicy and lightly browned. Remove the guanciale to a plate; remove the pan from the heat and set aside, reserving the fat in the pan.
Cook the spaghetti in the boiling water until just al dente. Add a good spoonful of the pasta water to the pan with the guanciale fat; drain the pasta. Return the guanciale to the pan, then add the pasta. Turn the heat back to medium-high and shake/toss the pasta with the water, fat, and guanciale for about a minute. Remove the pan from the heat and add 1/2 cup of the cheese, the egg whites, and freshly ground black pepper to taste; toss until thoroughly mixed (the egg whites will cook from the heat of the pasta).
Divide the pasta into nest-like piles between two warmed pasta bowls. Gently slide an egg yolk into the middle of each nest, then season with more pepper, the rest of the cheese, and the green garlic. Serve immediately, allowing each diner to stir the yolk into their own serving.
 Farmers and food artisans who created the ingredients for this week’s meal:
Guisto’s Vita-Grain, South San Francisco: sea salt
Bariani, Sacramento: olive oil
Hedonia, San Francisco: guanciale (from Prather pork jowls)
Eduardo’s, San Francisco: spaghetti
Spring Hill Cheese Company, Petaluma: dry Jack cheese
Soul Food Farm, Vacaville: eggs
Tairwa Knoll Farms, Brentwood: green garlic
exemptions: black pepper
Dark Days challenge, Italian, locavore, meat, other blogs
3 Comments »


Posted by Cameron on 03.07.10 2:40 PM

Tara, one of our very favorite meat-eating vegetarians, is on the San Francisco leg of her book tour. Happily for us, we’ve been able to see quite a bit of her when she’s not chatting with admirers, moderating debates between militant vegetarians and ethical carnivores, and seducing the crowds with her prose.
We got to talking about meat pies in general and pork pies in particular, and Tara told us about something that she had read in Danny, The Champion of the World, by Roald Dahl. The passage, which she first encountered when she was very young, describes a cold meat pie with hard-boiled eggs buried in it. The description struck a nerve, and it stayed with her into adulthood (apparently, she’s not the only one).
I love meat pies. Love, love, love, love. Cornish pasties, forfar bridies, empañadas, pot pies, steak pies, pork pies, you name it; there’s just something completely, utterly, and ineffably right about the combination of meat and pastry. Tara hadn’t even finished her story before Anita and I were waggling our eyebrows at each other and grinning like schoolkids. “So,” I asked the woman who has only recently begun to forge a relationship with meat after a lifetime of vegetarianism, “Want to make a pork pie?”
What fun! While Anita weighed and diced up the filling, Tara pulled together the hot-water crust with the quick, sure movements of a woman who has been cooking almost since she could walk. I caught the briefest of hesitations when she turned to the next step, but undaunted, she was quickly up to her forearms in a bowl of three different kinds of cold chopped pork. In honor of Mr. Dahl’s Danny, we buried hard-boiled eggs in the filling, and then I rolled out the top crust and crimped it in place.
This is my third time through this recipe, taken from The River Cottage Meat Book, and it’s a winner. The recipe doesn’t call for hard-boiled eggs, but they did just fine when we popped them in there.
The only downside of pork pie is that — because it’s best cold — you don’t get to taste it until the day after you’ve made it. We put together the pie on Sunday and it was our Dark Days Challenge dinner on Monday night, with pickles and mustard on the side.
Raised Pork Pie
– adapted from The River Cottage Meat Book
Filling
2# pork shoulder, cut into 1/2 inch cubes
8 oz fatty sausage meat (or ground pork belly)
8 oz salt pork, pancetta, or bacon, finely chopped
5 to 6 hard-boiled eggs, top and bottom trimmed so yolk shows through (optional)
12 sage leaves, finely chopped
leaves from 2 good sprigs of thyme, chopped
1 tsp salt
1 tsp coarsely ground black pepper
1 t ground white pepper
1/2 tsp ground mace
A good pinch of cayenne pepper
1 bay leaf
1 cup good pork stock that will set to jelly
Crust
7 T lard, diced
7 T butter, diced
Scant 1 cup water
4 1/4 c AP flour (approximately 630 g)
1-1/2 t salt
2 medium eggs, beaten, plus 1 egg, beaten, to glaze
Make the hot water crust pastry first. Put the lard , butter, and water in a saucepan and heat gently until melted; do not let it boil. Put the flour and salt in a mixing bowl. Make a hollow in the center and add the beaten eggs, stirring them gently around with a knife so they are half mixed with the flour. Pour in the melted fat and water and mix together to form a soft dough; add up to 3 1/2 T extra warm water if it is too dry. Knead gently, adding more flour if it is too sticky to handle. Wrap in plastic wrap and chill thoroughly (at least 1 hour).
For the filling, mix all the meats with the herbs, salt, and seasonings (except the bay leaf), so they are thoroughly combined.
Now assemble the pie. Preheat oven to 350 degrees. Cut off a generous quarter of the pastry and keep in the fridge, for the lid. On a floured surface, roll out the rest of the pastry into a 12 inch circle around 1/3 inch thick. Use this to line an 8 inch springform (or removable bottom) cake pan, pressing the pastry into the sides and flattening any overlap with your fingers. It should come 2-1/2 to 3 inches up the sides of the pan.
Fill with the seasoned pork mixture and push the bay leaf into the middle of it. (If you are adding eggs, lay down a thin layer of filling, place the eggs in a ring halfway between the center and the pie edge, and then add the rest of the filling around and covering the eggs.) Roll out the reserved piece of pastry into a circle about the size of the pan. Brush the edges of the lining pastry with a little beaten egg, and lay the pastry lid on top of the pie. crimp the edges together so they are sealed. Cut a 1/3-inch diameter hole in the center of the pastry lid.
Place the pie in the oven and bake for 30 minutes. reduce the temperature to 325 degrees and bake for a further 1-1/4 hours. If your top crust is concave instead of convex, a pool of juice and fat may form around the center hole during baking that you’ll want to remove with a turkey baster, or the crust may become soggy.
Remove the pie from the oven and carefully release the side of the pan. Brush the top and sides of the pie with beaten egg and cook for another 15 minutes to set the glaze. Take the pie out of the oven and allow to cool. The filling will have shrunk slightly, creating a cavity that is traditionally filled with jellied stock. When the pie is still a little warm, heat the jellied stock just until it’s pourable — not too hot! Carefully lift the edges of the center hold of the pastry with the tip of a knife, making sure you have good access to the cavity. Use a small funnel or, better still, a turkey baster to gently introduce the stock through the center hole. Tilt the pie from time to time to distribute the stock, then try and get a little more in. Stop when the stock begins to overflow from the hole. Leave the pie to cool, then put it in the fridge.
 Farmers and food artisans who created the ingredients for this week’s meal:
Shasta Valley Farm, Gazelle: pork loin and pork sausage
Boccalone, Oakland: pancetta
Prather Ranch, MacDoel: leaf lard
Soul Food Farm, Vacaville: eggs
Guisto’s Vita-Grain, South San Francisco: flour, sea salt
Spring Hill Cheese Company, Petaluma: butter
…and our own homemade pickles, and homegrown celery and carrots (for pork jelly); sage, bay, and thyme
exemptions: pepper, mace, cayenne
Dark Days challenge, locavore, meat, recipes
15 Comments »


Posted by Anita on 02.28.10 5:33 PM
 I used to work with a woman who brought in a sleeve of bagels, a tub of cream cheese, and a carton of orange juice every Monday. She parked them in the office fridge and then religiously ate the identical breakfast every morning, for weeks, months, years.
Just the memory of it makes me a bit twitchy, but also more than a little envious — think of how much time I could save if I could be content with monotony! But though I crave familiarity as much as the next person, I could never be one of those people who eats the same thing over and over, day in and day out. Heck, I can barely stand to repeat a dinner menu more than monthly.
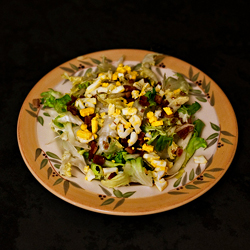
So you can imagine my surprise when I found myself craving — and then making — the same salad three times in two weeks. Originally, the recipe appealed because I found myself the proud owner of three heads of escarole, courtesy of our latest Mariquita Farm mystery vegetable box. I’d intended to use this broad-leafed chicory in a variety of recipes: in Zuni bread salad, in brothy Italian sausage soup, and sauteed simply and scattered with pine nuts. But once I’d tasted this salad, I couldn’t stop making it.
It bears more than a passing resemblance to salade lyonnaise — that heavenly mixture of pleasantly bitter frisée and thick lardons of bacon, crowned with a poached egg — but requires a lot less fuss. You can boil the eggs and fry the bacon hours ahead of time, then whip everything together when you’re ready to serve. And it’s interesting enough to hold its own, or sit happily alongside a simple main course like the roast chicken we made for this week’s Dark Days Challenge dinner.





Warm Escarole Salad
– adapted from Bon Appétit
1 small head of escarole, torn into bite-size pieces (about 4 cups)
1 large slice bacon
1T extra-virgin olive oil
1T balsamic vinegar
3T finely chopped shallot
1 hard-boiled egg, diced
Over medium heat, cook the bacon until just crisp. Remove to paper towels, reserving the bacon drippings in the skillet. Chop bacon and set aside.
In a small bowl, whisk olive oil and vinegar together. Reheat the bacon drippings in the skillet; add shallots and sauté until slightly softened but not browned. Add olive oil mixture and stir until heated through. Season to taste with salt and pepper.
Divide escarole between two plates, and drizzle warm vinaigrette over the top. Sprinkle with egg and bacon, and serve warm.
 Farmers and food artisans who created the ingredients for this week’s meal:
Mariquita Farm, Watsonville: escarole
Shasta Valley Farm, Gazelle (via Live Culture): bacon
Bariani, Sacramento: olive oil & vinegar
Dirty Girl Produce, Santa Cruz: shallot
Soul Food Farm, Vacaville: eggs and chicken
Guisto’s Vita-Grain, South San Francisco: sea salt
exemptions: black pepper
Dark Days challenge, locavore, recipes
4 Comments »


Posted by Anita on 02.22.10 12:12 PM
 I find it fascinating how some recipes languish in my clippings folder for months, years even, before I set my mind to trying them. It’s not that they don’t sound appealing — clearly they do, or I wouldn’t have bothered putting them aside — but maybe the moment’s not right, the ingredients aren’t at hand, the quantities are best saved for a party.
Not every recipe gathers dust, though. Some send me sprinting to the kitchen as soon as I read them. And our friends Michael and Jen’s deep-dish pizza is one that I absolutely had to try right away.
I saw the original version of the recipe on Jen’s blog, Last Night’s Dinner, almost a year ago. We made it ourselves fairly soon thereafter, and we liked it. But we’re rather set in our pizza-making ways here, generally leaning toward thin-crust Italian-style pies when we decide to go the home-pizzeria route. Seeing Jen’s photos of Mike’s latest tweaks to his deep-dish recipe reminded me that we have a giant stash of Italian sausage waiting in our freezer, and got me thinking how well it would complement a sauce made from last summer’s home-grown tomatoes for this week’s Dark Days Challenge meal.
We gave Mike’s new edition a try — actually two tries in one week, that’s how much we like it — and weren’t surprised that it’s even better than the original pie. I made a few tweaks to the crust to adjust it to our taste; unfortunately, these changes turn Mike’s relatively painless recipe into a process that’s less convenient for weeknight preparation, so you may very well prefer his streamlined version. I often like to make and rise my pizza dough after dinner on one night, then tackle the second rise on the next. If your schedule’s a little more compressed, you can quick-rise the dough — as Mike’s master recipe does — and the end result will still be very, very good.
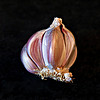




Deep-Dish Pizza
Adapted from Last Night’s Dinner, with crust tips from American Pie
– Crust
2 tsp active dry yeast
1 tsp sugar
1C warm water
3T unsalted butter, softened
1tsp table salt or 2tsp kosher salt
3C unbleached AP flour [15oz]
Grease a medium bowl with olive oil and set aside. In the bowl of a stand mixer fitted with a dough hook, combine the yeast, sugar, butter, and water; let sit 5 minutes or until frothy. Add the flour and salt, and combine at low speed. Increase speed to medium and mix until the dough pulls away from the sides of the bowl and crawls up the dough hook, about 1 minute. Add 1 to 2 tablespoons water if dough is dry; add 1 to 2 tablespoons flour if dough is wet. Continue to knead (in the mixer, or by hand) until dough is silky smooth and passes the windowpane test.
Form the dough into a ball and place in the oiled bowl, turning to coat all sides of the dough ball with oil. Cover with plastic wrap and let rise until it doubles in bulk, about an hour. Punch down, reshape, and let rise again (covered) in the refrigerator, at least 2 hours or overnight. Bring the dough back to room temperature 2 hours before you plan to roll it out. (You can also use the dough immediately after the first rise, or even let it complete the second rise at room temperature, but the texture and taste will be better if you proceed with the second, slower rise.)
– Sauce
1T extra-virgin olive oil
1 small onion, peeled and diced
2 cloves fresh garlic, peeled and sliced
2T shredded carrot
1-1/2 T chopped fresh thyme
a 28oz can of whole peeled tomatoes, crushed with your hands
1/4 C red wine or port
salt, to taste
In a medium saucepan, heat olive oil over medium heat. Add onion and a pinch of salt; sauté until soft and golden, then stir in garlic and cook until soft. Add carrot and thyme and continue cooking until the carrot is soft.
Add tomatoes and their juice, plus wine. Lower the heat and cook until the sauce is thick, about 30 minutes, seasoning to taste as you go.
– Finishing
1 recipe crust
1 recipe sauce
1/2 lb Italian sausage
2T olive oil
3/4 to 1 pound button mushrooms, quartered
8 oz mozzarella (if fresh, torn into 1-inch pieces; if drier, shredded — we like half and half)
1/2 cup freshly grated hard cheese (such as Dry Jack or Parmesan)
1/2 cup fresh basil or spinach leaves, chiffonade
Preheat the oven to 400°F.
Heat a 12-inch cast-iron skillet on the stove over medium heat. Add 1T olive oil and crumble Italian sausage into the skillet. Brown, adding more olive oil if needed, until cooked through. Using a slotted spoon, remove the sausage to a plate lined with paper towels, leaving the fat in the skillet. (If your sausage is on the fatty side, you might remove some of the fat, but be sure to leave the skillet well greased.)
While sausage is cooking, saute the mushrooms in a large skillet: Heat 1T olive oil over medium heat, then add the mushrooms and saute until they lose their liquid. Salt if desired, and set aside.
Pat or roll the room-temperature dough into a circle about 12 inches in diameter. Let rest for 5 minutes — this will help keep the crust from shrinking — then transfer it to the skillet. Press dough down into bottom of skillet and partway up the sides. Drizzle a little olive oil over the crust, then layer the sauce, sausage, mushrooms, and mozzarella. Bake on bottom rack of oven for 30 minutes. Start checking the pizza for doneness; you want the pizza crust to be golden brown, and the toppings to be just starting to brown. Remove pizza from oven and top with grated cheese and basil.
 Farmers and food artisans who created the ingredients for this week’s meal:
Spring Hill Cheese Company, Petaluma: butter
Guisto’s Vita-Grain, South San Francisco: sea salt, flour
Bariani, Sacramento: Olive oil
Catalán Family Farm, Hollister: onion
Iacopi, Half Moon Bay: garlic
Ottimino, Occidental: Rancho Bello Zinfandel (for sauce)
Shasta Valley Farm, Gazelle (via Live Culture): Mangalitsa Italian sausage
Far West Fungi, Moss Landing: button mushrooms
Belfiore Cheese Company, Berkeley: mozzarella
Vella Cheese, Sonoma: dry Jack cheese
Mariquita Farm, Watsonville: spinach
Anchor Brewing, San Francisco: beer
…and our own homegrown carrots, tomatoes, thyme
exemptions: yeast, sugar
Dark Days challenge, locavore, other blogs, recipes
7 Comments »


Posted by Anita on 02.15.10 10:45 PM
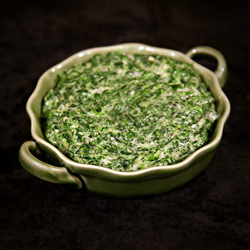 We hardly ever go out for big holidays like Valentine’s Day. It just seems so fraught, in so many ways. Somehow you always end up paying through the nose for a prix-fixe menu full of things that really aren’t what you’d want to order. And expectations are so high — not only because it’s everyone’s Special Night, but because, hey, you walked through fire to get that prime 8pm reservation — that there’s hardly any way a restaurant could rise to the occasion, much less impress.
So for as long as I can remember, we’ve chosen to stay in and cook ourselves a special meal. This year, we both decided we wanted a classic steakhouse dinner: A big, crisp salad with chunky bleu cheese dressing, a nice grilled ribeye big enough to share, a giant baked potato with all the fixins, a luscious ramekin of creamed spinach, and a special-occasion bottle of red wine.
With a little careful shopping, we managed to combine our romantic Valentine’s Day dinner for two with this week’s Dark Days Challenge meal — a wonderful match, if I do say so. Better still, we got to spend our evening cooking together, rather than circling endlessly looking for parking and jostling for a harried waiter’s attention.





Steakhouse-Style Creamed Spinach
– serves 2
10oz fresh spinach
3T butter (divided use)
3T all-purpose flour
2T diced onion
1 small bay leaf
1 whole clove
2 C whole milk
pinch of nutmeg
Blanch spinach in large pot of boiling, well-salted water just until tender. Drain, then cool the spinach in a bowl filled with ice water. Drain well, then roll up spinach in kitchen towel and squeeze out as much liquid as possible. Transfer spinach to food processor and chop.
Melt 2T butter in skillet over medium heat. Add flour and stir until light golden. Stir in onion, bay leaf, and clove. Whisk in milk, stirring until mixture boils and thickens, about 10 minutes. Reduce heat to low and simmer, whisking frequently, until sauce is very thick. Remove bay leaf and clove, and add a pinch of nutmeg.
Add spinach to warm sauce. Simmer over low heat until spinach is heated through, stirring often. When ready to serve, stir in remaining tablespoon of butter, and season to taste with salt and pepper.
 Farmers and food artisans who created the ingredients for this week’s meal:
Mariquita Farm, Watsonville: spinach
Spring Hill Cheese Company, Petaluma: butter
Guisto’s Vita-Grain, South San Francisco: sea salt, flour
Catalán Family Farm, Hollister: onion
Claravale Farm, Paicines: Raw milk
Little Organic Farm, Marin: potatoes
Clover Organic, Petaluma: sour cream
Prather Ranch, MacDoel: ribeye
Ottimino, Occidental: Rancho Bello Zinfandel
Star Route, Bolinas: Little Gem romaine lettuces
Point Reyes Farmstead Cheese, Pt. Reyes Station: Bleu cheese
…and our own homegrown bay and radishes
Exemptions: pepper, clove, nutmeg
Dark Days challenge, locavore, recipes
5 Comments »


Posted by Anita on 02.07.10 9:16 PM
 Yes, yes — soup again. I’d really hoped to have something better to share by the end of the week, but I’m still fighting the after-effects of a particularly nasty cold. Making dinner is doubly complicated: Not only do I not feel much like cooking, but I often have to trick myself into eating something I’m craving before my appetite disappears again.
Early last week, the only thing I could really get worked up about making was tortilla soup. We’re still at least a month away from local avocados at our farmers market, but I couldn’t imagine this classic soup without them. Sometimes it’s worth it, I rationalized, to make an exception for an ingredient that has no reasonable local alternative.
As luck would have it, Cameron found semi-local organic avocados at our co-op — California is better than Mexico, right? And we have plenty of local tomatoes in the pantry, so I didn’t have to venture too far off the local path to satisfy my sick-kid whims.




Sopa Azteca / Tortilla Soup
– adapted from Mexican Everyday
2 cups diced tomatoes in juice
2T ground pasilla or ancho chile
2T chicken fat (or mild vegetable oil)
3 garlic cloves, peeled
2 quarts chicken broth
1 large sprig epazote (optional)
2-1/2 cups cooked chicken, chopped or shredded
1 large ripe avocado, pitted, skinned, and cubed
6oz (about 1-1/2 cups) shredded mild cheese, such as asadero, Jack, etc.
6oz (about 4 cups) broken tortilla chips
1 large lime, cut into 6 wedges
Preheat the broiler. Drain the tomatoes, reserving the juice, and place on a parchment-lined rimmed cookie sheet. Broil the tomatoes until beginning to blacken; turn with a spatula and cook a little longer on the other side, until toasted and aromatic. Remove from oven and set aside.
Melt the chicken fat in a medium saucepan over medium-high heat. Add the onion and garlic and saute until softened. Add the ground chile and cook for another minute or two; be careful not to burn the chile — add water and/or adjust the heat if you smell it getting too hot. Remove the vegetables from the pan with a slotted spoon, leaving behind as much of the fat as possible, and transfer to the blender. Process until smooth, adding only as much of the tomato juice as you need to get a puree going.
Return the pan with the fat to medium-high heat. When hot, add the puree and stir constantly until the puree is thickened to a paste. Puree the roasted tomatoes and the reserved tomato juice, and add them to the pot along with the broth and the epazote. Bring the soup just to a boil, then reduce heat to medium-low and simmer for 15 minutes. Taste and season with salt. Add the chicken to the simmering broth and heat through.
Divide the avocado, cheese, and tortilla chips between four individual bowls. Serve the lime wedges separately at the table.
 Farmers and food artisans who created the ingredients for this week’s meal:
Tierra Vegetables, Santa Rosa: chile powder and garlic
Soul Food Farm, Vacaville: chicken
Spring Hill Cheese Company, Petaluma: Jack cheese
Primavera, Sonoma: Corn tortillas (for homemade tortilla strips)
Mariquita Farm, Watsonville: limes
…and our own home-canned chicken stock and tomatoes, and homegrown epazote
Exemption: avocado (California organic)
Dark Days challenge, locavore, Mexican, recipes
5 Comments »


Posted by Cameron on 01.31.10 8:57 PM
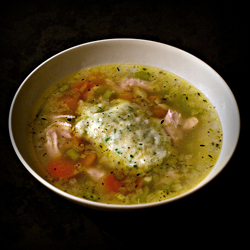 The display read 101°F when the digital thermometer beeped, which might have been okay if we were proofing yeast. But we were in the bedroom, not the kitchen — and the thermometer was under the tongue of my very achy, very sick wife. “You are not going to work,” I said. “And I am coming home early and making chicken soup.”
I don’t have an operatic range as a cook, but chicken soup is one of the dishes that I do well. I wish I could say that I follow a Secret Family Recipe steeped in a Romantic Patina of age and memory, written carefully in cursive on an index card that is Stained with Character and Creased with Use.
But the truth is that I found my chicken soup in a cookbook while we were living in Seattle, and I was first drawn to it by the fact that it had a gimmick: You start with a whole chicken and some vegetables, and end up two hours later with soup. The trick is accomplished by cutting the chicken (except for the breast) — bones and all — into very small pieces and sautéeing them before making a super-quick broth. It’s fast, it’s easy, it’s reliable, and it tastes fantastic.
I can modestly admit to having made a few small discoveries and tweaks to the basic recipe. The original calls for a 4-pound chicken, but I discovered that the larger the bird, the more tasty the soup. These days, we’re getting lovely little 3- to 4-pound birds from the Soul Food Farms CSA, so I add some feet, necks, and wings from the stock bag in the freezer to bring the total weight up to five pounds. I also cut my onions as finely as possible instead of the original medium dice, because I like them to melt into the soup.
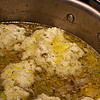
Finally, the original recipe calls for noodles, but I much prefer dumplings. I make a slightly wetter version of my standard biscuit dough and — when the soup is almost done — float globs of the dough on top, cover the pot with a lid, and steam for about 10 minutes.

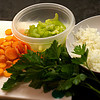


Hearty Chicken Soup
– adapted from The Perfect Recipe
3 T vegetable oil or chicken fat
2 medium onions, cut into small dice
1 whole chicken (about 5 lbs.; add extra necks and/or wings if your bird is smaller)
2 bay leaves
1 large carrot, sliced 1/4 inch thick
1 celery stalk, sliced 1/4 inch thick
1/2 teaspoon dried thyme leaves
1/4 cup minced fresh parsley leaves
Salt
Dumplings
– adapted from Joy of Cooking
1 3/4 cups all-purpose flour
1/2 tsp salt
3 tsp double-acting baking powder
6 T chilled butter
3/4 cup plus 1 T milk
Cut up the whole chicken as if you were going to cook it in parts, splitting the breast into two pieces, but keeping the meat on the bone. (Cooking for Engineers has a nice post on breaking down a chicken. Alton Brown also does a good tutorial, although he takes the breast meat off the bone.)
Set aside the breasts and use a cleaver or poultry shears to hack the rest of the chicken — including the back, neck, and feet if you have them — into 1- or 2-inch chunks. Cut through the bones!
Heat the oil or fat over medium-high heat in a large soup pot. Add half of the chopped onion and all of the chicken pieces except the breast. Sauté until the chicken is no longer pink (I like to see some brown on the chicken pieces, but that can be tough to do in a crowded pot. Be careful not to burn the onions!). Reduce heat to low, cover, and simmer until the chicken releases its juices, about 20 minutes. Increase the heat to high and add 2 quarts of cold water, along with the chicken breasts, 2 teaspoons of salt, and bay leaves. Bring to a simmer, then cover, reduce heat to low and barely simmer until chicken breast is cooked and the broth is rich and flavorful, about 20 minutes.
Skim the fat from the soup and reserve it, then remove chicken breast from the pot and set aside. Strain the broth into a large bowl and discard the rest of the chicken pieces and bones. When the breast is cool enough to handle, remove the skin, and then remove the meat from the bones, shredding it into bite-sized pieces. Discard the skin and bones.
Return the pot to medium-high heat. Add 2 to 4 tablespoons of the reserved chicken fat, the remaining onion, the carrot and the celery, and a pinch of salt. Sauté until softened, about 5 minutes. Add thyme, broth, and shredded chicken. Simmer until the vegetables are tender and the flavors meld, 10 to 15 minutes.
If you like pasta, you can add two cups of egg noodles and cook until tender. Taste the soup and correct the seasonings — it will almost certainly need more salt. However, be careful with the salt if you’re going to add dumplings, as most dumpling/biscuit dough has salt in it somewhere… and I wouldn’t do both dumplings and noodles.
To make the dumplings, put the flour, salt, and baking powder in a food processor and pulse until well mixed. Add the butter, cut into tablespoon-sized chunks. Pulse until thoroughly mixed. Add the milk and pulse until the dough comes together. Drop globs of dough from a spoon onto the surface of the soup. Cover and simmer until the dumplings are cooked through, approximately 10 minutes.
Sprinkle with the parsley and serve.
Farmers and food artisans who created the ingredients for this week’s meal: 
Spring Hill Cheese Company, Petaluma: butter
Soul Food Farm, Vacaville: chicken
Guisto’s Vita-Grain, South San Francisco: sea salt, flour
Catalán Family Farm, Hollister: onion, celery
Straus Creamery, Petaluma: milk
…and our own homegrown thyme, carrots, bay, and parsley
(Exemption: baking powder)
cookbooks, cooking, Dark Days challenge, locavore, recipes
8 Comments »


Posted by Anita on 01.25.10 6:27 PM
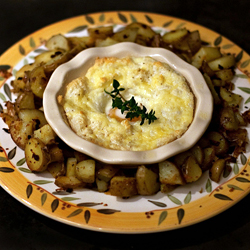 Failure may be too strong of a word.
In fact, I’m sure it is. On the other hand, saying “it tasted fine, but wasn’t really worth the effort” doesn’t make a very good headline. But it does neatly sum up this locavore household’s unanimous verdict on our Dark Days Challenge meal this week.
I’ve had Gourmet‘s recipe for Oeufs à la Cantalienne in my clippings for at least three years. The headnotes promise “the soft, yolky flavor of eggs Benedict but without all the hassle”, a notion that appealed to me as I tried to figure out a way to make midweek breakfast-for-dinner more exciting.
We’re pretty handy with eggs, but I think a novice cook especially might find this recipe — which entails buttering ramekins, separating eggs, keeping yolks intact, whipping egg whites, folding cheese, smoothing egg whites, and dolloping créme fraîche — at least as daunting as toasting muffins, poaching eggs, and whisking up a batch of Hollandaise.
When I went looking for other versions of this dish to see where I might have gone astray, I discovered that Molly – whose culinary opinion I trust — loved this recipe, and her photos of her friend Jimmy’s version look much more promising than ours did. I feel terrible casting aspersions based on a single lackluster effort, but on the other hand, this is not a recipe I’m anxious to try again. Faced with the same ingredients, next time out I’m just as likely to make a nice cheese-and-herb omelette to go with our home fries.
So here’s the recipe, in all of its glory. If you try it and like it (or even if you loathe it), I’d can’t wait to hear about it.
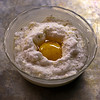




Oeufs à la Cantalienne (Baked Eggs with Cheese)
– adapted from Gourmet
Butter, for greasing ramekins
6 large eggs
1/4 tsp salt
1/4 tsp black pepper
1/8 tsp freshly grated nutmeg
1/8 tsp cream of tartar
3 oz grated Cantal or other mild, semi-firm cow’s cheese (we used Carmody)
6 T créme fraîche
1 T chopped fresh herbs
Adjust oven rack to middle position and preheat oven to 350°F. Butter six 8-oz ramekins.
Separate the eggs, carefully sliding whole, unbroken yolks into a small bowl of cold water and putting whites in a large bowl. Add salt, pepper, nutmeg, and cream of tartar to the egg whites. Using an electric mixer at medium-high speed, beat whites with until they just hold stiff peaks.
Gently fold half of cheese into the beaten whites, taking care not to deflate the mixture, then divide among ramekins. Smooth the top of the egg whites, then make an indentation in the center of each ramekin.
Using your fingers, carefully remove yolks from water one at a time and put a yolk in each indentation. Stir créme fraîche, and dollop 1 tablespoon on top of each yolk; sprinkle eggs with remaining cheese. Transfer ramekins to a rimmed cookie sheet.
Bake until whites are puffed and pale golden but yolks still jiggle slightly, 10 to 14 minutes. Sprinkle with herbs and serve immediately.
Farmers and food artisans who created the ingredients for this week’s meal: 
Spring Hill Cheese Company, Petaluma: butter
Soul Food Farm, Vacaville: eggs
Guisto’s Vita-Grain, South San Francisco: sea salt
Bellwether Farms, Sonoma: crème fraîche, Carmody cheese
Little Organic Farm, Marin: potatoes (for homefries)
Catalán Family Farm, Hollister: onion (for homefries)
…and our own homegrown thyme.
(Exemptions: black pepper, nutmeg, cream of tartar)
Dark Days challenge, locavore
2 Comments »


Posted by Anita on 01.18.10 6:23 AM
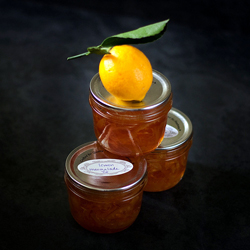 I don’t think anyone would be surprised to hear that I love to can. Most years, I get started on the preservation kick at the height cherry season (when I make my annual batch of cocktail garnishes), and don’t put away the canner until after the last tomato harvest. So when I heard about a new, year-round canning challenge — one that has participants putting up a different type of produce every month — I knew I had to jump on in and join Tigress’s Can Jam.
January’s Can Jam theme is citrus, a particularly apt topic here in the Bay Area where farmers markets and backyard trees are bursting with the best oranges, lemons, and grapefruits of the year. I always like canning with a friend to help share the work (and the resulting bounty), so I asked Laura from (not so) Urban Hennery if she’d like to can together when she visited San Francisco last weekend; she happily agreed. I flagged a bunch of citrus recipes in my favorite canning books, thinking I’d let Laura decide which sounded the most appealing. A girl after my own heart, she suggested that we make them all!
The first, a Meyer lemon curd, wasn’t technically eligible for the Can Jam, because it needs to be pressure canned to be shelf-stable. (The challenge requires all recipes to be suited to a standard boiling-water canner.) But we made it anyway, and oh am I glad we did. With the orange yolks from Laura’s hennery eggs — yes, she brought them down in her checked baggage! — and the deep yellow zest from Meyer lemons we bought from Hamada Farms, the end product turned an eye-searing yellow. If I saw a bottle of curd that yellow in the store, I’d walk away, thinking it must be filled with artificial everything.
Our second recipe — which used June Taylor‘s three-fruit marmalade as a starting point — featured a quadruple-dose of citrus: Moro blood oranges, lemons, golden grapefruit, and one giant bergamot from our backyard tree. We ended up with 9 half-pint jars of a deep crimson preserve, clear enough to see the different-shaped bits of peel suspended evenly throughout its jewel-like base. It’s pleasantly bitter, and (at least at this stage) you can pick out the flavor of each of the citrus varieties as you make your way through a spoonful… er, I mean, a slice of toast.
The last recipe turned out to be our hands-down favorite. Its simplicity — both of ingredients and of preparation — belies its gorgeous looks and uniquely delicious taste. Combining lemons, sugar, and water, this one’s good enough that Laura and I were already plotting how to get our hands on more Meyer lemons before the week was out.




Meyer Lemon Marmalade
– adapted from Catherine Plagemann’s Fine Preserving
3 perfect, very fresh Meyer lemons
1 more lemon, for juice
sugar (about 4 cups)
Sterilize canning jars and prepare lids according to manufacturer’s directions.
Peel the three lemons, removing just the yellow and none of the pith. Slice the peel into very fine, thin strips and set aside. Cut each peeled lemon in half, lengthwise. Remove as many seeds as possible plus the center strings. On a cutting board with a lip, slice the lemon halves, including the white rind, paper thin. Remove any remaining seeds. In a glass measure, combine the zest, lemon pulp, any juices from the pulp, and the juice of one more lemon. You should have about 1 cup of prepared lemon and juices.
 Cover the prepared lemon with about a cup of cold water; it should be just enough to submerge all of the lemon. Let soak for 3 hours, to soften the zest. After soaking, combine the soaked lemon and zest in a wide Dutch oven along with an equal amount of sugar by volume. Bring to a simmer over medium-high heat, and simmer (do not boil) until the marmalade jells.
Keep a close eye on the cooking marmalade. It will go from liquid to jelled more quickly than you would expect. Don’t go by eye in the pan; the mixture will still look much more wet than a typically set marmalade. Use the saucer test or watch for the liquid to sheet off the edge of a metal spoon.
Ladle into hot, sterilized half-pint jars, leaving 1/4-inch headspace. Wipe rims of jars with a damp, clean towel; adjust canning lids and process in a boiling-water canner for 5 minutes. Turn off the heat and leave processed jars in the canner for 5 minutes more, then remove and cool on a thick towel or a wire rack for 12 hours. When jars are completely cooled, check for proper seal. Remove rings from sealed jars, and put any unsealed jars in the refrigerator to use first.
If you can bear it, it’s best to let this marmalade cure for at least a week before eating, otherwise the zest is a bit tough.
Yields three 8oz jars
CanJam, locavore, preserving & infusing, recipes
15 Comments »


 Every St. Patrick’s day we wonder: How did we let another year go by without making corned beef with all the trimmings? It’s simple, affordable, and delicious — too good to save for the holiday celebrations.
 Farmers and food artisans who created the ingredients for this week’s meal:


 When you stock your larder with good quality staples, you’re able to create some amazing, quick weeknight meals. We’re lucky to live in a part of the country with access to a year-round supply of pastured eggs, a wide assortment of local artisan-made cheeses, and some truly excellent dry pasta, all from local sources.


 I don’t think anyone would be surprised to hear that I love to can. Most years, I get started on the preservation kick at the height cherry season (when I make my annual


