Posted by Anita on 05.21.11 11:06 AM
 Rhubarb when raw is so tough
And its leaves contain poisonous stuff,
– But when cleaned and de-soiled
– Dipped in sugar and boiled
Then the stalks are quite tasty enough.
– — The Rhubarb Compendium
—-
This month’s CanJam challenge — hosted by Toronto Tasting Notes — offers not one but two options for us to put up: Asparagus or rhubarb. Given that I’d used the former in last month’s project (the theme was herbs, and I made tarragon asparagus pickles), my path was clear.
I know that some of my friends (including both of the people who I consider my pie gurus) will disown me when I admit this, but I’m not generally a fan of rhubarb’s texture; I just can’t tolerate the usual sliminess. I love its tart fruitiness, so I’ve learned a trick or two for keeping it firm in desserts, but canning it in a water bath — the whole point of the CanJam — would undo all of those careful preparations.
But there are a few preserves, like flavored syrups, where the pulp of the fruit (or vegetable, in this case) is strained out, leaving just the juice and its flavor behind. Best of all, syrups are simple to preserve, and they’re a compact way to save the flavors of seasonal produce for enjoyment throughout the year. You can also freeze syrups, if — unlike me — you’ve got the space to safely stash a glass bottle.
You can use this flavored syrup any place a sweet-spicy-sour touch would be welcome, something as simple as brushing it onto a cake, or diluting it with sparkling water for a homemade soda. To my mind, its perfect use is making a pink variation on the venerable summer drink known as the Paloma (or even a virgin variation, sans tequila).


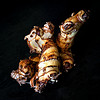
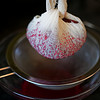
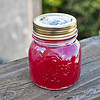
Rhubarb-Ginger Syrup
– makes 1 jar to keep, plus a little to use right away; can easily be doubled or tripled
1.5 cups white sugar
1 cup water
2 cups thick-sliced rhubarb stalks, leaves discarded
1 cup chopped ginger (no need to peel)
Prepare canner (or a saucepan deep enough to cover the jar by 3 inches), plus a small jam jar and its lid, according to the usual method; keep jar and lid hot until needed.
In a medium saucepan, bring the sugar and water to a simmer, stirring to dissolve. Add the rhubarb and ginger; return to a simmer, then reduce heat and let slowly bubble until the rhubarb is thoroughly soft. Remove from heat and let steep for 30 minutes. Meanwhile, line a metal strainer with cheesecloth, and place it over a heatproof bowl. (If you want crystal-clear syrup, use a muslin jelly bag and be prepared to wait for gravity to draw the liquid into the bowl; be careful not to press or squeeze the solids.)
Bring the strained syrup back to a simmer, then pour into the heated jar, leaving 1/2-inch headspace. Wipe rim and center lid on jar. Screw band to fingertip-tight.
Place jar in canner. Bring to a boil; process covered for 5 minutes. Remove lid, wait 5 minutes, then remove jar. Cool, check seal, and store in a cool, dark place.
—-
 La Paloma Rosada
1.5 to 2oz blanco tequila
1/2 oz rhubarb-ginger syrup
grapefruit bitters
tart grapefruit soda (such as Izze Grapefruit)
Fill a Collins glass with ice. Add the tequila and syrup; fill with grapefruit soda, and give a good stir. Top the ice with a few shakes of bitters.
CanJam, drinks, preserving & infusing, recipes
13 Comments »


Posted by Anita on 12.19.10 3:24 PM
 Hungry Mother always seemed like the kind of place we’d enjoy: local and sustainable sourcing, Southern-inspired food, and a great cocktail list. It’s been on our short list of places to try for years, and on a recent trip to Boston, we finally made it there.
It’s easy to win hearts and minds with menu items like pimento cheese, bourbon-braised pork shoulder, and cheddar grits with house-made tasso, not to mention winning cocktails like the No. 43 (rye, tawny port, maple syrup, and bitters). But amid all of these decadent treats was a salad that sounded so tame that I actually felt a little boring for ordering it.
The buttermilk-chive dressing was what pushed me over the edge, luring me away from other options. That, I suppose, and the pecans, which I love but can’t get locally here in Northern California. What I hadn’t expected was that the farro — a humble, wheat-like grain — would be the star of the show, bringing a nutty depth to the dish that made it substantial enough to stand up to the rich main courses that followed.
I woke up the next morning dreaming about this salad, knowing I wanted to recreate it when we got home. I realized that with a few adjustments — walnuts for pecans, wheatberries for farro — I could make it entirely from locally sourced ingredients, making it a perfect candidate for our first Dark Days Eat Local Challenge meal of the winter.
Don’t be put off by the little ingredient-prep recipes that go into this dish; none are particularly difficult or time-consuming, and all of the parts can be stored for future use. And be sure that you’re picking through and using tender frisée leaves, as more-mature ones are unpleasantly grassy and spiky.

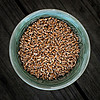
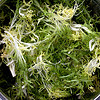

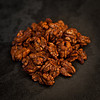
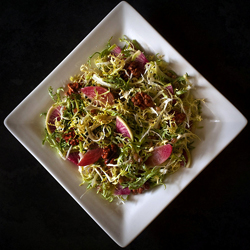
Autumn Salad with Wheatberries
– inspired by Hungry Mother; serves 2
6 cups loosely packed tender frisée leaves
3 to 4T buttermilk dressing
1/2 cup cooked wheatberries
roasted beet wedges equal to 1 large beet (or 2 to 3 small beets)
1 watermelon radish (or 3 to 5 small radishes), sliced thinly and cut into quarter-rounds
6 to 8 sweet-savory walnut halves
Toss all ingredients together, and serve on chilled shallow bowls or rimmed plates.
– Roasted Beets
Preheat the oven to 375°F. Scrub the beets and trim off tops and tails. Place in a baking dish about as deep as the beets are tall, and add 1/4 inch of water. Cover tightly with foil and bake until the beets are barely tender through (run a toothpick or cake tester through the center), about 45 minutes for large beets, 20 to 30 minutes for smaller ones. Remove from the oven and let sit, covered, for 5 more minutes. Uncover the beets, rub off the skin, and trim the tops and tails again. Cut into wedges and season to taste with salt. If not using within an hour or so, toss with a bit of olive oil; they will keep a few days in the fridge if well covered.
– Cooked Wheatberries
Note: For the 1/2 cup cooked wheatberries the salad requires, you’ll need 1/4 cup uncooked. However, it’s hard to cook less than 1 cup at a time. Leftovers freeze well, and they make a great base for grain salads, or in place of cooked rice in soups.
Soak the wheatberries overnight, or for at least a few hours. Bring the berries to a boil in a large saucepan of salted water. Reduce heat to a slow simmer and cook until tender but not blown out, about 2 hours. (Depending on freshness, wheat variety, and soaking time, this can take as little as 45 minutes or up to 3 hours.) When cooked, drain the berries and set aside.
– Buttermilk-Green Garlic Dressing
1/4 cup sour cream or plain yogurt
1/4 cup buttermilk
1/4 cup mayonnaise
1 tsp Champagne vinegar (or white-wine vinegar)
1 stalk green garlic, minced, or 1T minced chives
coarse-ground black pepper, to taste
salt, to taste
Mix all ingredients in a bowl, and refrigerate for at least an hour.
– Sweet-Savory Walnuts or Pecans
adapted from Epicurious
2 tsp sugar
1/4 tsp salt
1/4 tsp paprika
1T egg white
1 cup walnut or pecan halves (about 1/4 pound)
Preheat oven to 350°F. Lightly oil a rimmed cookie sheet, or line it with parchment.
Whisk together sugar, salt, and paprika in a small bowl. Whisk egg white in a medium bowl until frothy, then stir in nuts, mixing until evenly coated with egg white. Add sugar mixture and toss to coat.
Spread the nuts in the pan in a single layer. Bake, stirring once or twice, until dry and well toasted, about 20 minutes. Loosen nuts from pan, then cool completely.
Farmers and food artisans who created the ingredients for this week’s meal:
Massa Organics, Hamilton City: wheatberries
Star Route, Bolinas: frisée
Mariquita Farm, Watsonville: beets, watermelon radish
Glashoff, Fairfield: walnuts
Clover Organic, Petaluma: buttermilk, yogurt
Eatwell Farm, Dixon: Pastured eggs (for mayo)
Bariani, Sacramento: olive oil
Katz, Napa: Champagne vinegar
Knoll Farms, Brentwood: green garlic
Guisto’s Vita-Grain, South San Francisco: sea salt
Range Brothers, Capay Valley: pork chop
Exemptions: sugar, peppercorns
Boston, Dark Days challenge, locavore, recipes
13 Comments »


Posted by Anita on 12.10.10 1:48 PM
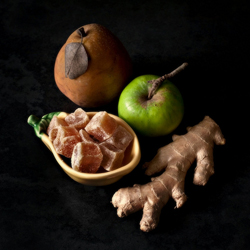 This month’s final CanJam theme — dried fruit — had me kicking the walls. I don’t really enjoy the texture of dried fruit, and given that it’s already preserved, it seems redundant to can it.
But our hostess, Tigress, set naysayers’ minds at easy, allowing that even a small amount of the featured ingredient was acceptable. With that in mind, I went back through the files to find a way to preserve a seasonal fresh ingredient with just a touch of dried-fruit flavor.
While looking through recipes for last month’s pome-fest, my runner-up candidate sounded so good that I put it aside, knowing I’d want to make it some other time. Calling for both dried currants and candied ginger, it definitely fits the bill for this month’s CanJam.
If you, like me, can’t get enough of ginger’s piquant flair, you’ll be happy to see that this recipe calls for ginger in three forms — fresh, candied, and ground — for a triple dose of sweet heat. The original recipe-writer calls this preserve a chutney, which it technically is, given the onions and vinegar. But the resulting texture is more like a savory compote or chunky pear-applesauce hybrid than the sticky, almost-chewy texture most of us associate with chutney. It’s delicious, of course (just look at that ingredients list… how could it not be?), but I felt a name-change was in order.
If your pears are thin-skinned and relatively free of blemishes, you may want to leave them unpeeled, to give the preserve a more rustic texture and color. If you prefer a smoother, lighter-colored preserve, do peel them. Note too that I’ve halved the original recipe’s quantities, so doubling the quantities below to make a 6-jar batch should be trouble-free.


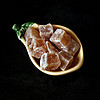

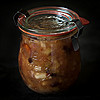
Savory Triple-Ginger Pear Preserves
– adapted from Chow Times
3 cups peeled (if desired), cored, and diced pears, mixed varieties
1/2 cup peeled, cored, and diced tart apple
1/2 cup chopped onion
1/4 cup minced candied ginger
1/4 cup seedless sultanas or dried currants
5oz apple cider vinegar
1/2 cup raw sugar or light brown sugar
1 clove garlic, sliced
1/2 T grated fresh ginger
1/4 tsp salt
1/4 tsp red pepper flakes
1/4 tsp ground dried ginger
Prepare canner, lids, and three 8-oz jars according to the usual method; keep jars hot until needed.
In a medium saucepan, heat all ingredients except pears, and bring to a boil over medium-high heat. Reduce heat to medium-low and simmer uncovered for 30 minutes, stirring occasionally.
Add the pears and bring to a boil over medium-high heat. Reduce heat again to medium-low and simmer until the desired consistency is reached, about 30 minutes depending on simmering speed, stirring occasionally at first but more often as you come closer to the end. The mixture is ready when it easily holds together and no excess liquid appears when parted with a spoon.
Using a stainless-steel canning funnel, ladle preserves into hot jars, leaving 1/2-inch headspace. Remove air bubbles using a plastic knife or chopstick, and readjust headspace as needed. Wipe jar rims with a clean, damp cloth and center the hot lids on jars. Screw band to fingertip-tight.
Place jars in canner, ensuring they are completely submerged. Bring to a boil and process covered for 10 minutes. Remove canner lid; wait 5 minutes, then remove jars. Cool thoroughly, check for seals, and store in a cool, dark place for up to a year.
CanJam, locavore, preserving & infusing, recipes
6 Comments »


Posted by Anita on 11.19.10 12:41 PM
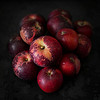
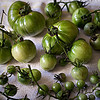
 The Cosmic Cowgirl picked pomes — that’s apples, pears, and quinces to you and me — as the theme of this month’s CanJam. As I dreamed of making mebrillo, pear butter, and dozens of other suitable recipes, I sat at the window overlooking our garden, still groaning with tomatoes. They’re ripening slowly now, and it’s time to plant our winter crops; a green tomato preserve was what I really needed to tackle before I gave any thought to recreational canning.
As interesting as it seemed, we never made much of a dent in the green tomato jam I made around this time last year. It’s finally dawning on me that our capacity for sweet preserves is fairly limited, so I knew this year’s project would have to be savory. I hit the books, and came up with a few ideas for pickles and such, but nothing that really made me want to pull out the canner. Then, while browsing on a completely unrelated topic, I serendipitously encountered a recipe for a green tomato and apple chutney. Voilá — two birds, one stone.
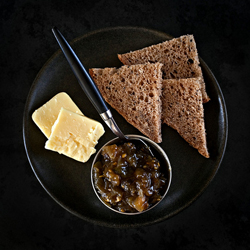
I love a nice, tidy solution, but experience has taught me that my effort’s wasted if I preserve something nobody wants to eat. That won’t be a problem this year: Barely an hour after the lids went ‘ping!’, we’d already polished off one small jar of this piquant preserve, slathered on good brown bread with hunks of aged cheddar to make a thoroughly autumnal ploughman’s lunch. A few days later, we cracked another jar and gobbled up a good share of it alongside an Indian curry. And just last night, Cameron sighed as he wondered aloud how well it would go alongside the Thanksgiving turkey, in place of the cranberry sauce that neither of us really craves.
I find myself in the odd position of hoping that the weather turns cold soon, so that the last of this year’s tomatoes won’t ripen and I’ll have another batch of green fruit to transform into chutney. If not, at least I know what I’ll be doing with the tail end of next year’s crop.
English-style Spicy Green Tomato & Apple Chutney
– adapted from BBC Food
1/2 oz fresh ginger (about a 2-inch piece)
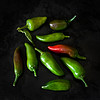
8 to 10 fresh hot chiles, halved but not seeded
4 pounds green tomatoes, chopped
1 pound apples, peeled, cored, and chopped
4 oz golden raisins, chopped, or dried currants (or half of each)
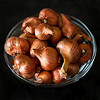
1 pound shallots, chopped
2 tsp kosher salt
1 pound raw sugar or light brown sugar
1 pint malt vinegar
Prepare canner, lids, and nine 8-oz jars according to the usual method; keep jars hot until needed.
Bruise the ginger and tie it into a muslin jelly bag with the chiles.
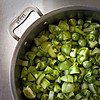
Place jelly bag and the remaining ingredients in a Dutch oven or other large, wide pan. Bring to a boil, stirring until the sugar has dissolved, and simmer until the desired consistency is reached, about an hour depending on simmering speed, stirring occasionally at first but more often as you come closer to the end.
Remove the jelly bag. Using a stainless-steel canning funnel, ladle the chutney into hot jars, leaving 1/2-inch headspace. Remove air bubbles using a plastic knife or chopstick, and readjust headspace as needed. Wipe jar rims with a clean, damp cloth and center the hot lids on jars. Screw band to fingertip-tight.
Place jars in canner, ensuring they are completely submerged. Bring to a boil and process covered for 15 minutes. Remove canner lid; wait 5 minutes, then remove jars. Cool thoroughly, check for seals, and store in a cool, dark place for up to a year.
CanJam, locavore, preserving & infusing, recipes
9 Comments »


Posted by Anita on 10.22.10 5:27 PM
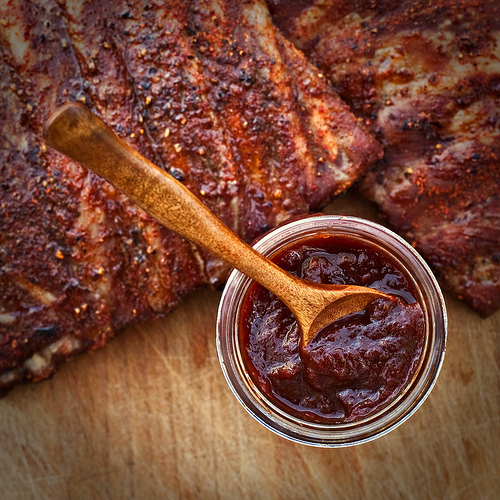 Kaela at Local Kitchen chose chile peppers as this month’s CanJam theme. Salsa seems the obvious choice, but having just put up an amazing fire-roasted salsa negra less than two months ago, our pantry was already fixed for Mexican sauces. We don’t use many pickled peppers, and we’ve already got many jars of our favorite tomatillo-based salsa verde put up for the fall.
Flipping through my favorite canning books, I found a few likely candidates in the hot-pepper genre. But too many of these used chiles as a grace note rather than an actual main ingredient — and I wanted the chiles’ flavor to play a starring role. In the end, our bountiful supply of (finally!) ripe tomatoes tipped the scales toward this barbecue sauce; finding fresh Fresno chiles in our Mariquita Farm mystery box clinched it.
Unlike the sorts of fancy regional-style barbecue sauces I like to make for most of the meats that come out of our smoker, this recipe yields a spicy variation on straight-up all-American BBQ sauce. Cameron described it as “like the stuff you’d get out of a bottle, but really really good.” And he’s right; there’s a familiar tangy sweetness, intensified by the slow burn that comes from a triple dose of chile — fresh, dried, and ground.


 Ancho Chile Barbecue Sauce
– adapted from Blue Ribbon Preserves
4 quarts peeled, cored, and chopped ripe tomatoes
2 cups chopped onion
1-1/2 cups seeded, de-ribbed, and chopped red bell peppers
1 cup chopped celery
4 fresh hot red chile peppers, such as Fresnos, seeded and finely chopped
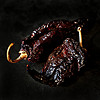
2 to 4 dried ancho chile peppers, stemmed and seeded
3 cloves garlic, minced
8 whole black peppercorns
1-1/4 cups firmly packed dark brown sugar
1 cup red wine vinegar
1/2 cup barley malt syrup (or dark corn syrup)
2 tsp kosher salt
2 tsp dry mustard
1 tsp hot red pepper sauce (Tabasco-style)
1/2 tsp ground ancho or red chile, or to taste
Prepare canner, lids, and seven 8-oz jars according to the usual method; keep jars hot until needed.
Toast the dried chiles in a skillet, pressing down gently to flatten and soften, just until they become pliable and fragrant.
Combine the tomatoes, onions, bell peppers, celery, fresh chiles, toasted dried chiles, and garlic in a large, wide Dutch oven. Bring the mixture to a boil over medium heat, stirring to prevent scorching. Reduce heat and simmer until the vegetables are soft and the tomatoes broken down, about 30 minutes, stirring frequently. Remove the pan from the heat.
Press the mixture through a food mill or a sieve — don’t use a blender or food processor here, because you don’t want to introduce air into the mixture. Return the sauce to the pan and simmer, stirring occasionally, until the mixture is reduced by half and will mound up gently on a spoon, about 45 minutes to an hour.
Tie the peppercorns in a spice bag or tea infusion ball, and add it to the mixture in the pan. Add the brown sugar, wine vinegar, malt syrup, salt, paprika, mustard, hot sauce, and ground red chile to the tomato mixture, stirring well after each addition. Simmer gently for 1-1/2 hours, or until the mixture is the consistency of ketchup. You will need to stir more frequently as the sauce thickens, to prevent scorching. Remove the pan from the heat and discard the spice bag. Taste and add additional ground red chile if desired.
Using a stainless-steel canning funnel, ladle the sauce into hot jars, leaving 1/2-inch headspace. Remove air bubbles using a plastic knife or chopstick, and readjust headspace as needed. Wipe jar rims with a clean, damp cloth and center the hot lids on jars. Screw band to fingertip-tight.
Place jars in canner, ensuring they are completely submerged. Bring to a boil and process covered for 15 minutes. Remove canner lid; wait 5 minutes, then remove jars. Cool, check for seals, and store in a cool, dark place for up to a year.
CanJam, preserving & infusing
6 Comments »


Posted by Anita on 09.17.10 10:57 PM
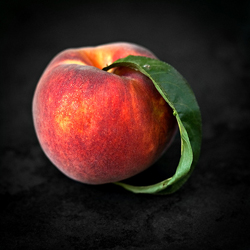 I have a great story to tell you about the peach preserves I made for this month’s CanJam — the theme of which is stone fruit — hosted by The Hip Girl’s Guide to Homemaking. But work has managed to sap every last ounce of my attention this week, and it’s already 11pm. Making matters worse, the hard-and-fast deadline for the CanJam roundup means this post must go up no later than midnight tonight. Time, it seems, is not on my side.
So you’ll just have to trust me when I say that the peaches we bought — the deep, aromatic, and complex-flavored ‘Oh Henry’ variety from Woodleaf Farm — were so damned perfect that we couldn’t bear to embellish them with the fancy ingredients we had originally planned to use. Instead, we turned to a formula that I learned years ago from preserves maven June Taylor, a simple recipe that lets the taste of the fruit shine.
We also wanted to preserve the deep blush of the peaches, so we didn’t peel our fruit before jamming. And truthfully, unless your peaches have problem skin, we recommend just giving them a quick rinse in cool water and drying them with a towel. Peeling is a pain in the neck, and you won’t notice the difference in the final preserve.

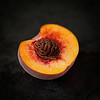
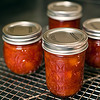
Perfectly Simple Peach Preserves
– adapted from June Taylor
 3 pounds pitted ripe peaches
– rinsed, dried, and cut into bite-sized pieces
10 oz white sugar*
2-1/2 T lemon juice
1 T orange zest
4 8-oz canning jars and lids
Prepare canner, lids, and jars according to the usual method; keep jars hot until needed.
Toss together the ingredients in a non-reactive bowl and let sit, covered, overnight to allow the peaches to soften and release their juices.
Transfer the macerated fruit and juices into a heavy, wide stainless-steel pot, and bring to a boil, stirring as necessary. After the mixture comes to a boil, reduce heat to maintain a steady simmer; stir frequently to distribute the mixture and prevent burning.
Actual cooking time will vary depending on the fruit’s moisture level and the speed of your simmer. Most batches are done at between 20 and 25 minutes; you don’t want to simmer longer than 30 minutes or the sugars will begin to caramelize.
As the mixture approaches a sauce-like consistency, stir constantly to prevent scorching. To test for proper gel, use the saucer test or watch for the liquid to sheet off the edge of a metal spoon.
When the preserves have reached the proper set, remove from the heat. Working quickly, ladle into hot prepared jars, leaving 1/4-inch headspace. Remove air bubbles and adjust headspace as needed. Wipe rims and center lids on jars; screw band to fingertip-tight.
Place jars in canner, ensuring they are completely submerged. Bring to a boil and process jars for 10 minutes with the canner lid on. When time is complete, remove canner lid and turn off heat; wait 5 minutes, then remove jars. Cool, check for seals, and store in a cool, dark place for up to 6 months.
—
* Sugar can and should be adjusted depending on the fruit’s level of sweetness and your own taste. The sweetest fruit will require a ratio of 5.5 pounds of prepared fruit to 1 pound of sugar; the least-sweet fruit will be closer to 4:1.
CanJam, locavore, preserving & infusing, recipes
7 Comments »


Posted by Anita on 08.20.10 6:06 PM
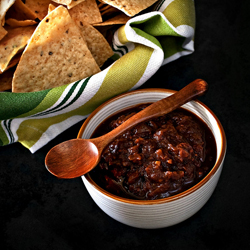 When life gives you lemons, as the saying goes, make lemonade. When life — or, in this case, a distracted farmer — gives you under-ripe tomatoes, make salsa.
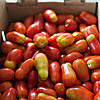
I’d ordered 40 pounds of San Marzano tomatoes from my favorite farm, planning to use some for my contribution to this month’s CanJam — hosted by What Julia Ate — and to pressure-can the rest for this winter’s cooking.
But when I got home and opened the crates, my heart sunk. I’d gotten two whole cases of tomatoes that ranged from rock-hard-green to just-barely-red, with the vast majority in the not-really-ripe category.
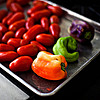
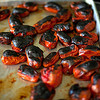
Already up to my ears in green-tomato jam from last season’s garden, I really didn’t want to go that route again. Happily, I remembered — no doubt from some wise Rick Bayless recipe — that the judicious application of heat helps less-than-perfect tomatoes become something better than they ought to be. Roasting tomatoes under a broiler gives them a soft, smoky sweetness, making them the perfect base for sauces and salsas.
The most appealing canner-ready recipe I found for roasted tomato salsa calls for a mix of dried chipotles and cascabel chiles. Having neither on hand, I opted for a mix of locally grown guajillos and some chilhuacles de oaxaca left over from a mole-making adventure. (Although you shouldn’t generally tinker with canning recipes, this kind of one-to-one substitution is fine, so long as the ingredients have the same acidity and moisture levels as the ones they’re replacing.)
The resulting salsa is a mix of bright acidity and smoky complexity, garlicky and rich with chile flavor. It’s definitely the best tomato salsa I’ve ever canned, and a great change from our usual tomatillo salsa. And although I seriously hope I’m never confronted with another case of under-ripe tomatoes, at least I now know exactly what to do with them.
Fire-Roasted Salsa Negra
– adapted from the Ball Complete Book of Home Preserving
Makes eight 8-oz jars or four pint jars
 24 dried chile peppers, such as chipotle, guajillo, ancho, etc.
2 cups hot water
3 pounds ripe plum tomatoes
2 large mild to medium-hot green chiles, such as Anaheims (or bell peppers, if you prefer)
2 small onions
1 head garlic, broken into cloves but not peeled
2 tsp white sugar
1 tsp salt
1 cup white vinegar
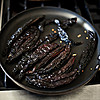
Preheat your broiler. Meanwhile, toast the dried chiles in a large, dry skillet over medium heat, about 30 seconds per side, until they are softened and fragrant. Transfer softened chiles to a heatproof bowl and cover with the hot water, weighing down with a saucer or small plate to keep chiles submerged. Soak the chiles for 15 minutes.
Working in batches, transfer soaked chiles and some of their soaking liquid to a blender; puree until smooth. Taste the puree; if you find it bitter, press the puree through a mesh strainer or sieve with a wooden spoon. Continue pressing and scraping until you’re left with a dry lump of seeds and bits of skin with no flesh attached.
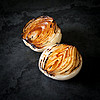
Meanwhile, roast the tomatoes, peppers, onions, and garlic under the preheated broiler, turning to roast all sides. When the tomatoes and peppers are blistered, blackened, and softened, and the onions and garlic skins are blackened in spots, remove them from the broiler; this usually takes anywhere from 10 to 20 minutes, depending on the age of your vegetables and the strength of your broiler. The garlic will likely need to come out before other vegetables are done, so keep tongs handy.
Set tomatoes, onions, and garlic aside to cool. Place the peppers in a paper bag and roll the top closed tightly; set aside. Peel and chop all of the vegetables as they become cool enough to handle.
Prepare canner, lids, and jars according to the usual method; keep jars hot until needed.
In a large, stainless-steel saucepan, combine reserved chile puree, chopped roasted vegetables, sugar, salt, and vinegar. Bring to a boil over medium-high heat, stirring constantly. Reduce heat and simmer, stirring frequently, until slightly thickened, about 15 minutes.
Ladle hot salsa into hot jars, leaving 1/2-inch headspace. Remove air bubbles and adjust headspace as needed. Wipe rims and center lids on jars; screw band to fingertip-tight.
Place jars in canner, ensuring they are completely submerged. Bring to a boil and process 8-ounce jars for 15 minutes and pint jars for 20 minutes with the canner lid on. When time is complete, remove canner lid and turn off heat; wait 5 minutes, then remove jars. Cool, check for seals, and store in a cool, dark place for up to a year.
CanJam, locavore, preserving & infusing
20 Comments »


Posted by Anita on 07.23.10 8:13 PM
 I’ve always wanted to make real kosher dill pickles, the kind that our grandparents might have bought from a barrel at their local dry-goods shop. Like sauerkraut or kimchee, these pickles get their sourness entirely from the fermentation process rather than the vinegar found in many pickle recipes.
With the crazy spring weather we had this year, it’s still rather early here for cucumbers, but the CanJam challenge — hosted by Gloria at Laundry Etc. — waits for no woman. The biggest cukes in our garden are barely longer than my thumb, and though I’d dearly love to make cornichons, we don’t yet have enough yet to fill even a single jar.
Persian and Asian cucumbers are abundant at the Ferry Plaza market already, but search as we might, we came up empty for pickling varieties like Kirby from any farm-direct sources. After scouring our local co-op grocery and more than one Whole Foods for just-ripe, unblemished specimens, we managed to scrounge up enough suitable cukes to make a small batch of kosher-style dills.
Right from the start, they smelled amazing, giving off a heady whiff of garlic atop the earthy tang of dill. But alas, something was amiss; the brine never clouded as it should have, to indicate the all-important presence of friendly bacteria. Apparently, the fermentation process never took off at all. After two weeks, our would-be pickles were merely over-salty cucumbers, fit only for the compost pile.
Staring down the CanJam deadline, I knew I didn’t have time for a replacement fermented batch before time ran out. My usual dill pickle recipe is reliable, good, and quick — a simple cold-pack, vinegar-brined thing — but nothing special. In the spirit of stretching a little, I hit the books before heading out to hunt down yet another armload of cucumbers.
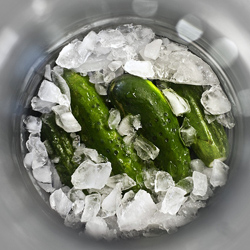
I found a compromise recipe of sorts, neither a fermentation nor a one-step pickle. My interest was piqued by method I’d never seen before: The cucumbers soak for 12 hours in a superchilled mixture of ice, water, and salt — a step that many sources say keeps the pickles crisp, even after processing in a boiling water bath. Although I’d discovered the recipe in a chapter titled “2-day Vegetable Pickles”, I realized that I could shave some much-needed time if I popped them in the icy brine before breakfast and processed the jars just before bedtime.
They may not be the fermented pickle of my dreams, but they’re pretty fabulous. The crisp spears offer a strong hit of garlic and a less-aggressive acidity than your typical homemade dills. Once our own cucumbers come in, I’m game to try another batch of the real fermented deal. But for now, I’m perfectly happy with my not-quite-kosher dills.
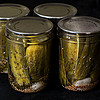
Ice-Brined Garlic Dill Pickles
– from the Ball Complete Book of Home Preserving
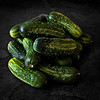
 8 lbs pickling cucumbers, gently washed & ends trimmed
16 cups crushed ice
1-1/4 cups pickling salt, divided use
12 cups water, divided use
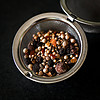
2T pickling spice
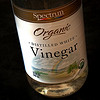
6 cups white vinegar
1/4 cup sugar
7 tsp yellow mustard seeds
10-1/2 fresh dill heads or 7T dill seeds (we used 7 sprigs fresh dill)
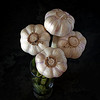
7 large (or 14 small) cloves garlic
– Day 1 (or early morning)
In a large clean crock (or tall ceramic, glass, or stainless steel bowl), layer the cucumbers and the ice.
In a large glass or stainless steel bowl, dissolve 1/2 cup of the pickling salt in 4 cups of the water. Pour over the cucumbers, adding enough cold water to cover the cucumbers, as needed. Place a large, clean inverted plate on top of the cucumbers and weigh down with two or three quart jars filled with water (and capped). Refrigerate or let stand in a very cool place for at least 12 hours, but no longer than 18 hours.
– Day 2 (or late evening)
Prepare canner, lids, and 7 pint jars according to the usual method; keep jars hot until needed.
Tie pickling spice in a square of cheesecloth (or use a tea-infusing ball).
In a large stainless steel saucepan, combine remaining 8 cups water, vinegar, remaining 3/4 cup pickling salt, sugar, and spice packet. Bring to a boil over medium-high heat, stirring to dissolve sugar and salt. Reduce heat, cover, and boil gently for 15 minutes, until spices have infused the liquid.
Transfer cucumbers to a colander placed over a sink and drain. Rinse with cool running water and drain thoroughly. Place dill and a garlic clove in each jar. Pack cucumbers into jars to within a generous 1/2 inch of the rim. Add 1 tsp mustard seed to each jar.
Using a stainless-steel canning funnel, pour hot pickling liquid into hot jars, leaving 1/2-inch headspace. Wipe rims and center lids on jars. Screw band to fingertip-tight.
Place jars in canner, ensuring they are completely submerged. Bring to a boil and process covered for 10 minutes. Remove canner lid; wait 5 minutes, then remove jars. Cool, check for seals, and store in a cool, dark place for up to a year.
CanJam, preserving & infusing, recipes
11 Comments »


Posted by Anita on 06.25.10 3:08 PM
 Growing up in Southern California, no summer was complete without boysenberry-flavored treats like boysenberry pie, boysenberry ice-cream topping, and even boysenberry pancake syrup. Popularized by Walter Knott at his Buena Park farmstand — years before Knott’s Berry Farm morphed into Southern California’s second-fiddle amusement park — this blackberry-raspberry hybrid boasts large fruit and a tart-yet-sweet taste that brings together the best qualities of both its parents.
Sadly for us in Northern California, the boysenberries of my youth are highly perishable; they don’t travel well, and they need to be eaten or preserved within a day of being picked. I’ve only found them once locally, and their mushy texture and under-ripe flavor didn’t match up to my childhood memories. On our recent Los Angeles vacation, I nearly cried with nostalgia when I found a box of boysenberries at the Hollywood Farmers Market; I took them back to our vacation house and greedily popped them in my mouth like bonbons, knowing full well that they might be the only boysenberries I’d taste for a long, long time.
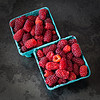
But boysenberries are just one of many varieties of blackberry-raspberry hybrids, and a number of their close cousins — including olallieberries, loganberries, and tayberries — grow well and abundantly here. Of the three, my favorite are the tayberries: large-ish berries with a heady, floral aroma that highlights their Rosaceae family ties to roses and plums. Less seed-riddled than raspberries, but more complex-tasting than domesticated blackberries, tayberries may well have stolen my heart away from the boysenberries of days past. (Absence may make the heart grow fonder, but a girl has her limits.)
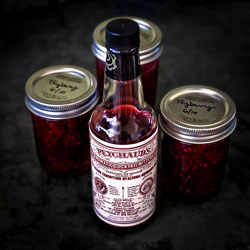
Anxious to preserve some of that mysterious tayberry flavor, I decided to make them the star of our entry for this month’s Berries/Cherries CanJam, hosted by Well Preserved. Tayberries’ spicy undertones and deep ruby-red color reminded me of the bottle of Peychaud’s bitters in our home bar, and the floral notes of both ingredients mix and mingle to make one heck of a summer preserve. Our first three-jar batch was so craveworthy, I made a beeline for the berry stand the very next weekend to make a few more jars.

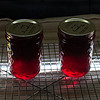

Tayberry-Peychaud Preserves
– adaped from Blue Ribbon Preserves
7 cups whole, firm tayberries
6-1/2 cups sugar
1/2 tsp unsalted butter
3oz liquid pectin
2T Peychaud’s bitters
Prepare canner, lids, and seven 8-oz jars according to the usual method; keep jars hot until needed.
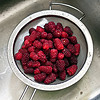
Gently rinse the berries, and drain well. (If berry seeds trouble you, you may want to mash half of the berries through a sieve.) Alternately layer the berries and half the sugar in an 8-quart pan; let stand for 30 minutes.
Gradually heat the berry mixture over medium-low heat until most of the sugar is dissolved, stirring to prevent sticking. Add the remaining sugar, a cup at a time, stirring between each cup. Heat until the sugar is completely dissolved, then stir in the butter.
 Bring the mixture to a rolling boil over medium-high heat, stirring constantly. Stir in the pectin, return the mixture to the rolling boil, again stirring constantly. Boil while you stir for 1 minute. Remove the pan from the heat, and skim off any foam. Set aside for 5 minutes to help prevent floating fruit. Gently stir in the bitters and distribute the fruit.
Using a stainless-steel canning funnel, ladle preserves into hot jars, leaving 1/4-inch headspace. Wipe rims and center lids on jars. Screw band to fingertip-tight.
Place jars in canner, ensuring they are completely submerged. Bring to a boil and process covered for 10 minutes. Remove canner lid; wait 5 minutes, then remove jars. Cool, check for seals, and store in a cool, dark place for up to a year.
CanJam, preserving & infusing, recipes
11 Comments »


Posted by Anita on 05.31.10 11:05 PM
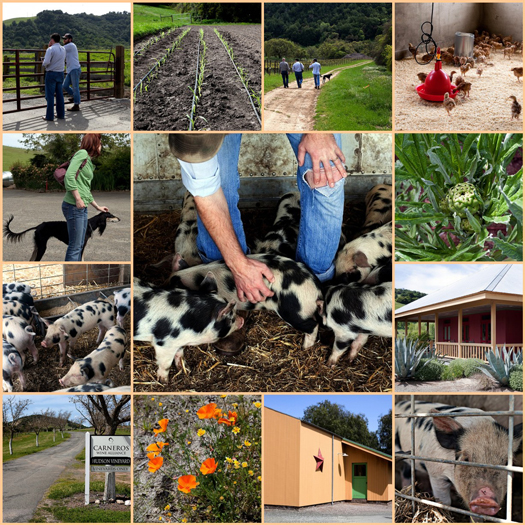
Last month, our friend Morgan Weber — who runs Revival Meats in Houston — came to town to talk shop with his Bay Area cohorts. He visited a who’s-who list of our local charcuterie shops and sustainable butchers, hitting up Fatted Calf, Boccalone, Bi-Rite Market, Prather Ranch, and a number of other carnivore havens. I don’t want to put words in anyone’s mouth, but I think it’s safe to say that one of the highlights of his trip was the Saturday afternoon spent at Hudson Ranch, a trip Morgan generously invited us to share.
Ranch manager Scott Boggs escorted us around Hudson’s spread, showing us both their hog and poultry sites, as well as their CSA vegetable farm. Hudson is primary known as a winery — their wines are cult favorites — but Scott came on board 2007 specifically to manage the edibles at Hudson Ranch. A veteran of The French Laundry’s garden operation as well as its kitchen, Scott brings true farm-to-table experience to the ranch; he understands what chefs want and need to see coming through the kitchen door.
We started our tour near the ranch offices, just off the main Carneros Highway. Our first stop — as Morgan was in town specifically to see them — was a pen full of dalmatian-spotted piglets, a litter born from an Old Spots sow mated to a boar of wilder heritage. Anyone with lingering doubts about how ethical meat can be would have been happy to see what we saw: A spacious, shaded pen with lots of room for piglets to play and plenty of room for their mama to move around (though she kept her snout in the trough during our whole visit), plus a view across to a beautiful lake and rolling hills beyond.
Down the road a piece, we got to peek in on a gaggle of chicks: babies in their boxes, and adolescents in their indoor roosts. By now, some of these birds are out on pasture, scratching away and fattening up for Chez Panisse and other local tables. A little further away, we trekked down a winding dirt road to check in on the CSA fields, where the first corn and tomato seedlings were already reaching for the sun.
We’re lucky that we were already eating lots of Hudson Ranch-raised food, even before we had any idea who they were. Hudson Ranch supplies Fatted Calf with some of their pork and poultry. (They also sell chickens and game hens to many restaurants you’d recognize.) The pig from Cameron’s birthday pig-roast last year was a Hudson, as were two of our last three Thanksgiving turkeys. Hudson also makes an award-winning olive oil, and they stock the produce shop at the Oxbow Public Market in Napa, in addition to supplying their CSA members’ weekly produce boxes.
One of my new year’s resolutions for 2010 was to eat more food grown by people we know. It wasn’t just born from a desire to eat more local food — we’re pretty much doing that all the time, now — but out of the realization that the closer we are to the source of our meals, the more satisfying they are for us. Even before last year, when we had the pleasure of picking our own tomatoes at Mariquita Farm, we were well acquainted with Julia, our Thursday night “casual CSA” farmer. And of course we had the privilege of helping Alexis and Eric after their devastating fire at Soul Food Farm, where our CSA chickens and eggs start out. We’ve toured Marin Sun Farms with Dave Evans, and seen where much of our beef, chicken, and pastured eggs come from.
Every time we open a quart jar of tomatoes, I’m reminded of the drive we took down to Watsonville and the morning we spent picking the very ripest Beefsteaks. When we enjoy a perfect omelette, a crisp roast chicken, or a plate of freshly dug new potatoes, we take a certain pride in knowing where it the ingredients came from, and in doing right by the food and the farmers who grew it. It may seem corny, but when we take a particularly delicious bite of food, we often thank the farmers, the ones who bring our daily feasts. I’m glad we can add Scott and his beautiful ranch to our roster of farmers we know.
Hudson Ranch
5398 Carneros Highway
Napa, California 94559
(by appointment only)
707-255-1455
http://www.hudsonia.com/hudson-ranch.html
@HudsonRanch on Twitter
—–
FTC disclaimers:
Morgan and Stacey Weber are friends of many years; Revival Meats is an editing client.
Hudson Ranch sent us a bottle of olive oil earlier this year as part of a media promotion.
farms & farmers, Napa & Sonoma
3 Comments »


 Rhubarb when raw is so tough
 La Paloma Rosada


 Ancho Chile Barbecue Sauce


 3 pounds pitted ripe peaches
 When life gives you lemons, as the saying goes, make lemonade. When life — or, in this case, a distracted farmer — gives you under-ripe tomatoes, make salsa.


 24 dried chile peppers, such as chipotle, guajillo, ancho, etc.


