Posted by Anita on 03.29.10 8:19 AM
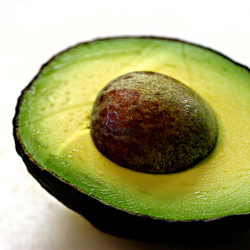 The first glimmers of spring are showing up at the farmers market, just as we’re on the home stretch of the Dark Days Challenge, and boy are we excited. Not so much for the strawberries; they’re still white in the center, and I’ll happily wait until they’re fully ripe. But we’re gorging ourselves on the new, tender asparagus, and we’re definitely making up for lost time in the avocado department.
We put up jars of salsa last summer to help get us through the bleak winter months — without tomatillos, tomatoes, or chile peppers, Mexican food becomes downright impossible. But avocados defy preserving, and even on those rare occasions when we break down and buy an out-of-season avocado or two (sometimes it’s a guacamole emergency, I tell ya!) we always remember why it pays to wait. The watery, wan specimens that make their way here from Mexico or Chile just can’t compare with Will’s buttery, nutty avocados. So we wait. And wait. And wait. Rather impatiently, I might add. It’s one of the few winter deprivations that actually makes me cranky.
And so this week, we celebrated the avocado’s return to our kitchen with a big mess of tacos. It’s another one of those shopping-not-cooking recipes: Once you’ve got all the ingredients on hand, it’s a little bit of chopping, and a whole lot of gobbling. And should you have any leftovers, I can vouch that this filling, along with perhaps a little cheese and a soft-scrambled egg or two, makes an exceptional breakfast taco.


Chorizo-Potato-Mushroom Tacos
– adapted from Mexico One Plate at a Time
2 medium waxy potatoes (about 1/2 pound)
1/2 pound Mexican chorizo
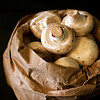
1/4 to 1/2 pound mushrooms, any variety, sliced
1 small white onion, diced
1/2 cup or more tomatillo salsa (homemade or store-bought)
1 ripe avocado
6 to 8 fresh tortillas
Cube the potatoes and simmer in a pot of salted water until tender; drain and set aside in a medium bowl.
Saute the chorizo and onion in a wide skillet over medium heat until the sausage is cooked through. Using a slotted spoon, remove the sausage and onions to the bowl with the potatoes, leaving the rendered fat in the pan. Add the mushrooms to the pan and saute until softened and beginning to brown. Return the potatoes and chorizo-onion mixture to the pan and cook until the potatoes begin to brown.
Meanwhile, thoroughly mash the avocado in a bowl, then add the tomatillo salsa. Add more salsa until the mixture is like a sauce. Season with salt as needed.
Warm the tortillas in a skillet or griddle, or by running them over an open flame. Wrap them in a towel as you go, to keep them warm for the table. When tortillas are all warmed, move the taco filling to a serving bowl, and bring to the table with the avocado salsa and the warm tortillas. Let each person build their own tacos at the table with a scoop of the filling and a drizzle of the salsa in the middle of each tortilla.
 Farmers and food artisans who created the ingredients for this week’s meal:
Little Organic Farm, Marin: potatoes
Fatted Calf, Napa: chorizo
Far West Fungi, Moss Landing: mushrooms
Catalán Family Farm, Hollister: onion
Will’s Avocados, Soledad: Avocados
La Palma Mexicatessen, San Francisco: fresh tortillas
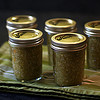
…and our own home-preserved tomatillo salsa
Dark Days challenge, locavore, meat, Mexican, recipes
6 Comments »


Posted by Anita on 03.19.10 11:06 PM
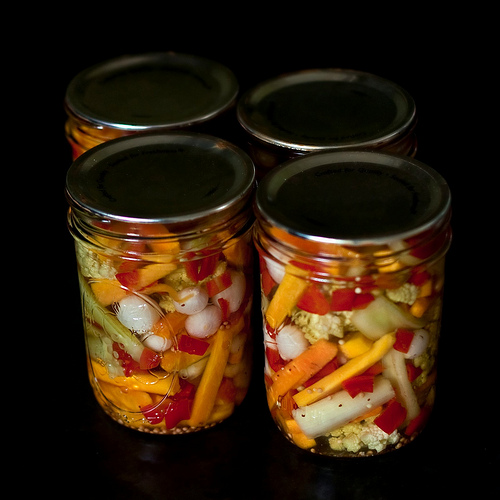 Trying to plan a suitable entry for this month’s CanJam — the theme is alliums — left us a little perplexed. It’s not that we haven’t been known to preserve onions: I’m a big fan of the bright-pink Yucatecan pickled onions served with cochinita pibil, and Cameron has a special fondness for English-style pub onions.
But because we prefer them very crisp, we usually make both of these recipes as refrigerator pickles. (Processing seals the jars and kills any lingering toxins, but it also cooks whatever’s in the jar.) Neither of us really cares for sweet condiments with our savory dishes, so onion jams were out.
Then it occurred to me: Giardiniera.
Now, strictly speaking, onions are just one of this Italian-style pickle’s many components, but the little devils take an ungodly amount of time to prep, way more than all of the other parts combined. First you have to slice off the hair-like root end, but oh-so-carefully so as to not dislodge the onion’s layers from one another. Then you have to peel each tiny onion — no mean feat when natural sugars keep papery skins adhered firmly to outer layers of the onion’s flesh — without cutting them in half or otherwise mangling them.
It’s a labor of love, I tell you, but it’s all worth it when you open up that first jar and taste. The onions are integral part of giardiniera, the linchpin of its piquant flavor.
Giardiniera means “gardener” in Italian, the implication being that this hodgepodge of different vegetables would be a great way to preserve the bounty of an active kitchen plot. But its traditional components — red peppers, carrots, celery, onions, and cauliflower — are never simultaneously seen in abundance in any garden I’ve ever known. Even in Italy, I think you’d be hard-pressed to find red peppers and cauliflower in the same patch. (I did a little research on how this seasonal impossibility got its start, and came up empty; if anyone knows how these ingredients ended up in a single pickle, I’d love to hear!)
Other than the peppers, though, we’re able to get everything we need from our own garden, or nearby farmers, even in late winter. In place of the bell peppers, I used a bunch of skin-on piquillo peppers I’d stashed in the freezer last summer, but added them to the mixture just before portioning the cooked vegetables into the jars, to avoid softening them any further. Their texture wasn’t so hot, but they’re mostly there for color, anyway. Next year, I might just — shhh! — buy an imported pepper or two.



Giardiniera (Italian-style Pickled Vegetables)
— adapted from Sunset Canning, Freezing, and Drying
1/2 pound carrots*
1/2 pound celery*
2 red bell peppers
1 large cauliflower or romanesco
1 pound small white pearl onions
1 cup pickling salt
2 quarts white vinegar
1/4 cup mustard seed
2T celery seed
1 small dried hot pepper
1-1/2 cups sugar
Peel carrots, then cut into 1-1/2-inch by 1/4-inch sticks; you should have about 4 cups*. Remove strings from the celery, then cut into into 1-1/2-inch by 1/2-inch planks; you should have about 3 cups*. Stem and seed the peppers peppers, then cut into wide strips. Break the cauliflower into florets; trim the stems. Carefully peel the onions, leaving the root intact. Try not to swear.
In a very large bowl, dissolve the pickling salt in 4 quarts cold water. Add the vegetables to the brine, and refrigerate for 12 to 18 hours. Drain the vegetables, rinse in cold water, and drain again.
Prepare canner, lids, and 6 pint jars according to the usual method.
 Combine the vinegar, mustard seed, celery seed, chili pepper, and sugar in a 6-quart stainless or enamel pan. Bring to a boil and continue to cook for 3 minutes. Add the vegetables, reduce heat to low, and cook for a few minutes until the vegetables just begin to soften. Remove from heat and discard the chili.
Using a funnel, pack vegetables into hot jars up to just shy of 1/2 inch of the rim. Ladle hot pickling liquid to cover vegetables, leaving 1/2-inch headspace.
Remove air bubbles and adjust headspace; wipe rims and apply lids and rings.
Place jars in canner, ensuring they are completely submerged. Bring to a boil and process covered for 5 minutes. Remove canner lid; wait 5 minutes, then remove jars. Cool, check for seals, and store in a cool, dark place for up to a year.
—
* Note: After reading comments from a friend and long-time reader, I suspect that my weight-to-volume measurements are incorrect here. Please see this comment and this follow-up.
CanJam, Italian, locavore, preserving & infusing
10 Comments »


Posted by Anita on 03.17.10 9:46 AM
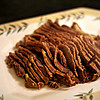
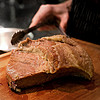
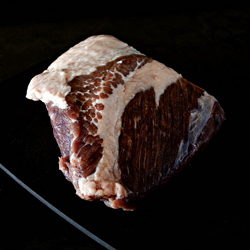 Every St. Patrick’s day we wonder: How did we let another year go by without making corned beef with all the trimmings? It’s simple, affordable, and delicious — too good to save for the holiday celebrations.
Sure, you can buy your corned beef at the market, but if you’d rather make your own using local meat and ingredients you can trust, it’s not difficult to brine it yourself. All it takes is a few minutes of measuring, a week of waiting, and a bit of refrigerator space.
We’ve made a number of recipes over the years, but the one we keep coming back to is the simplest. Hugh Fearnley-Whittingstall’s corned beef recipe serves 10 in its original ratios, so we’ve scaled it down to a more manageable size. If you do end up with extra meat, you’re in luck: In my book, corned-beef hash and Reubens are right up in leftovers heaven alongside the meatloaf sandwich.
Many recipes call for curing salt, but its only purpose is to maintain the pink-red color of the meat; it doesn’t serve any preservative purpose in corned beef, so we usually leave it out. (In charcuterie, it’s a necessary ingredient, but here it’s just for looks.) If you prefer the traditional blush, add 2 tsp of pink curing salt — also known as sodium nitrite or Insta Cure #1 — to the brine.


Corned Beef and Cabbage
– adapted from The River Cottage Meat Book
3 to 3-1/2 pounds well-marbled brisket
—
* for the brine:
2-1/2 quarts water
8oz demarara or light brown sugar
1-1/2 pounds coarse sea salt
1/2 tsp black peppercorns
1 tsp juniper berries
3 cloves
2 bay leaves
a sprig of thyme
—
* for cooking:
bouquet garni
1 carrot, chopped
1 onion, chopped
1 stalk celery, chopped
4-6 cloves garlic
—
* at the end:
3-5 large carrots, cut into large chunks
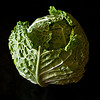
1 medium head cabbage, quartered, leaving core intact (or 4 small heads, halved)
5-10 potatoes, halved
2-3 turnips (optional), halved or quartered
Put all the brine ingredients in a medium saucepan and stir well over low heat until the sugar and salt dissolve. Bring to a boil, then remove from heat and let cool to room temperature.
Place your brisket in a large, non-metallic container (we use a large zip-top bag, but a deep casserole works well, too). Cover the meat with the cooled brine; weigh it down with a saucer or other non-reactive object if it floats (not necessary with the bag). Leave in the refrigerator for 5 to 7 days, turning every couple of days.
The day before you want to cook the corned beef, remove the brisket from the brine and soak it in cold water for 24 hours, changing the water at least once.
After the soak, place the brisket in soup pot with the bouquet garni, chopped vegetables, and garlic. Cover with fresh water and bring to a gentle simmer. Poach gently on top of the stove (or in a 275°F oven) until tender, about 3 to 3-1/2 hours. (A good test is to run a metal skewer through the meat; if it slides in easily, your brisket is done.) About 30 minutes before the brisket is done, add the remaining vegetables and simmer along with the meat.
Serve the hot corned beef cut into thick slices, along with the simmered vegetable chunks. (You can discard the smaller chopped vegetable bits in the broth.) Serve with fresh horseradish cream at the table.
 Farmers and food artisans who created the ingredients for this week’s meal:
Prather Ranch, MacDoel: brisket
Catalán Family Farm, Hollister: onion, celery
Dirty Girl Produce, Santa Cruz: carrots, cabbage
Little Organic Farm, Marin: potatoes
Iacopi, Half Moon Bay: garlic
Happy Girl Kitchen Co., Big Sur: prepared horseradish
Clover Organic, Petaluma: sour cream
…and our own homegrown bay and thyme
Exemptions: sugar, peppercorns, juniper berries, cloves
Dark Days challenge, holidays & occasions, locavore, meat
8 Comments »


Posted by Anita on 03.15.10 9:48 PM
 When you stock your larder with good quality staples, you’re able to create some amazing, quick weeknight meals. We’re lucky to live in a part of the country with access to a year-round supply of pastured eggs, a wide assortment of local artisan-made cheeses, and some truly excellent dry pasta, all from local sources.
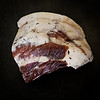
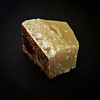
We’re also blessed to have good friends with amazing food-crafting skills. A case in point: Our friend Sean made his own house-cured guanciale, and generously gifted us with a chunk of the most delicious pork product we’ve tasted in recent memory.
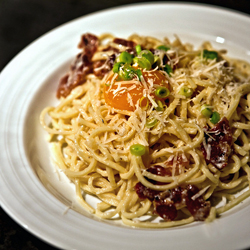
Although Laura’s birthday dinner last Sunday could technically have been my Dark Days Challenge dinner for the week, I felt pretty happy knowing we’d be able to throw together an all-local meal, even though I’d missed the weekly farmer’s market during my Seattle trip. With Sean’s home-cured guanciale in our stash, along with a fresh dozen eggs from last week’s Soul Food Farm CSA delivery, we were only a few ingredients away from one of Cameron’s favorite simple suppers.
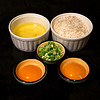
Two things set this pasta carbonara recipe apart from the usual. First, we added slivered green garlic as a garnish, an embellishment that’s sure to be frowned upon by carbonara purists, but one we’ll keep making as long as Knoll Farms keeps supplying our weekly fix. The second innovation is simple but revelatory: Separating the eggs and stirring the hot pasta with just the whites, then topping each serving with its own yolk to be stirred in at the table. This small trick lends the sauce a silky quality, and adds a little flair to the proceedings — just the trick for making a quick midweek supper worthy of an ingredient that took weeks to make.


Spaghetti alla Carbonara
— adapted from Molto Italiano
1-1/2 T extra virgin olive oil
4oz guanciale (or pancetta)
1/2 pound spaghetti
3/4 cup freshly grated Parmesan
2 large eggs, separated
1 green garlic, white and light green parts, sliced thin
freshly ground black pepper
In a large pot, bring 4 quarts of well-salted water to a boil. Meanwhile, cut the gianciale into flat pieces, then combine the olive oil and guanciale in a large skillet over medium heat. Cook until the guanciale has rendered its fat, and becomes juicy and lightly browned. Remove the guanciale to a plate; remove the pan from the heat and set aside, reserving the fat in the pan.
Cook the spaghetti in the boiling water until just al dente. Add a good spoonful of the pasta water to the pan with the guanciale fat; drain the pasta. Return the guanciale to the pan, then add the pasta. Turn the heat back to medium-high and shake/toss the pasta with the water, fat, and guanciale for about a minute. Remove the pan from the heat and add 1/2 cup of the cheese, the egg whites, and freshly ground black pepper to taste; toss until thoroughly mixed (the egg whites will cook from the heat of the pasta).
Divide the pasta into nest-like piles between two warmed pasta bowls. Gently slide an egg yolk into the middle of each nest, then season with more pepper, the rest of the cheese, and the green garlic. Serve immediately, allowing each diner to stir the yolk into their own serving.
 Farmers and food artisans who created the ingredients for this week’s meal:
Guisto’s Vita-Grain, South San Francisco: sea salt
Bariani, Sacramento: olive oil
Hedonia, San Francisco: guanciale (from Prather pork jowls)
Eduardo’s, San Francisco: spaghetti
Spring Hill Cheese Company, Petaluma: dry Jack cheese
Soul Food Farm, Vacaville: eggs
Tairwa Knoll Farms, Brentwood: green garlic
exemptions: black pepper
Dark Days challenge, Italian, locavore, meat, other blogs
3 Comments »


Posted by Cameron on 03.07.10 2:40 PM
Tara, one of our very favorite meat-eating vegetarians, is on the San Francisco leg of her book tour. Happily for us, we’ve been able to see quite a bit of her when she’s not chatting with admirers, moderating debates between militant vegetarians and ethical carnivores, and seducing the crowds with her prose.
We got to talking about meat pies in general and pork pies in particular, and Tara told us about something that she had read in Danny, The Champion of the World, by Roald Dahl. The passage, which she first encountered when she was very young, describes a cold meat pie with hard-boiled eggs buried in it. The description struck a nerve, and it stayed with her into adulthood (apparently, she’s not the only one).
I love meat pies. Love, love, love, love. Cornish pasties, forfar bridies, empañadas, pot pies, steak pies, pork pies, you name it; there’s just something completely, utterly, and ineffably right about the combination of meat and pastry. Tara hadn’t even finished her story before Anita and I were waggling our eyebrows at each other and grinning like schoolkids. “So,” I asked the woman who has only recently begun to forge a relationship with meat after a lifetime of vegetarianism, “Want to make a pork pie?”
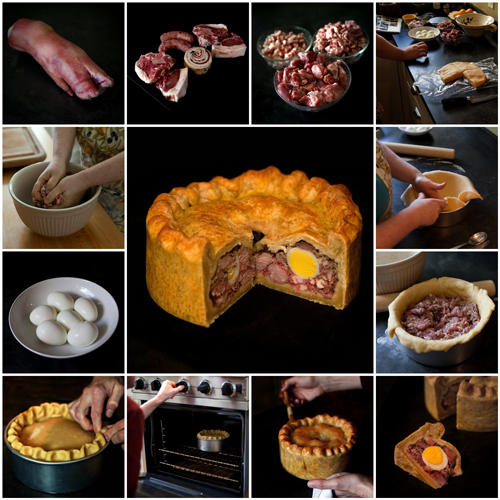
What fun! While Anita weighed and diced up the filling, Tara pulled together the hot-water crust with the quick, sure movements of a woman who has been cooking almost since she could walk. I caught the briefest of hesitations when she turned to the next step, but undaunted, she was quickly up to her forearms in a bowl of three different kinds of cold chopped pork. In honor of Mr. Dahl’s Danny, we buried hard-boiled eggs in the filling, and then I rolled out the top crust and crimped it in place.
This is my third time through this recipe, taken from The River Cottage Meat Book, and it’s a winner. The recipe doesn’t call for hard-boiled eggs, but they did just fine when we popped them in there.
The only downside of pork pie is that — because it’s best cold — you don’t get to taste it until the day after you’ve made it. We put together the pie on Sunday and it was our Dark Days Challenge dinner on Monday night, with pickles and mustard on the side.
Raised Pork Pie
– adapted from The River Cottage Meat Book
Filling
2# pork shoulder, cut into 1/2 inch cubes
8 oz fatty sausage meat (or ground pork belly)
8 oz salt pork, pancetta, or bacon, finely chopped
5 to 6 hard-boiled eggs, top and bottom trimmed so yolk shows through (optional)
12 sage leaves, finely chopped
leaves from 2 good sprigs of thyme, chopped
1 tsp salt
1 tsp coarsely ground black pepper
1 t ground white pepper
1/2 tsp ground mace
A good pinch of cayenne pepper
1 bay leaf
1 cup good pork stock that will set to jelly
Crust
7 T lard, diced
7 T butter, diced
Scant 1 cup water
4 1/4 c AP flour (approximately 630 g)
1-1/2 t salt
2 medium eggs, beaten, plus 1 egg, beaten, to glaze
Make the hot water crust pastry first. Put the lard , butter, and water in a saucepan and heat gently until melted; do not let it boil. Put the flour and salt in a mixing bowl. Make a hollow in the center and add the beaten eggs, stirring them gently around with a knife so they are half mixed with the flour. Pour in the melted fat and water and mix together to form a soft dough; add up to 3 1/2 T extra warm water if it is too dry. Knead gently, adding more flour if it is too sticky to handle. Wrap in plastic wrap and chill thoroughly (at least 1 hour).
For the filling, mix all the meats with the herbs, salt, and seasonings (except the bay leaf), so they are thoroughly combined.
Now assemble the pie. Preheat oven to 350 degrees. Cut off a generous quarter of the pastry and keep in the fridge, for the lid. On a floured surface, roll out the rest of the pastry into a 12 inch circle around 1/3 inch thick. Use this to line an 8 inch springform (or removable bottom) cake pan, pressing the pastry into the sides and flattening any overlap with your fingers. It should come 2-1/2 to 3 inches up the sides of the pan.
Fill with the seasoned pork mixture and push the bay leaf into the middle of it. (If you are adding eggs, lay down a thin layer of filling, place the eggs in a ring halfway between the center and the pie edge, and then add the rest of the filling around and covering the eggs.) Roll out the reserved piece of pastry into a circle about the size of the pan. Brush the edges of the lining pastry with a little beaten egg, and lay the pastry lid on top of the pie. crimp the edges together so they are sealed. Cut a 1/3-inch diameter hole in the center of the pastry lid.
Place the pie in the oven and bake for 30 minutes. reduce the temperature to 325 degrees and bake for a further 1-1/4 hours. If your top crust is concave instead of convex, a pool of juice and fat may form around the center hole during baking that you’ll want to remove with a turkey baster, or the crust may become soggy.
Remove the pie from the oven and carefully release the side of the pan. Brush the top and sides of the pie with beaten egg and cook for another 15 minutes to set the glaze. Take the pie out of the oven and allow to cool. The filling will have shrunk slightly, creating a cavity that is traditionally filled with jellied stock. When the pie is still a little warm, heat the jellied stock just until it’s pourable — not too hot! Carefully lift the edges of the center hold of the pastry with the tip of a knife, making sure you have good access to the cavity. Use a small funnel or, better still, a turkey baster to gently introduce the stock through the center hole. Tilt the pie from time to time to distribute the stock, then try and get a little more in. Stop when the stock begins to overflow from the hole. Leave the pie to cool, then put it in the fridge.
 Farmers and food artisans who created the ingredients for this week’s meal:
Shasta Valley Farm, Gazelle: pork loin and pork sausage
Boccalone, Oakland: pancetta
Prather Ranch, MacDoel: leaf lard
Soul Food Farm, Vacaville: eggs
Guisto’s Vita-Grain, South San Francisco: flour, sea salt
Spring Hill Cheese Company, Petaluma: butter
…and our own homemade pickles, and homegrown celery and carrots (for pork jelly); sage, bay, and thyme
exemptions: pepper, mace, cayenne
Dark Days challenge, locavore, meat, recipes
15 Comments »


 The first glimmers of spring are showing up at the farmers market, just as we’re on the home stretch of the Dark Days Challenge, and boy are we excited. Not so much for the strawberries; they’re still white in the center, and I’ll happily wait until they’re fully ripe. But we’re gorging ourselves on the new, tender asparagus, and we’re definitely making up for lost time in the avocado department.
 Farmers and food artisans who created the ingredients for this week’s meal:


 When you stock your larder with good quality staples, you’re able to create some amazing, quick weeknight meals. We’re lucky to live in a part of the country with access to a year-round supply of pastured eggs, a wide assortment of local artisan-made cheeses, and some truly excellent dry pasta, all from local sources.


