Posted by Cameron on 01.31.10 8:57 PM
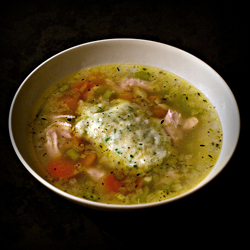 The display read 101°F when the digital thermometer beeped, which might have been okay if we were proofing yeast. But we were in the bedroom, not the kitchen — and the thermometer was under the tongue of my very achy, very sick wife. “You are not going to work,” I said. “And I am coming home early and making chicken soup.”
I don’t have an operatic range as a cook, but chicken soup is one of the dishes that I do well. I wish I could say that I follow a Secret Family Recipe steeped in a Romantic Patina of age and memory, written carefully in cursive on an index card that is Stained with Character and Creased with Use.
But the truth is that I found my chicken soup in a cookbook while we were living in Seattle, and I was first drawn to it by the fact that it had a gimmick: You start with a whole chicken and some vegetables, and end up two hours later with soup. The trick is accomplished by cutting the chicken (except for the breast) — bones and all — into very small pieces and sautéeing them before making a super-quick broth. It’s fast, it’s easy, it’s reliable, and it tastes fantastic.
I can modestly admit to having made a few small discoveries and tweaks to the basic recipe. The original calls for a 4-pound chicken, but I discovered that the larger the bird, the more tasty the soup. These days, we’re getting lovely little 3- to 4-pound birds from the Soul Food Farms CSA, so I add some feet, necks, and wings from the stock bag in the freezer to bring the total weight up to five pounds. I also cut my onions as finely as possible instead of the original medium dice, because I like them to melt into the soup.
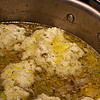
Finally, the original recipe calls for noodles, but I much prefer dumplings. I make a slightly wetter version of my standard biscuit dough and — when the soup is almost done — float globs of the dough on top, cover the pot with a lid, and steam for about 10 minutes.



Hearty Chicken Soup
– adapted from The Perfect Recipe
3 T vegetable oil or chicken fat
2 medium onions, cut into small dice
1 whole chicken (about 5 lbs.; add extra necks and/or wings if your bird is smaller)
2 bay leaves
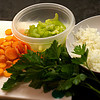
1 large carrot, sliced 1/4 inch thick
1 celery stalk, sliced 1/4 inch thick
1/2 teaspoon dried thyme leaves
1/4 cup minced fresh parsley leaves
Salt
Dumplings
– adapted from Joy of Cooking
1 3/4 cups all-purpose flour
1/2 tsp salt
3 tsp double-acting baking powder
6 T chilled butter
3/4 cup plus 1 T milk
Cut up the whole chicken as if you were going to cook it in parts, splitting the breast into two pieces, but keeping the meat on the bone. (Cooking for Engineers has a nice post on breaking down a chicken. Alton Brown also does a good tutorial, although he takes the breast meat off the bone.)
Set aside the breasts and use a cleaver or poultry shears to hack the rest of the chicken — including the back, neck, and feet if you have them — into 1- or 2-inch chunks. Cut through the bones!
Heat the oil or fat over medium-high heat in a large soup pot. Add half of the chopped onion and all of the chicken pieces except the breast. Sauté until the chicken is no longer pink (I like to see some brown on the chicken pieces, but that can be tough to do in a crowded pot. Be careful not to burn the onions!). Reduce heat to low, cover, and simmer until the chicken releases its juices, about 20 minutes. Increase the heat to high and add 2 quarts of cold water, along with the chicken breasts, 2 teaspoons of salt, and bay leaves. Bring to a simmer, then cover, reduce heat to low and barely simmer until chicken breast is cooked and the broth is rich and flavorful, about 20 minutes.
Skim the fat from the soup and reserve it, then remove chicken breast from the pot and set aside. Strain the broth into a large bowl and discard the rest of the chicken pieces and bones. When the breast is cool enough to handle, remove the skin, and then remove the meat from the bones, shredding it into bite-sized pieces. Discard the skin and bones.
Return the pot to medium-high heat. Add 2 to 4 tablespoons of the reserved chicken fat, the remaining onion, the carrot and the celery, and a pinch of salt. Sauté until softened, about 5 minutes. Add thyme, broth, and shredded chicken. Simmer until the vegetables are tender and the flavors meld, 10 to 15 minutes.
If you like pasta, you can add two cups of egg noodles and cook until tender. Taste the soup and correct the seasonings — it will almost certainly need more salt. However, be careful with the salt if you’re going to add dumplings, as most dumpling/biscuit dough has salt in it somewhere… and I wouldn’t do both dumplings and noodles.
To make the dumplings, put the flour, salt, and baking powder in a food processor and pulse until well mixed. Add the butter, cut into tablespoon-sized chunks. Pulse until thoroughly mixed. Add the milk and pulse until the dough comes together. Drop globs of dough from a spoon onto the surface of the soup. Cover and simmer until the dumplings are cooked through, approximately 10 minutes.
Sprinkle with the parsley and serve.
Farmers and food artisans who created the ingredients for this week’s meal: 
Spring Hill Cheese Company, Petaluma: butter
Soul Food Farm, Vacaville: chicken
Guisto’s Vita-Grain, South San Francisco: sea salt, flour
Catalán Family Farm, Hollister: onion, celery
Straus Creamery, Petaluma: milk
…and our own homegrown thyme, carrots, bay, and parsley
(Exemption: baking powder)
cookbooks, cooking, Dark Days challenge, locavore, recipes
8 Comments »


Posted by Anita on 01.25.10 6:27 PM
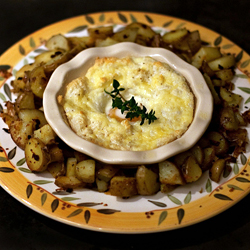 Failure may be too strong of a word.
In fact, I’m sure it is. On the other hand, saying “it tasted fine, but wasn’t really worth the effort” doesn’t make a very good headline. But it does neatly sum up this locavore household’s unanimous verdict on our Dark Days Challenge meal this week.
I’ve had Gourmet‘s recipe for Oeufs à la Cantalienne in my clippings for at least three years. The headnotes promise “the soft, yolky flavor of eggs Benedict but without all the hassle”, a notion that appealed to me as I tried to figure out a way to make midweek breakfast-for-dinner more exciting.
We’re pretty handy with eggs, but I think a novice cook especially might find this recipe — which entails buttering ramekins, separating eggs, keeping yolks intact, whipping egg whites, folding cheese, smoothing egg whites, and dolloping créme fraîche — at least as daunting as toasting muffins, poaching eggs, and whisking up a batch of Hollandaise.
When I went looking for other versions of this dish to see where I might have gone astray, I discovered that Molly – whose culinary opinion I trust — loved this recipe, and her photos of her friend Jimmy’s version look much more promising than ours did. I feel terrible casting aspersions based on a single lackluster effort, but on the other hand, this is not a recipe I’m anxious to try again. Faced with the same ingredients, next time out I’m just as likely to make a nice cheese-and-herb omelette to go with our home fries.
So here’s the recipe, in all of its glory. If you try it and like it (or even if you loathe it), I’d can’t wait to hear about it.




Oeufs à la Cantalienne (Baked Eggs with Cheese)
– adapted from Gourmet
Butter, for greasing ramekins
6 large eggs
1/4 tsp salt
1/4 tsp black pepper
1/8 tsp freshly grated nutmeg
1/8 tsp cream of tartar
3 oz grated Cantal or other mild, semi-firm cow’s cheese (we used Carmody)
6 T créme fraîche
1 T chopped fresh herbs
Adjust oven rack to middle position and preheat oven to 350°F. Butter six 8-oz ramekins.
Separate the eggs, carefully sliding whole, unbroken yolks into a small bowl of cold water and putting whites in a large bowl. Add salt, pepper, nutmeg, and cream of tartar to the egg whites. Using an electric mixer at medium-high speed, beat whites with until they just hold stiff peaks.
Gently fold half of cheese into the beaten whites, taking care not to deflate the mixture, then divide among ramekins. Smooth the top of the egg whites, then make an indentation in the center of each ramekin.
Using your fingers, carefully remove yolks from water one at a time and put a yolk in each indentation. Stir créme fraîche, and dollop 1 tablespoon on top of each yolk; sprinkle eggs with remaining cheese. Transfer ramekins to a rimmed cookie sheet.
Bake until whites are puffed and pale golden but yolks still jiggle slightly, 10 to 14 minutes. Sprinkle with herbs and serve immediately.
Farmers and food artisans who created the ingredients for this week’s meal: 
Spring Hill Cheese Company, Petaluma: butter
Soul Food Farm, Vacaville: eggs
Guisto’s Vita-Grain, South San Francisco: sea salt
Bellwether Farms, Sonoma: crème fraîche, Carmody cheese
Little Organic Farm, Marin: potatoes (for homefries)
Catalán Family Farm, Hollister: onion (for homefries)
…and our own homegrown thyme.
(Exemptions: black pepper, nutmeg, cream of tartar)
Dark Days challenge, locavore
2 Comments »


Posted by Anita on 01.18.10 6:23 AM
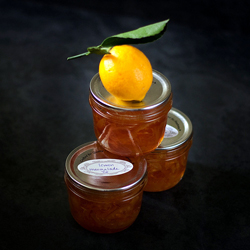 I don’t think anyone would be surprised to hear that I love to can. Most years, I get started on the preservation kick at the height cherry season (when I make my annual batch of cocktail garnishes), and don’t put away the canner until after the last tomato harvest. So when I heard about a new, year-round canning challenge — one that has participants putting up a different type of produce every month — I knew I had to jump on in and join Tigress’s Can Jam.
January’s Can Jam theme is citrus, a particularly apt topic here in the Bay Area where farmers markets and backyard trees are bursting with the best oranges, lemons, and grapefruits of the year. I always like canning with a friend to help share the work (and the resulting bounty), so I asked Laura from (not so) Urban Hennery if she’d like to can together when she visited San Francisco last weekend; she happily agreed. I flagged a bunch of citrus recipes in my favorite canning books, thinking I’d let Laura decide which sounded the most appealing. A girl after my own heart, she suggested that we make them all!
The first, a Meyer lemon curd, wasn’t technically eligible for the Can Jam, because it needs to be pressure canned to be shelf-stable. (The challenge requires all recipes to be suited to a standard boiling-water canner.) But we made it anyway, and oh am I glad we did. With the orange yolks from Laura’s hennery eggs — yes, she brought them down in her checked baggage! — and the deep yellow zest from Meyer lemons we bought from Hamada Farms, the end product turned an eye-searing yellow. If I saw a bottle of curd that yellow in the store, I’d walk away, thinking it must be filled with artificial everything.
Our second recipe — which used June Taylor‘s three-fruit marmalade as a starting point — featured a quadruple-dose of citrus: Moro blood oranges, lemons, golden grapefruit, and one giant bergamot from our backyard tree. We ended up with 9 half-pint jars of a deep crimson preserve, clear enough to see the different-shaped bits of peel suspended evenly throughout its jewel-like base. It’s pleasantly bitter, and (at least at this stage) you can pick out the flavor of each of the citrus varieties as you make your way through a spoonful… er, I mean, a slice of toast.
The last recipe turned out to be our hands-down favorite. Its simplicity — both of ingredients and of preparation — belies its gorgeous looks and uniquely delicious taste. Combining lemons, sugar, and water, this one’s good enough that Laura and I were already plotting how to get our hands on more Meyer lemons before the week was out.



Meyer Lemon Marmalade
– adapted from Catherine Plagemann’s Fine Preserving
3 perfect, very fresh Meyer lemons
1 more lemon, for juice
sugar (about 4 cups)
Sterilize canning jars and prepare lids according to manufacturer’s directions.
Peel the three lemons, removing just the yellow and none of the pith. Slice the peel into very fine, thin strips and set aside. Cut each peeled lemon in half, lengthwise. Remove as many seeds as possible plus the center strings. On a cutting board with a lip, slice the lemon halves, including the white rind, paper thin. Remove any remaining seeds. In a glass measure, combine the zest, lemon pulp, any juices from the pulp, and the juice of one more lemon. You should have about 1 cup of prepared lemon and juices.
 Cover the prepared lemon with about a cup of cold water; it should be just enough to submerge all of the lemon. Let soak for 3 hours, to soften the zest. After soaking, combine the soaked lemon and zest in a wide Dutch oven along with an equal amount of sugar by volume. Bring to a simmer over medium-high heat, and simmer (do not boil) until the marmalade jells.
Keep a close eye on the cooking marmalade. It will go from liquid to jelled more quickly than you would expect. Don’t go by eye in the pan; the mixture will still look much more wet than a typically set marmalade. Use the saucer test or watch for the liquid to sheet off the edge of a metal spoon.
Ladle into hot, sterilized half-pint jars, leaving 1/4-inch headspace. Wipe rims of jars with a damp, clean towel; adjust canning lids and process in a boiling-water canner for 5 minutes. Turn off the heat and leave processed jars in the canner for 5 minutes more, then remove and cool on a thick towel or a wire rack for 12 hours. When jars are completely cooled, check for proper seal. Remove rings from sealed jars, and put any unsealed jars in the refrigerator to use first.
If you can bear it, it’s best to let this marmalade cure for at least a week before eating, otherwise the zest is a bit tough.
Yields three 8oz jars
CanJam, locavore, preserving & infusing, recipes
15 Comments »


Posted by Anita on 01.17.10 8:57 PM
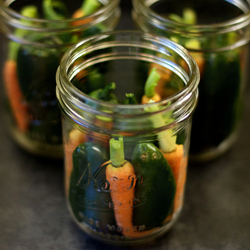 I really didn’t intend to feature yet another Mexican stew this week, but it’s inadvertently turned into a south-of-the-border comfort food month at our house. We had something entirely different planned for this week’s Dark Days Challenge meal, but our schedule got scrambled — by good things — so our fallback plan moved into the spotlight.
Because we’re so addicted to Latin flavors, we put up many of the necessary ingredients in the summer, at the height of their season. For this recipe, we used roasted, skinned tomatillos that we froze in bags, plus jalapeño peppers pickled in a traditional salty brine. Our cilantro’s wintered over quite well, so we don’t even have to claim exemptions this week.
This bean-enriched variation on chile verde isn’t a particularly beautiful dish, but it’s delicious. If you want to make it in the slow cooker, the original recipe omits the stock and layers all of the ingredients in the crock — starting with the tomatillos, followed by the rest of the vegetables, and the pork at the top. Cover and slow-cook on high for 6 hours, then add the cooked beans just before serving.





Puerco en Salsa Verde – Tomatillo Pork Braise with White Beans
– adapted from Mexican Everyday
1 to 1-1/4 pounds boneless pork shoulder, cut into 2-inch cubes
1 pound tomatillos
3 pickled jalapeños (divided use)
1 medium white or red onion, diced (divided use)
2 garlic cloves
1/3 cup loosely packed rough-chopped cilantro (divided use)
2 cups chicken or pork stock
2 cups cooked cannellini beans, drained
Mexican crema, sour cream, or creme fraiche, as desired
Salt the pork cubes, and set aside. Husk the tomatillos, then rinse and cut into quarters. Stem and halve the jalapeños, cut them in half, and scrape out the seeds; dice one of the chiles and set aside for garnish.
Heat oil or drippings in a large saucepan or small Dutch oven over medium heat. When shimmering, add the pork in a single layer and saute until golden brown on all sides. Remove the browned meat to a clean plate. Add about 2/3 of the diced onion to the pan and saute until soft. Add the garlic and continue to cook until garlic is golden. Add the jalapeños and half of the cilantro and cook until just soft. Add the prepared tomatillos and jalapenos, and return the meat to the pan. Add enough of the stock to come a little more than halfway up the side of the pork. Cover and simmer gently, 3 hours or more until the pork is tender, adding more stock as needed to keep the meat partly submerged.
When the pork is thoroughly tender, remove the meat to a clean plate with tongs. Puree the sauce with an immersion blender (or in batches — carefully — in a standard blender; then return to pan). Return the meat to the pan, and add the cooked beans. Taste and season with salt as needed, adding more stock or water to keep the sauce at the consistency of a creamy soup. Bring the dish to a simmer and serve warm, with remaining cilantro, onions, pickled jalapeños, and crema for garnish.
Farmers and food artisans who created the ingredients for this week’s meal: 
Marin Sun Farms, Point Reyes: pork shoulder
Catalán Family Farm, Hollister: tomatillos, onion, jalapeños
Iacopi, Half Moon Bay: garlic
Rancho Gordo, Napa: cannellini beans
Bellwether Farms, Sonoma: crème fraiche
Guisto’s Vita-Grain, South San Francisco: sea salt
…and our own homegrown cilantro and homemade pork stock
Dark Days challenge, locavore, Mexican, recipes
6 Comments »


Posted by Anita on 01.10.10 10:01 PM
 To take the chill out of winter, I like to make a big pot of pozole, the traditional Mexican pork stew. It’s one of those meals that leaves you feeling warm inside, even hours after you’ve finished dinner. I was feeling deprived that I hadn’t gotten around to it yet; I’d been waiting for a lazy weekend to appear, when a long Saturday might give me enough time to tackle the various steps.
I’d bought the hominy and the dried chiles, even squirreled away a particularly meaty piece of pork, but didn’t get around to actually putting the stew together until it was time to make this week’s Dark Days Challenge meal.
Pozole verde, the version made with tomatillos and green chiles, is a staple in our house. But the deeper, complex brick-colored rojo style isn’t something we’ve made as often. Local dried chiles are significantly more expensive than the fresh varieties, but in the winter, when cooking with green chiles means dipping into our precious freezer stash, it doesn’t seem so profligate to splurge on a few dried anchos.
Steve Sando — who knows a few things about new-world grains — says that “in America, the [prepared] corn and the finished dish are called posole. In Mexico, only the finished dish is called pozole.” But I’m not fussy. Green or red, with an S or with a Z… I’m an equal opportunity pozole-loving fool.
Pozole is typically fiesta fare, so most recipes serve a crowd. At the moment, we’re short on freezer space, so we scaled this recipe to make just one dinner for two plus a pair of lunch-sized leftovers.





Pozole Rojo – Red Pork and Hominy Stew
– adapted from Mexico One Plate at a Time
1/2 pound dried corn prepared for pozole (such as Rancho Gordo White Corn Posole)
5 cloves garlic, peeled and halved
1 meaty piece of bone-in pork, about 1.5 pounds
– (we used shank; shoulder steaks are also good)
1 small pork trotter
1 white onion, chopped (divided use)
3 medium ancho chiles, stemmed and seeded
2 cups shredded green cabbage
5 radishes, sliced
1T dry Mexican oregano
2 tsp ground dried hot chile (optional, to taste)
thick tortilla chips or tostadas
In a large pot, combine 2 quarts of water with the hominy and garlic. Bring to a boil; partially cover the pot and simmer gently until the corn is thoroughly tender, 2 to 3 hours; many will split open. Season with salt and cool in the liquid.
While the corn simmers, place the pork and trotter in another pot; cover with water, add 2 tsp salt, and bring to a boil. Skim off any foam that rises to the surface, then add half of the chopped onion. Simmer over medium-low heat, partially covered, until all of the meat is tender, at least 2 hours. Cool the meat in the broth, then remove it to a plate. Skim the fat from the broth, or cool overnight and remove the solidified fat the next morning. You should have about 3 cups of broth. Pull the meat off the bones and chop into 3/4-inch shreds. (There may not be much usable meat on the trotter, but it’s there mostly for body and texture; you can discard the chewy bits unless you’re feeling muy macho.) Depending on the cut of meat you used, you’ll have anywhere from 1 to 2 cups of meat.
Soak the ancho chiles in enough hot water to cover, for about 20 minutes. Puree the chiles and their liquid in a blender. When the corn is tender, press the chile puree through a medium-mesh sieve into the corn broth. Add the pork broth, shredded meat, and 3/4 tsp salt; partially cover, and simmer 1 hour. (At this point, the stew can — and ideally should — be cooled and refrigerated for a day or two; its flavor improves with time. Reheat to a simmer before serving.)
Before serving, check consistency. (Bayless says “The stew should look hearty — chock-full of hominy with bits of meat — but brothy enough to be thought of as a soup or brothy stew.”) If necessary, add unsalted chicken stock or water to return to the correct thickness. Taste and adjust salt.
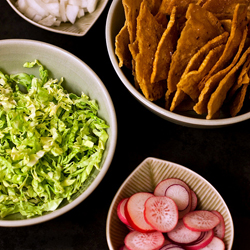
Set out bowls of condiments — the remaining chopped onion, shredded cabbage, sliced radishes, oregano, ground chile, and tostadas — on the table for each diner to add to their bowl as they like.
Makes 4 servings
Farmers and food artisans who created the ingredients for this week’s meal: 
Iacopi, Half Moon Bay: garlic
Catalán Family Farm, Hollister: onions
Tierra Vegatables, Santa Rosa: ancho chiles
Dirty Girl Produce, Santa Cruz: green cabbage & radishes
Marin Sun Farms, Point Reyes: pork trotter
Rancho Gordo, Napa: dried hominy, ground red chile, Mexican oregano
Shasta Valley Farm, Gazelle (via Live Culture‘s Pork Prom): Mangalitsa pork shank
Primavera, Sonoma: Corn tortillas (for homemade tostadas)
Guisto’s Vita-Grain, South San Francisco: sea salt
Dark Days challenge, locavore, Mexican, recipes
5 Comments »


Posted by Anita on 01.04.10 7:41 AM
 One of my other new year’s resolutions is to make time — and space in my budget — to improve my blogging chops. Education isn’t cheap, especially when you’re learning from the pros, but the classes I took in 2009 were some of the highlights of my year. I met cool groups of like-minded folks, had a great excuse to travel, and enjoyed delicious food along the way.
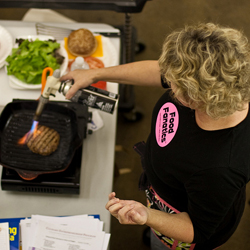
Hands down my favorite learning experience of 2009 was the Food Styling and Photography class taught by the Food Fanatics — Cindie Flannigan and Denise Vivaldo — and Matt Armendariz. Happily for those of us in the Bay Area, the Food Fanatics are headed our way this month, teaching a hands-on, full weekend class at The Art Institute San Francisco on January 16 & 17.
Denise tells me there are a couple of spots left, so head on over to their site and check out the details. If you’re a food blogger, it’s probably even a tax write-off. And it’s sure to be a blast.
classes
2 Comments »


Posted by Anita on 01.03.10 11:40 PM
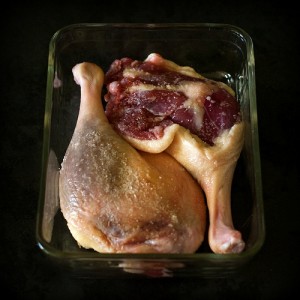 If it’s New Year’s week, it must be time for cassoulet at our house. For this week’s Dark Days Challenge meal, we used the same streamlined recipe we’ve been making for the last couple of years. But this year, we went back to the classic preparation, and made our own duck confit.
We were lucky enough, last fall, to buy one of the Pekin ducks that Massa Organics was using for pest control in their rice fields. We parted out the bird, setting aside the breasts for searing, making stock out of the carcass, rendering down the fat and skin, and preserving the legs in the rendered fat.
One of my new year’s resolutions is to eat more food grown by people I know in 2010. We already do a pretty good job of finding local sources, but it’s always that much sweeter when we know the families behind our dinner. This cassoulet was a pretty good first step — we’re friends with three of the producers: Steve Sando from Rancho Gordo, Taylor Boetticher from Fatted Calf, and Greg Massa of Massa Organics. We know many of our other farmers by sight from our market trips, but in the next year we’re going to try and become even more familiar with the people who put food on our plates.
The recipe below may seem long, but trust me when I say that it’s a gross simplification of Judy Rogers’s original recipe, which runs to 6 full pages. Just like her Mock Porchetta (and pretty much every other Zuni recipe), the length isn’t so much an indicator of complexity or difficulty, but rather a mix of thoughtful hints, step-by-step signposts, and thought-provoking commentary. In the book, Rogers details how various duck breeds adapt to the master recipe, recounts her laborious process to find the best variety of salt for curing, offers ideas on how to get enough fat to cover your meat, makes suggestions for adapting the recipe to duck breasts or gizzards, and provides a number of serving ideas. It’s a treatise on duck confit in all its glory, and I highly recommend you read it at least once in its entirety. (If you don’t already own a copy, it’s well worth picking up. You don’t have to take my word for it: Eat Me Daily named it one of their top cookbooks of the past decade.)




Duck Confit
– adapted and condensed from The Zuni Cafe Cookbook
4 whole duck legs (legs and thighs attached)
1/3 oz (approximately 2 tsp) sea salt per pound of meat
rendered duck fat, sufficient to cover the legs
– (approximately 2 cups fat per pound of meat) plus a little extra for insurance
Rinse the legs well and pat dry, trimming off any ragged edges of skin or fat. Working on a sheet of parchment, salt the legs all over, a little more on the thick parts and less on the bony legs and ankles. Roll the legs in the salt left on the parchment. Arrange the legs in a single layer in a wide glass, ceramic, or stainless container, skin side down. Refrigerate for 18 to 24 hours, depending on the size and meatiness of the legs.
Rinse the legs well, one at a time, under cold running water; do not soak or you will end up with waterlogged meat. The flesh should feel firm, but knead the excess salt out of any areas that feel especially hard. Dry the rinsed legs on a clean towel and pat dry. Test for saltiness by trimming off a bit of meat and simmering it in duck fat for 5 minutes. If it tastes too salty, rinse and dry each leg again. (Rogers says it should be reminiscent of well-seasoned sausage, and not to worry if it’s tough at this stage.) Place the legs on a very clean plate and rest at room temperature for an hour, or overnight in the refrigerator, covered with plastic wrap.
Heat the fat until warm but not bubbling, then add the duck legs to the warm fat. Choose the smallest pot that will fit your duck, to reduce the amount of fat you’ll need. Unlike most recipes, it’s fine — in fact, it’s desirable — to crowd the pieces into the pan, but do not stack more than 2 layers deep. If needed, add more fat to submerge the legs completely. Heat the fat and legs to just below a simmer (200°F is a good target, if you have a deep-frying thermometer), skimming off any foam.
Stand by to adjust the heat, maintaining a steady temperature to avoid toughening the meat. Cook for an hour, then begin testing for doneness every 10 minutes. (Large legs often take 90 minutes to 2 hours; small legs, like those on the Massa ducks, are done just after an hour.) The meat should yield to a firm prodding in the pot; when it does, remove a piece from the fat, and slice off a bit. Allow the sample to cool; fully cooked meat will be tender when just cooled enough to hold with your bare hands.
When the meat is done, remove the pot from the heat and allow to sit undisturbed for 20 to 30 minutes. Skim the surface of the fat, removing any stray bits. Using tongs, gently move the legs to a sterilized glass or ceramic container, trying not to tear the skin or to disturb the liquid on the bottom of the pot beneath the fat. Skim the fat again, and ladle it through a fine-mesh strainer over the meat, again taking care not to disturb the gel at the bottom of the pot. Cover the meat completely — depending on the size of your storage container, you may need to melt more fat — and cool to room temperature. Cover the container well, then refrigerate for three days to a week before using. For longer storage, I prefer the freezer; the fat protects the meat from drying, and the deeper chill prevents any off flavors.
Farmers and food artisans who created the ingredients for this week’s meal: 
Rancho Gordo, Napa: flageolet beans
Fatted Calf, Napa: Toulouse sausage and ham trimmings
Massa Organics, Hamilton City: duck
Catalán Family Farm, Hollister: onions
Guisto’s Vita-Grain, South San Francisco: sea salt
…and our own homegrown thyme and crumbs from homemade bread
Dark Days challenge, locavore, meat, preserving & infusing, recipes
5 Comments »


 The display read 101°F when the digital thermometer beeped, which might have been okay if we were proofing yeast. But we were in the bedroom, not the kitchen — and the thermometer was under the tongue of my very achy, very sick wife. “You are not going to work,” I said. “And I am coming home early and making chicken soup.”


 I don’t think anyone would be surprised to hear that I love to can. Most years, I get started on the preservation kick at the height cherry season (when I make my annual


