Posted by Anita on 05.26.10 11:28 AM
This post is the third of 12 installments in the Dinner on a Deadline series, a project designed to help you get thoughtful meals on the table quickly without resorting to processed convenience foods. Each week features homework to help you put the lessons into action, plus a sample recipe to show how we use the week’s tips in real life.
 There are entire books (and at least one blog) devoted to the idea that recipes are the problem, not the solution. Rather than cheerful assistants, the theory goes, recipes can be tyrannical oppressors, stifling creativity and causing culinary heartache.
Though I’d never go that far myself — my cookbooks and recipe binders are a source of wonderful inspiration, and a great resource for those rare days when I have plenty of time to spend in the kitchen — I definitely see the value of dispensing with recipes for many everyday meals.
When it comes to no-recipes meals, there are plenty of old standbys. On Twitter, I asked what readers like to make when they cook without recipes. Nearly everyone named at least one dish that falls into the category our friends Sean and DPaul call leftovers velcro: Omelettes and frittatas filled with bits of cheese and herbs, a chef’s salad with cold roast chicken and a few crumbles of bleu cheese, hearty soups made from stock and the assorted contents of the vegetable bin.
All of these are good, simple meals, and I love them because creative re-use is both easy on the wallet and environmentally fabulous. But cooking without recipes can be much more than just a way to clear out your fridge. It’s a way of thinking about ingredients that gives you basic formulas for easy suppers, and a platform for improvising even as you plan. If you stock your pantry well, you can combine protein, starch, and seasonal vegetables in dozens of ways.
 Here’s one example that makes use of our favorite pasta + pork + greens trinity: Simmer pasta of your choice. Meanwhile, sauté sausage, bacon, ham, or ground pork; remove the cooked meat with a slotted spoon. Using the same skillet, sauté a clove or two of minced garlic in the rendered fat from the meat; add legumes or greens (examples: shredded kale, chopped broccoli raab, sliced sugar-snap peas, cooked cannellini) and sauté until tender, adding a little stock or water to steam the firmer items. When the pasta’s done, toss everything together, adding a splash of stock or cream. Sprinkle with herbs and/or Parmesan cheese and you’re good to go. (Two favorite variations on this theme include Orecchiete with Broccoli di Ciccio and Italian sausage, and Pasta e Fagioli with ‘Nduja.)
This method also works great with international flavors. For an Asian-style meal, sauté a quick-marinated protein (sliced meat, shrimp, or tofu tossed with soy sauce, sherry, sesame oil, and a bit of cornstarch) in peanut oil; remove with a slotted spoon. Sauté garlic and greens (such as long beans, bok choy, spinach) until tender. Stir in a regionally appropriate flavor enhancer (like curry paste, oyster sauce, chili-garlic sauce), then add the meat back into the pan and heat through; serve over rice or noodles. If you prefer a Tex-Mex variation, you can make fajitas: Grill or sauté chicken or steak strips, add sauteed peppers and onions, and serve with tortillas. Once you have the basics down, the variations are only limited by your imagination and the depth of your pantry.
This week’s homework
No-recipe novices: Plan at least two meals for the upcoming week, including at least one no-recipe dinner. Make use of your newly organized pantry staples.
Extra for experts: Take one of your existing no-recipe meals and adapt it into something new. For example: If you usually use pasta as the base, turn it into a stir-fry over rice. Or, add an ethnic twist, use a different protein, or make some other modification that will push your creativity.


This week’s recipe
I realize that this goes entirely against the spirit of the lesson, giving you a real recipe with measurements and timing. But for anyone new to the no-recipes concept, it’s useful to see how it works. After you’ve done it a few times, you’ll be able to come up with your own variations, judging quantities and timing by eye.
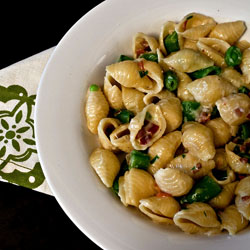
We made this dish — a Food 52 category winner — for a midweek supper with our friend Meriko; we liked it so much we had it again this week. (The fact that we’ve got a bumper crop of sugar-snap peas helps, too.) The second time around, we were out of mint and low on cream, so we swapped in some parsley and chicken stock; we liked the fresher end result even better. Feel free to make your own substitutions depending on what you have on hand or what strikes your fancy.
Creamy Pasta with Prosciutto and Snap Peas
– adapted from Food 52
For each 3 servings; multiply as needed
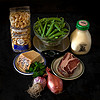
6 to 8oz dry shaped pasta (preferrably shells, orechiette, or other cup-shaped pasta)
2 cloves garlic, minced
1-1/2 T olive oil
2oz prosciutto, lonza, or country ham, thickly sliced (1/4-inch minimum) then minced
2 small shallots, minced
1/2 cup cream
1/2 cup unsalted stock
1/4 cup freshly grated Parmesan, plus more for the table
1/4 pound fresh sugar-snap peas, chopped into 1/2-inch pieces
2T to 1/4 cup minced fresh flat-leaf parsley
salt and freshly ground pepper
In a large saucepan, bring salted pasta water to a boil while prepping the various ingredients. (If it comes to a boil before you’re ready, cover and reduce heat to low.) When everything is ready to go, add the pasta to the boiling water.
In a heavy skillet, heat the olive oil over medium heat. When shimmering, add the garlic and cook until just softened. Add the minced prosciutto and cook for an additional 3 to 4 minutes. Add the shallots; continue cooking until softened. If at any point the garlic or shallots start to brown, add a splash of water and/or turn down the heat. When cooked through, season to taste with salt and freshly ground black pepper. (Amounts will vary greatly depending on how salty your pork is.) If there are more than 3 minutes left on the pasta timer, reduce the skillet heat to low, or remove the pan from heat, depending on how long you have left.
When your pasta is about 3 minutes away from being done, add the peas to the proscuitto mixture and cook for 2 minutes over medium heat, until just tender. With one minute remaining, raise the heat to high; add the cream and stock, and bring to a boil while stirring. Add the Parmesan, stir to combine, and reduce the heat to low.
Drain the pasta, and add to the sauce; toss to coat. If the sauce is loose, simmer over medium-high heat until it coats the pasta. Sprinkle liberally with fresh herbs, and serve with black pepper and extra Parmesan.
cooking, Dinner on a Deadline, recipes
15 Comments »


Posted by Anita on 05.18.10 11:54 AM
This post is the second of 12 installments in the Dinner on a Deadline series, a project designed to help you get thoughtful meals on the table quickly without resorting to processed convenience foods. Each week features homework to help you put the lessons into action, plus a sample recipe to show how we use the week’s tips in real life.
 So, gang — how’s the menu planning going? From my point of view, the homework looks great! Between the comments on last week’s post and the Twitter stream, I’ve seen some good menu plans, lots of delicious meals made from items already on hand, and many good tips for weeknight dinner prep. So let’s move on with some more ideas for getting food on the table.
One of the most powerful weapons in the weeknight-dinner arsenal is a well-stocked pantry. Now, when I say “pantry”, I hear all the small-kitchen cooks groan. But a pantry doesn’t have to be large or lavish to be effective — even a single, dedicated shelf next to the dishes is better than nothing. No matter whether you have an enormous pantry or a tiny one, keeping staples on hand encourages spontaneous meals and lets you shift gears quickly when your weeknight throws you a curve. And, stocking up is especially important if you’re not a particularly dedicated meal planner.
Once you stock your pantry, keeping it up to date needs to be a continuous process. At our house, we opt for the instant-replacement method: If we use, say, a package of penne, we add penne to the grocery list and buy it on our very next trip to the store. When we get down to the last few ounces of soy sauce, it goes on the list, too. We never wait until we need a staple item to replace it. In the case of items we use a lot, we even keep backups on hand when space permits.
Speaking of space: The elephant in the room here is that most people’s pantries (including mine, until I tidied it up last weekend) look like a disaster area. Once you clear away the clutter, you may find yourself with a lot more storage space than you thought you had. With this in mind, the first real step in stocking the pantry is a thorough clean-up. I know the idea of spending your precious kitchen time tackling a long-postponed chore isn’t terribly appealing, but the payoff is huge. Even the most rudimentary kitchen organization helps make it fun to cook, instead of a hassle. Once you’ve got your kit organized, you won’t have to dig through a mess to find things when you need them quickly. You’ll also have a better idea of what you have, and what you’re missing.
When it comes to quick weeknight dinners, staples are key. There are a few million articles online dedicated to stocking your pantry. (Simple Bites has a good one, with links to many others.) Every site’s list is a little different — and they should be. There’s no one right way to fill your shelves; the important thing is that you figure out the kinds of meals you eat (or want to eat) and stock for them. Personally, I don’t like to rely a lot on the canned soups, commercially frozen vegetables, and other industrial products that some of the lists include. You know your own tastes better than I do; look through a few lists, and use them as a jumping off point.
Here’s what our pantry typically contains:
• In the fridge: Eggs, cheese (something melty plus a hard cheese like Parmesan), bacon, milk, sour cream, kimchi and/or sauerkraut, tortillas, bread, butter, mushrooms, olives, mustard, peanut & almond butters, maple syrup
•Â In the garden: Fresh herbs, lettuce, carrots, radishes, celery, lemons, green onions, one or two seasonal vegetables (peas, tomatoes, etc.)
• In the cupboard: Pastas, rices, polenta, dry beans, posole, coconut milk, chiles (pickled/dry), tomatoes, pressure-canned chicken stock, pickles & preserves, soy sauce & fish sauce, canned tuna, shallots & onions, garlic, ginger, potatoes, crackers, tortilla chips, nuts, salsas, herbs & spices, oils & vinegars, baking supplies
• In the freezer: Precooked beans and grains; pie and pizza doughs; pasta sauces; curry pastes; leftover bread/buns; leftover cooked meat; precooked meatballs; quick-thawing raw proteins (ham cubes, chicken parts, sirloin tips, ground meat, duck confit) in meal-size packs; sausages (Italian, chorizo, breakfast, ‘nduja); pancetta & guanciale; butter; blanched garden veggies; ice cubes of many types: chicken stock, lemon and lime juice, egg whites, tomato sauce/paste, chipotle en adobo, etc.
(I know there’s a a lot of untapped detail in that last bullet item; we’ll talk more about stocking the freezer later in the series.)
Looking at our list, you can probably already see that, even without a recipe, I can get a number of basic dinners on the table using just what we have on hand. This week, I made a simple Asian-style noodle dish using beef from the freezer and a bunch of items from the pantry, plus a few vegetables from our farm box. Pretty much once a week — and more often when we’ve been traveling or otherwise unable to get to the farmers market — we eat this way, “shopping” from the items we’ve put aside for quick weeknight meals.
Once you have a well-stocked larder, you’ll be amazed at how handily you’re able to put together meals, even when you’ve got “nothing” in the house. After just a few weeks of building meals from what you’ve got on hand, you’ll start to develop a repertoire of pantry-based suppers.
 In addition to this week’s recipe below, here are a few meals we make using pantry staples and just one or two fresh ingredients:
– Simple chilaquiles
– Fondue mac & cheese
– Weeknight paella
– Korean-style tacos
– Deep-dish pizza
– Pasta carbonara
– Pea and proscuitto risotto
– Pasta with leafy broccoli and sausage
– Sopa Azteca (tortilla soup)
– Ham, chickpea, and orzo salad
– Chorizo, potato, and mushroom tacos
That’s not an exhaustive list, by the way — that’s just the pantry-centric ideas we’ve already blogged about. Once you’ve got your own pantry stocked, you’ll see the possibilities and patterns in your own meals.
This week’s homework
Novice pantry-stockers: Organize your pantry space: Take everything out and put it on the counters, wipe down the shelves, and then put things back in an order than makes sense based on the way you use them. Same thing with the fridge and the freezer — they’re an extension of your pantry, after all. Give away (to the food bank / coworkers / freecycle) anything you don’t want to eat that’s taking up space. Think about the kinds of meals you like to eat, make a list of what’s missing, and stock up as your budget permits. Plan and cook at least two meals, each using a pantry ingredient you already have.
Extra for experts: Tackle the organization project above, plus one of these two options: (1) Write a post about at least 5 items in your pantry, and why they’ve earned a permanent spot on your shelves. (2) Buy yourself one splurge-worthy ingredient (Calabrian chiles, a new kind of rice, heirloom beans, etc.) and cook with it, using at least two existing pantry ingredients that you’ve let languish.


This week’s recipe
I love this recipe — which really is more like a template — because it’s so flexible. Don’t have beef? Use the same quantity of sliced chicken, butterflied shrimp, ground pork, or tofu cubes. You can use pretty much any Asian noodle, too: Fresh, dry, egg, wheat, rice, curly, straight — they all work, so long as you’ve got close to the right quantity going into the wok. Any crunchy vegetables can take the place of the peas; we’ve used boy choy pieces, green beans, and celery cut on the bias; don’t be afraid to experiment.
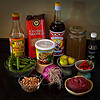
When it comes to Thai-style curry paste; we like the Mae Ploy brand that comes in a plastic tub (it keeps almost forever in the freezer if you roll up the inside bag tightly); this recipe is especially good with the red and yellow varieties, but it’s flexible enough to use what you’ve got. Heat and saltiness vary widely, though, so if you’re using another brand, start out with less paste; if you find the end result is a little bland, spike it up with some fish sauce and/or chile flakes at the table, and make a note to adjust the recipe the next time. I like to mix it up by using half red curry paste and half peanut butter, which makes an especially tasty combination for little kids or other spice-phobic eaters.
This recipe can be made by one focused cook in less than 30 minutes from start to finish, but to streamline the post-work chaos, I generally do all of the prep the night before, then store all of the measured and cut ingredients in the fridge overnight.
Thai Curry Beef Noodles
– adapted from Big Bowl Noodles and Rice
For two servings — multiply as needed:
4 to 6 oz dry Asian wheat or egg noodles (for substitutions, see end of instructions)
Peanut or vegetable oil
6 oz beef (such as flank steak or sirloin tip) sliced thin across the grain into 2-inch lengths
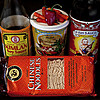
1-1/2 tsp dark soy sauce (we like Kimlan Super Special)
1 tsp sesame oil
1 tsp cornstarch
1/3 cup homemade chicken stock (or water — canned broth is too salty)
1-2T fish sauce (depending on the saltiness of the curry paste)
1T fresh lime juice
1-1/2 tsp sugar
1/2 to 1 red chile (such as Fresno), julienned
1/4 cup thinly sliced red onion
a handful (12 to 15) snow or snap peas, cut in half on the diagonal
1 to 2T Thai curry paste (depending on how hot you like it; you can use half peanut butter)
1/4 cup peanuts, chopped
a few tablespoons chopped cilantro leaves
Bring 4 to 6 quarts of water to a boil and cook the noodles according to package directions. Drain, run under cold water, drain again, and toss with a teaspoon of peanut oil; set aside.
Mix the beef with the soy sauce, cornstarch, and sesame oil. In a separate bowl, mix the chicken stock with the fish sauce, lime juice, and sugar and whisk to blend. Set both the mixtures aside.
Heat 1/2 cup oil in a wok (or your largest skillet) over high heat until very hot but not smoking; add the beef, stirring to separate the slices. Using a slotted spoon or a spider, remove the meat to a clean plate when still pink in the center. Pour off the oil into a heatproof bowl.
Wipe the wok clean and return it to the burner over high heat. When hot, add 2T of the reserved oil. Add the chiles, onions, and peas; cook, tossing rapidly, until well coated with the oil. Scoot the vegetables to the side of the wok and add the curry paste to the bottom. Stir the paste around briefly in the oil to release the flavor. Add the seasoned stock mixture; bring to a boil, stirring or whisking to distribute the curry paste. Then, add the noodles.
Cook, tossing the noodles until mixed with the sauce and vegetables. Add the beef and toss briefly until everything is heated through and well mixed. Remove the cooked noodles to a platter, sprinkle with peanuts and chopped cilantro, and serve.
—
If you want to substitute other noodles, keep in mind that fresh noodles gain very little mass when cooked, where dry pastas can double or triple in size. You want 8 to 10 oz of cooked noodles for two servings. If you find you’ve prepped too many noodles, they keep for a day or two in the fridge, provided they’re tossed liberally in oil and well covered. They make a great snack or lunch when reheated with a little peanut butter, a splash of water or stock, and a sprinkling of chili flakes.
cooking, Dinner on a Deadline, recipes
17 Comments »


Posted by Anita on 05.11.10 9:11 AM
This is a housekeeping post in the Dinner on a Deadline series, a project designed to help you get thoughtful meals on the table quickly without resorting to processed convenience foods. Each week features homework to help you put the lessons into action, plus a sample recipe to show how we use the week’s tips in real life.
 How’s the menu planning homework going? We’d love to hear about your successes and your struggles, either here in the comments, or — if you’re blogging — with a trackback to your post. And, if you have any menu planning questions (either from us or other readers), we’ll get them answered.
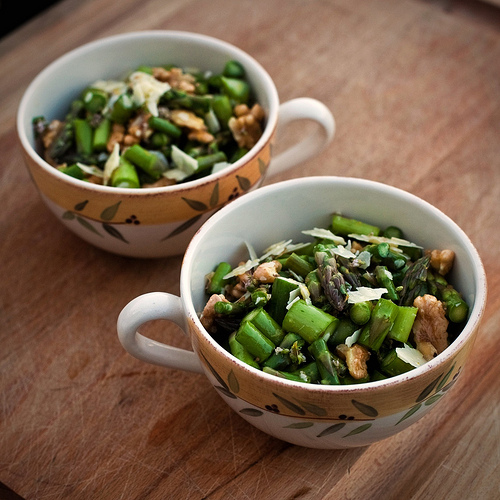
(Oh, and that beautiful weeknight dinner to the left? That’s our riff on Shauna and Dan‘s asparagus and walnut salad, one of the most interesting and hearty salads I’ve enjoyed in a long time. We used thyme and Parmesan in place of their tarragon and mizithra. Sometimes you’ve gotta improvise to get dinner on the table.)
Schedule shift:
I’d originally thought to post new Dinner on a Deadline topics on Fridays, to give people a chance to use the weekend for their homework. But after realizing that most of you are coming here on Mondays and Tuesdays, I’m going to adjust the posting schedule. This way, you’ll have the week to think about homework (and tackle it, if your schedule permits) and then the weekend to kick it into gear before the next post goes up on the following Monday. But don’t let my posting schedule pin you down; you should feel free to tackle each of the projects on your own pace.
 Recaps (or not):
A couple of commenters have asked where they should post their homework, which took me (pleasantly) by surprise because I hadn’t really expected participants to post weekly updates — although I am flattered that you would, and I will love to read them all. Please do leave a comment on the appropriate post so that other readers can follow along. I won’t be recapping each week; getting a new Dinner on a Deadline post up each week is about all I can handle at this point. But at the end of the series we’ll have a blog event where I’ll encourage everyone to post their graduation homework — and I will recap those posts in a final roundup.
Tweet tweet:
I’ve got a new Twitter account — @DeadlineDinners — that you can follow if you want to know when each Dinner on a Deadline post is live, or to get midweek updates. Our existing @MarriedWDinner account will stay focused on the usual mix of food and blather.
Dinner on a Deadline
1 Comment »


Posted by Anita on 05.07.10 6:55 AM
This post is the first of 12 installments in the Dinner on a Deadline series, a project designed to help you get thoughtful meals on the table quickly without resorting to processed convenience foods. Each week features homework to help you put the lessons into action, plus a sample recipe to show how we use the week’s tips in real life.
Chances are, if you’re reading this blog, you like to cook. But there’s some evil alchemy that happens on a weeknight, after a long day of work; even avid cooks lose their mojo when dinner starts to feel like drudgery. Although I’m not a planner by nature (really, I swear — stop snickering!), I’ve developed a routine that helps me fend off kitchen ennui. By mapping out our weeknight meals in advance, and making sure I have everything I need to keep things moving, I feel less harried and enjoy cooking more.
In the same way that it’s always easier to cook when you’ve done your mise en place first, it’s always easier to tackle menu planning when you’ve done a little legwork in advance. During the week, make a file of recipes that catch your eye as you’re reading magazines, blogs, and cookbooks. Then, figure out a way to get yourself at least a half an hour when you won’t be interrupted, so you can focus on your task. Clear off your desk or the table, then sit down with your calendar and your cookbooks, magazine clippings, and bookmarks. At our house, I work on menu planning on Fridays, the night before our favorite farmers market. To free up my time, Cameron fixes a garden salad and his choice of pasta — using pantry staples and homemade sauces from the freezer — while I plan dinners for the coming week.
To make menu planning less daunting, I have a few stock meals slotted into in the schedule. In addition to our regular Friday pasta night, on Tuesdays — when Cameron has band rehearsal — we usually reheat something from the freezer, like sloppy joes, chili, or a hearty soup. Plugging those standbys into my schedule, I have 2/7 of the week taken care of, right off the bat. Next, I block off any nights where we won’t need to cook: Wednesdays are rough days for us, so we often treat ourselves by going out for dinner or grabbing takeout sushi on the way home. We also frequently have some sort of outing during the week — theater tickets, dinner parties, and the like — so I note those, too. Saturdays we typically have plenty of time to spend in the kitchen, so I schedule the most time-consuming meal there, along with any kitchen projects like making big batches of chicken stock, pasta sauces, and other freezer staples. By this point, the week’s filling up nicely, and it’s just a matter of shuffling a mix of old favorites, new ideas, and seasonal inspirations from my clipping file into the remaining days.
It also helps to know what foods are in season in your area, both to minimize shopping hassles, and to keep your budget under control. Many farmers markets feature seasonality calendars on their sites (and yes, there’s an app for that). If you’re worried that your plan includes items that won’t be available, hedge your bets and know what your fallback recipe requires. If I’m planning, say, a fennel salad during a time when I don’t know whether there will be fennel at the market, I’ll make a note on the list of an alternative ingredient (like frisée) that I’m positive I can find.
If this seems like too much work, you can just head to the farmers market or grocery store and buy what looks good, but you’ll want to make sure to browse with a plan in mind. A lot of my friends do this, shopping with a list of categories like “vegetables for 2 dinners, fruit for 4 lunches” rather than an entire menu plan, then deciding when they get home how it all goes together. (I will confess that whenever I shop this way, I inevitably end up missing some key ingredient; I think my friends are better organized than I am!) If you’re not already adept at building meals from the pantry and cooking without recipes, though, you could find yourself with too much of one sort of thing, like tempting-but-perishable vegetables, and not enough of something critical, like meats or starches.

Speaking of surpluses: Meal planning can help prevent food waste and the motivation-sapping guilt that goes with it. I start my planning with a quick fridge inventory. With a list of what’s in the crisper, I can plan the next week’s meals to use up stragglers before they turn to compost.
As funny as it sounds, one of my menu planning secrets is to leave room for a little spontaneity. I always keep at least one night open, allowing us to accept impromptu dinner invitations, indulge a craving, or polish off leftovers.
Just as every cook has a different style, your planning will be different than mine. There’s a universe of software, sites, even iPhone apps designed to help you plan meals; the good ones will create a shopping list automatically as you add recipes to the menu. I find that a little too complicated for my taste; my system involves nothing more than a word-processing document in GoogleDocs with a shopping list down one side and menus down the other. I keep it online so both of us can reference it from anywhere — home, work, the grocery store — in case we need to add to it or shop from it. It doesn’t really matter what system you use, but it needs to work for you.
Have I scared you off yet? If the thought of planning for the whole week seems overwhelming, start with just a couple of planned meals and see how it goes. I think if you plan at least a few meals every week, you’ll begin to see how much easier it is to get dinner on the table without a lot of drama. The more you plan, the less likely you are to push the panic button and find yourself dialing for pizza.
This week’s homework
Novice planners: Plan out at least 2 meals for the coming week. Make a shopping list for your planned meals. Print out the recipes you’ll be using (or flag them in books) so you can find them easily when you hit the kitchen. If the meal you’re planning takes more than 30 minutes of prep, see if you can figure out a way to break it into manageable chunks by prepping parts of the recipe in advance the night before or the morning of.
Extra for experts: If you’re already planning meals ahead of time, this one’s for you: Make at least one full meal this week from what you already have on hand in your fridge, freezer, or pantry, without shopping for anything new. Bonus points for dessert.



This week’s recipe
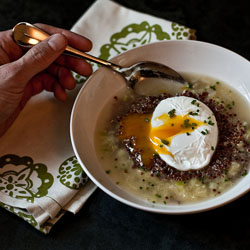
When my friend Jen and I went to dinner recently at Range, I ordered an appetizer that epitomized spring comfort foods for me. I’m a sucker for anything with an egg on top; the buttery leeks were indulgent, and the Parmesan broth was silky and rich. Looking at the various components, I had a hunch that I could re-create this combination at home.
As I started planning this meal, I was excited to realize I could make it entirely from things I already had on hand, although you certainly could buy them from any good grocery store. (Quinoa, by the way, can often be found in the bulk bins; feel free to substitute brown rice, lentils, or any other small, quick-cooking grain or legume.) With a little reheating and a quick bit of actual cooking, our dinner — a credible duplicate of a dish served at a Michelin-starred restaurant — was on the table in less than 20 minutes.
In the coming weeks, I’ll talk more about stocking your larder so that you can improvise, too. In the meantime, you should be able to make all the components from start to finish in less than an hour, even quicker if you’ve got a helper. If you’d rather do some of the prep work in advance — a topic we’ll discuss in more depth later in the series — I’ve noted how far out you can make that happen. Add a simple salad and a glass of wine, and you’ve got a meal that you’d be proud to serve to anyone.
Melted Leeks and Quinoa with a Poached Farm Egg and Parmesan Broth
– inspired by a first course at Range
For each serving — multiply as needed:
1/3 cup melted leeks
1/2 cup cooked quinoa
1/2 cup simmering chicken stock
a handful of Parmesan cheese, grated as finely as possible (about 1/2oz by weight)
1 extra-large egg
minced chives, for garnish
salt, as needed
Up to a week in advance:
– Make the melted leeks
- Slice the leeks in half lengthwise, then slice the white and light-green parts into half-rings about 1/4- to 1/8-inch thick. Rinse leek slices well in a bowl of running water. Melt butter in heavy skillet over medium-low heat. Add leeks and a couple of tablespoons of water. Simmer slowly until leeks are tender and almost all water evaporates, adding more water if needed to further soften the leeks. Season well with salt. If using immediately, remove pan from the heat and set aside. Otherwise, cool to room temperature and store for up to a week in the fridge. (2 cups sliced raw leeks + 4T butter makes about 2/3 cup cooked, enough for 2 servings.)
Up to 24 hours in advance:
- Thaw the stock in the fridge, if frozen.
- Grate the Parmesan cheese with your finest grater, and refrigerate. (We use a Microplane zester so the cheese melts almost instantly when it hits the broth.)
When you’re ready for dinner:
- Cook the quinoa. (1.5x water to 1x quinoa, slow-simmered about 20 minutes or until all water evaporates. 1/2 cup quinoa + 3/4 cup water makes 1-1/4 cups cooked, a little more than enough for 2 servings.)Â
- Warm the leeks in a skillet with just a splash of added water.
- Mince the chives.
- Bring the chicken broth to a lively simmer and whisk in the Parmesan.
- Just before you’re ready to serve, soft-poach the eggs.
- While the eggs are cooking, divide the melted leeks among individual bowls, spreading to cover about 2/3 of the bottom of the bowl. Scoop the quinoa over the leeks, and top each serving with a soft-poached egg. Sprinkle with chives, and pour the Parmesan broth around the edges of the bowl.
Plan-ahead ideas that made this meal easier:
– Having chives in the windowbox
– Stocking interesting stuff in our larder (quinoa, Parmesan, farm eggs, homemade stock)
– Breaking prep tasks across multiple days (pre-cooking leeks, pre-grating cheese, etc.)
Melted Leeks and Quinoa with a Poached Farm Egg and Parmesan Broth
– inspired by a first course at Range
For each serving — multiply as needed:
1/3 cup melted leeks
1/2 cup cooked quinoa
1/2 cup simmering chicken stock
a handful of Parmesan, grated as finely as possible (about 1/2oz by weight)
1 extra-large egg
minced chives, for garnish
salt, as needed
Up to a week in advance:
- Make the melted leeks
Slice the leeks in half lengthwise, then slice the white and light-green parts into half-rings about 1/4- to 1/8-inch thick. Rinse leek slices well in a bowl of running water. [LM: you can also rinse the leeks after slicing in half lengthwise and before slicing. It’s easier to do than rinsing the slices if you leave them connected at the top. Then you can just shake off before slicing] [AC: I agree with JenH; I’ve tried it both ways. Plus, the extra water isn’t an issue here.] Melt butter in heavy skillet over medium-low heat. Add leeks and a couple of tablespoons of water. Simmer slowly until leeks are tender and almost all water evaporates, adding more water if needed to further soften the leeks. Season well with salt. If using immediately, remove pan from the heat and set aside. Otherwise, cool to room temperature and store for up to a week in the fridge. (2 cups sliced raw leeks + 4T butter makes about 2/3 cup cooked, enough for 2 servings.)
Up to 24 hours in advance:
- Thaw the stock in the fridge, if frozen.
- Grate the Parmesan cheese with your finest grater, and refrigerate. (We use a Microplane, so it melts almost instantly.) [ST: Do you really? Does it not affect the texture and flavor too much to grate it that far in advance?] [AC: I don’t grate the whole wedge, but if I’m using it within the day I don’t notice a difference.]
When you’re ready for dinner:
- Cook the quinoa. (1.5x water to 1x quinoa, slow-simmered about 20 minutes or until all water evaporates. 1/2 cup quinoa + 3/4 cup water makes 1-1/4 cups cooked, a little more than enough for 2 servings.) [ST: This is something I might put in the make-ahead category. If I’m making any kind of grain, I make more than I need, and use it over a few meals. Quinoa holds up well.][AC: I actually find premade quinoa to be gluier than I like, but I’d love it if you could add your experience in the comments once the post goes up.]
- Warm the leeks in a skillet with just a splash of added water.
- Mince the chives.
- Bring the chicken broth to a lively simmer and whisk in the Parmesan.
- Just before you’re ready to serve, soft-poach the eggs.
- While the eggs are cooking, divide the melted leeks among individual bowls, spreading to cover about 2/3 of the bottom of the bowl. Scoop the quinoa over the leeks, and top each serving with a soft-poached egg. Sprinkle with chives, and pour the Parmesan broth around the edges of the bowl.
Plan-ahead ideas that made this meal easier:
– Having chives in the windowbox
– Stocking interesting stuff in our larder (quinoa, Parmesan cheese, farm eggs, homemade stock)
– Breaking prep tasks across multiple days (pre-cooking the melted leeks, pre-grating the cheese, etc.)
cooking, Dinner on a Deadline, meatless, recipes
29 Comments »


Posted by Anita on 04.29.10 12:52 PM
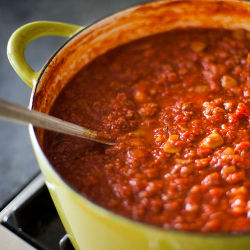 Michael Ruhlman ruffled a lot feathers when he called bullshit on people who can’t find time to cook. To be sure, there are people out there making poor choices, watching hours of TV yet kvetching they can’t put any energy into feeding themselves or their families. But leaving this (admittedly large) group aside for a moment, I also know there are many smart, thoughtful people who simply can’t spend even an hour every day in the kitchen.
Take our household, as one example. I honestly don’t think anyone could question our devotion to good food and home cooking. We go to the farmers market every damned week, even when it’s pouring buckets. We grow a lot of our own produce, though it would be far simpler to buy it. And we preserve both our own harvest and foods we buy in season. We cure our own meats, from time to time. We spend whole days — whole weekends, even — focused on putting real food on our table, and sharing it with people we care about.
But even though I love nothing more than spending hours in the kitchen, the realities of my job and my life mean it’s a luxury that I can’t have all the time.
I know Ruhlman loves to stir the pot — and god love him for that, the world needs more agitators. I also know that his reality is different from mine, and probably yours: This is a man who works at home and devotes his professional life to food. His bread-baking is integrated into his bread-winning in a way that few of us could manage. But for many people, even his simple roast chicken is too much work. Hell, on some particularly craptacular nights, roast chicken is too much work for me. I’m not proud of that. But on the other hand, I don’t beat myself up about it. As Cameron often says: “We eat better at home than most people do in restaurants.” And I think that’s true even when we’re defrosting, reheating, and MacGyvering our way to the table.
We (by which I mean all of us who care about food, and health, and community) need to teach people to make good food in whatever time they have available, not heap scorn on those who think that 30-Minute Meals are the answer. I can make dinner — organic, local, balanced food — in 15 minutes if pressed. It may not be pretty, but it’s real and it’s delicious.
I’ve been cooking since I was old enough to reach the countertop, though, and a lot of what allows me to make those on-the-fly meals happen is the result of hard work at some point days or weeks earlier. Cooking on a daily basis requires planning. It also means relying not necessarily on convenience foods, but convenient food. It’s equal parts planning ahead, stocking your larder, and knowing your limitations — things that can take years to master by trial and error. We shouldn’t expect people to come straight to the kitchen knowing what they need to do.
I realize, as I write all this, that in a way I’ve been part of the problem.
I rarely mention, much less post, our quick-and-dirty weeknight meals. They’re often less-than-photogenic specimens, and they’re usually the sort of food you don’t really need a recipe to make. When I do resort to posting something unglamorous, it’s usually because I’ve signed on for a challenge, and the deadline is looming. I always feel odd, writing about a dinner that isn’t picture perfect, because it feels like I am shortchanging my readers. But on the other hand, I think (hope!) you all realize that we don’t eat beautiful food seven days a week.
 So here’s my commitment: Every week, for the next 12 weeks, I’m going to write about a trick I use to get dinner on the table quickly. I’ll also give you a little homework: Something simple enough that you can do it while your partner washes up after dinner, or in an hour or so on the weekend. And each post will include a recipe to show how to use the week’s tip in a real-life setting, usually a tried-and-true supper we actually eat on a regular basis. I’ll answer questions in the comments, and hopefully we can all learn from one another.
When I get to the bottom of my bag of tricks, I’ll throw it open to you. We’ll have a roundup event, where you can either use my tips to create your own weeknight meal, or post a time-saver of your own. By August, you’ll know what I know, and you’ll have put it into practice so you can riff on it yourself.
I may be preaching to the choir here; if you’re reading this blog, you may be doing these things already. On the other hand, a quick straw poll of my food-loving pals tells me there’s value in this exercise, even for the veterans. But fear not: I’ll keep things simple enough that novice cooks will be able to put the tips to use, too.
So, who’s with me: Who wants to play along?
cooking, Dinner on a Deadline
79 Comments »


Posted by Anita on 04.24.10 9:06 PM
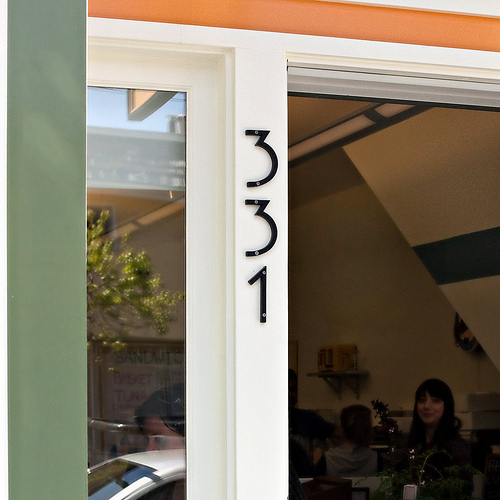 The newest addition to the ever-growing list of Bernal Heights culinary resources can be found at 331 Cortland, both the name and the address of a conglomeration of food-centric stalls in a single storefront. After longer-than-expected delays for construction and permitting — apparently, nobody in city hall knew quite how to handle a multi-unit setup under one roof — the six marketplace vendors held a soft opening today for their Bernal neighbors.
We stopped in around 3pm and found a good-sized crowd full of happy folks getting their afternoon snack on. Bernal Cutlery features Japanese whetstone knife sharpening, plus a beautiful assortment of knives both culinary and otherwise. El Porteño, a familiar vendor at many local farmers markets, carries their full line of sweet and savory Argentinian empanadas. Paulie’s Pickling sells pickles, of course, as well as a rotating selection of sandwiches and deli salads.
On the other side of the shop, Wholesome Bakery features vegan and low-glycemic treats and breads. ICHI Lucky Cat Deli, the new home of ICHI’s itinerant sushi-makers, offers nigiri, maki, and sashimi, as well as some specialty snacks (katsu-sando sliders, oh my!). In the front window, Della Terra Organics sells a pretty assortment of fresh produce from local farms. Each of the vendors will set their own hours, but the marketplace as a whole plans to be open 7am to 7pm every day.
It’s a plethora of options, and a welcome addition to the area. The new marketplace joins the small but quite comprehensive Good Life Grocery, the much-lauded Avedano’s Meats down the block, and newcomer Sandbox Bakery at the other end of the Cortland shopping district. You can stroll a few blocks and pick up pretty much everything you need for a picnic in Holly Park, or a home-made dinner. Surprising as it seems, once-sleepy Bernal could actually become food-lover’s shopping destination.



The Marketplace at 331 Cortland
331 Cortland Avenue (x Bennington)
San Francisco, CA 94110
@331Cortland on Twitter
ICHI Lucky Cat Deli
http://ichisushi.com
415-822-4024
@ICHIsushi on Twitter
El Porteño Empanadas
http://www.elportenosf.com
415-357-3621
@ElPorteno on Twitter
Paulie’s Pickling
http://www.pauliespickling.com
415-285-0800
@PauliesPickling on Twitter
Wholesome Bakery
http://www.wholesomebakery.com
415-343-5414
@wholesomebakery on Twitter
Bernal Cutlery
http://www.bernalcutlery.com
415-902-6531
@BernalCutlery on Twitter
Della Terra Organics
http://www.dtoproduce.com
Bernal, locavore, shopping
2 Comments »


Posted by Anita on 04.23.10 4:53 PM
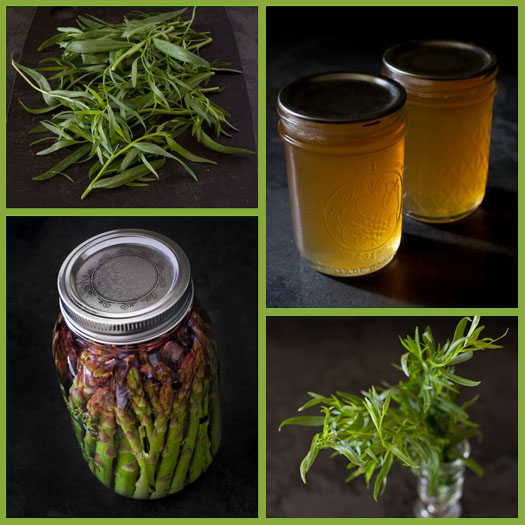
This month’s CanJam roundup — hosted by Marisa at Food in Jars — focuses on herbs, a fitting subject for a month when many canners have little fresh produce close at hand. Our garden is overflowing with herbs, but in the spirit of exploration I decided to make use of a big bunch of tarragon from our latest Mariquita Farm delivery. My only problem was deciding whether to make a sweet preserve or a savory pickle.
Eventually I rationalized that there will be plenty of time later in the year to put up fruit, and pondered the early spring crops I know I would be craving later. Top of that list is asparagus, so I started by using my herbal ingredient to flavor a batch of asparagus pickles. After all, béarnaise sauce — essentially a Hollandaise flavored with tarragon and shallots — and asparagus are natural partners.
Aside from the fiddly task of trimming each spear to the height of a quart jar, the pickled asparagus was simple enough. but I found myself with plenty of leftover tarragon. Rather than wait another week for the next farmers market to put up more asparagus, I rummaged around to see what else I had on hand that would pair well with this anise-scented herb. A quick turn through my canning books yielded a simple recipe for fresh herb jelly, using a base of dry white wine.
I didn’t want to crack a full bottle of vino to get the cup and a half I needed for the recipe, but I did have a half-bottle of bubbly leftover from a recent brunch; swapping in Champagne vinegar for the recipe’s white wine vinegar made the Champagne theme complete. The resulting preserve isn’t the sort of thing you’d spread on toast, or swirl into yogurt — at least to my palate. Much like other savory-sweet jellies (like popular ones that feature jalapeno or mint) this jelly works well as a companion to cheese and crackers, or as a condiment for roast meats.
Asparagus Pickles with Tarragon
– adapted from Jan Roberts-Dominguez, Eugene Register-Guard
2-3/4 cups white distilled vinegar
2-1/4 cups water
3T canning salt
2 sprigs tarragon, about 4 inches long
3 bunches tender asparagus, preferably thin stalks, washed
2 small shallots, peeled and partially split in half
2 garlic cloves, peeled and partially split in half
2 tsp mustard seed
2 tsp whole peppercorns
Prepare canner, lids, and two narrow-mouth 1-quart jars according to the usual method; keep jars hot until needed. 
In a medium saucepan, combine the vinegar, water, and salt over high heat.
Meanwhile, trim the asparagus of any white or tough ends, then cut to the height of the jars’ shoulders. (There are usually enough tender trimmings to make asparagus pesto.)
Divide the tarragon among the two jars, then pack the trimmed asparagus into the jars, along with 1 shallot and 1 clove of garlic per jar. Sprinkle in the mustard seed and peppercorns, then pour in the boiling brine, leaving 1/2-inch headspace. Wipe rims and center lids on jars. Screw band to fingertip-tight.
Place jars in canner, ensuring they are completely submerged. Bring to a boil and process covered for 10 minutes. Remove canner lid; wait 5 minutes, then remove jars. Cool, check for seals, and store in a cool, dark place for up to a year.
(For crisper spears, you can also make these as refrigerator pickles: Seal the jars after pouring in the brine, but do not process. Cool completely to room temperature, then store in the refrigerator for up to 3 months.)
—
Champagne Tarragon Jelly
– adapted from the Ball Complete Book of Home Preserving
2 cups loosely packed, coarsely chopped tarragon
1-1/2 cups sparkling wine
1 cup water
1 cup Champagne vinegar
1 packet powdered fruit pectin (1-3/4oz) *
5 cups granulated sugar
Prepare canner, lids, and five 8-oz jars according to the usual method; keep jars hot until needed.
Combine tarragon, sparkling wine, water, and vinegar in a large stainless steel saucepan. Bring to a boil over medium heat, then remove from heat and cover, steeping for 15 minutes. Stir well, pressing tarragon to extract flavor.
Pour the tarragon mixture through a dampened jelly bag (or a strainer lined with several layers of dampened cheesecloth) set over a deep bowl. Let drip, undisturbed and without squeezing, until all of the liquid has fallen from the tarragon. (At this point, you should have 3-1/4 cups liquid.)
Transfer the liquid to a clean deep stainless steel saucepan. Whisk in the pectin* until completely dissolved, then bring to a boil over high heat, stirring frequently. Add sugar all at once and return to a full rolling boil, stirring constantly. Boil hard, stirring, for 1 minute. Remove from pan from the heat and quickly skim off any foam as needed.
Using a stainless-steel canning funnel, pour hot jelly into hot jars, leaving 1/4-inch headspace. Wipe rims and center lids on jars. Screw band to fingertip-tight.
Place jars in canner, ensuring they are completely submerged. Bring to a boil and process covered for 10 minutes. Remove canner lid; wait 5 minutes, then remove jars. Cool, check for seals, and store in a cool, dark place for up to a year.
—
* If using Pomona’s Natural Pectin, use 3T pectin powder, and combine it with 1 cup of the sugar before proceeding.
CanJam, preserving & infusing, recipes
9 Comments »


Posted by Anita on 04.18.10 12:03 PM
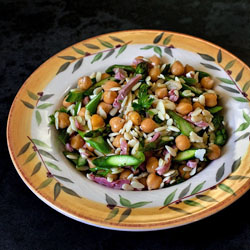 Now that the Dark Days are over, we’re back in the kitchen, casting hungry eyes on spring’s new crops. We’ve had asparagus at our markets now for more than a month, and we’re gorging ourselves on it every week. It’s making its way into every course but dessert!
For a recent brunch party with friends, I wanted to include asparagus on the menu — it’s such a perfect spring flavor — but didn’t really want to mess around with Hollandaise sauce, or any of the other prepped-to-order asparagus dishes in my repertoire. None of the recipes for asparagus salads I found really appealed to me, so I winged it, adding ingredients until I found a combination that looked as good as it tasted.
The recipe below was more than enough as a side dish for 8. Our guests took home some of the leftovers, and we still had enough for two lunch-size portions. So unless you’ve got a big group on hand, or you’re serving it as a main course, a half batch should be more than sufficient.


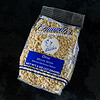
Asparagus Salad
– serves 8 as a light meal, or 16 as a side dish
1 bunch medium asparagus
8oz orzo
1-1/2 cup matchstick-sized pieces of ham
2/3 cup extra-virgin olive oil
1 tsp finely grated fresh lemon zest
1/4 to 1/3 cup fresh lemon juice
1 tsp salt
1/2 tsp black pepper
3 cups cooked garbanzo beans, rinsed and drained
Parmesan cheese, broadly shaved with a peeler (1/2 cup)
1/3 cup chopped fresh flat-leaf parsley
Cut asparagus on the bias into 1/8-inch slices, discarding woody or tough ends. Cook the orzo al dente, then rinse in cool water to cool; drain well, shaking the colander to remove excess water.
In a wide skillet, bring oil, zest, juice, salt, and pepper to a simmer. Stir in the garbanzo beans, then remove from heat and let steep. When beans have cooled to near room temperature, place in a large bowl along with their dressing. Toss with the orzo, ham, Parmesan cheese, and parsley. Taste and adjust seasonings as needed. Serve at room temperature, or cold.
Note: As long as your ingredients are fresh and the pasta very well drained, the salad can be prepared up to 8 hours ahead with no loss of texture.
entertaining, recipes
3 Comments »


Posted by Anita on 04.04.10 9:43 AM
 Spring has come to the blog: We made it to the end of the Dark Days Challenge! We’re excited to share some spring recipes with you soon. But before we head off into the sunshine, I’m sending a round of applause to all the other Dark Days bloggers who stuck it out to the end, especially our hostess, Laura at (not so) Urban Hennery.
It’s been funny, pretending it was still Dark Days when the weather — and the market — make it clear that spring is upon us. Despite last week’s avocado orgy, we’ve tried to stick with the spirit of the challenge (and not torture participants in colder climates), using pantry goods and foraging in the freezer.
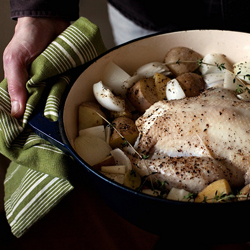
The weather has been obligingly wintery here in San Francisco this past week, so for our final Dark Days meal, we turned to a cool-weather dish I’ve been wanting to try for months. I came across this recipe in the River Cottage Cookbook, and was captivated: Why on earth had I never heard of pot-roast chicken before? We make pot roast with beef, and pork, and even lamb, but apparently the Brits (or at least Hugh F-W) know something we don’t. Dead simple, this one: Just chunk up whatever hardy vegetables you have on hand — vary the list below with the seasons, so long as there’s a starch and some onions — pop them in a big pot with a chicken in the middle, and Bob’s your uncle.
We made a few tweaks to the River Cottage recipe: Even once it was fully cooked, we found the chicken a little flabby and the pan juices a little thin for our taste. We solved both problems by popping the chicken back in the oven on its own for a few minutes to crisp the skin while reducing the pan juices a bit on the stove top. (Even if you don’t take this extra step, everything tastes delicious.) Cooked in this novel method, even the breast meat stays moist — a perfect ingredient for, say, chicken salad the next day. And should you have any leftover vegetables, they make a fine soup pureed with chicken stock and garnished with a bit of cream and a sprig of herbs.



Pot-Roast Chicken and Vegetables
– adapted from The River Cottage Cookbook
1 chicken, 4 to 6 pounds
2T butter
2 tsp salt
freshly ground black pepper
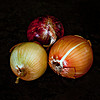
2 onions
3 large carrots
3 stalks of celery
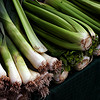
2 leeks
3 potatoes
2 bay leaves
1 cup white wine
1 cup unsalted chicken stock (or water)
3 sprigs of thyme
Preheat the oven to 375°F. Cut up the vegetables into large chunks. Smear butter over the top of the chicken, and season with salt and pepper. Place the buttered chicken in a large casserole or a deep lidded roasting pan, and surround with the chunked vegetables. Pour in the wine and stock, add the thyme, cover, and place in the preheated oven.
After an hour, remove the lid; stir the vegetables and baste the chicken with the fat on the top of the pan juices. Return to the oven, uncovered, for another 30 minutes or until the breast is browned and the juices run clear at the thigh.
Carve the chicken into individual portions and place in an oven-safe plate or pan; return it to the oven to get a little more brown and crispy while you finish the pan juices. Remove the vegetables to a serving bowl, and cover to keep warm. On the stove, simmer the juices in the roasting pan, reducing to a medium consistency (or as you like).
Farmers and food artisans who created the ingredients for this week’s meal:
Soul Food Farm, Vacaville: chicken
Catalán Family Farm, Hollister: onion, leeks, celery
Dirty Girl Produce, Santa Cruz: carrots
Little Organic Farm, Marin: potatoes
Spring Hill Cheese Company, Petaluma: Jersey butter
Souverain, Geyserville: white wine
Guisto’s Vita-Grain, South San Francisco: sea salt
…and our own homegrown bay leaves and thyme, and home-canned chicken stock
exemptions: black pepper
Dark Days challenge, locavore, meat, recipes
Comments Off on Dark Days, spring chicken


Posted by Anita on 03.29.10 8:19 AM
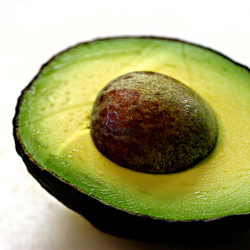 The first glimmers of spring are showing up at the farmers market, just as we’re on the home stretch of the Dark Days Challenge, and boy are we excited. Not so much for the strawberries; they’re still white in the center, and I’ll happily wait until they’re fully ripe. But we’re gorging ourselves on the new, tender asparagus, and we’re definitely making up for lost time in the avocado department.
We put up jars of salsa last summer to help get us through the bleak winter months — without tomatillos, tomatoes, or chile peppers, Mexican food becomes downright impossible. But avocados defy preserving, and even on those rare occasions when we break down and buy an out-of-season avocado or two (sometimes it’s a guacamole emergency, I tell ya!) we always remember why it pays to wait. The watery, wan specimens that make their way here from Mexico or Chile just can’t compare with Will’s buttery, nutty avocados. So we wait. And wait. And wait. Rather impatiently, I might add. It’s one of the few winter deprivations that actually makes me cranky.
And so this week, we celebrated the avocado’s return to our kitchen with a big mess of tacos. It’s another one of those shopping-not-cooking recipes: Once you’ve got all the ingredients on hand, it’s a little bit of chopping, and a whole lot of gobbling. And should you have any leftovers, I can vouch that this filling, along with perhaps a little cheese and a soft-scrambled egg or two, makes an exceptional breakfast taco.



Chorizo-Potato-Mushroom Tacos
– adapted from Mexico One Plate at a Time
2 medium waxy potatoes (about 1/2 pound)
1/2 pound Mexican chorizo
1/4 to 1/2 pound mushrooms, any variety, sliced
1 small white onion, diced
1/2 cup or more tomatillo salsa (homemade or store-bought)
1 ripe avocado
6 to 8 fresh tortillas
Cube the potatoes and simmer in a pot of salted water until tender; drain and set aside in a medium bowl.
Saute the chorizo and onion in a wide skillet over medium heat until the sausage is cooked through. Using a slotted spoon, remove the sausage and onions to the bowl with the potatoes, leaving the rendered fat in the pan. Add the mushrooms to the pan and saute until softened and beginning to brown. Return the potatoes and chorizo-onion mixture to the pan and cook until the potatoes begin to brown.
Meanwhile, thoroughly mash the avocado in a bowl, then add the tomatillo salsa. Add more salsa until the mixture is like a sauce. Season with salt as needed.
Warm the tortillas in a skillet or griddle, or by running them over an open flame. Wrap them in a towel as you go, to keep them warm for the table. When tortillas are all warmed, move the taco filling to a serving bowl, and bring to the table with the avocado salsa and the warm tortillas. Let each person build their own tacos at the table with a scoop of the filling and a drizzle of the salsa in the middle of each tortilla.
 Farmers and food artisans who created the ingredients for this week’s meal:
Little Organic Farm, Marin: potatoes
Fatted Calf, Napa: chorizo
Far West Fungi, Moss Landing: mushrooms
Catalán Family Farm, Hollister: onion
Will’s Avocados, Soledad: Avocados
La Palma Mexicatessen, San Francisco: fresh tortillas
…and our own home-preserved tomatillo salsa
Dark Days challenge, locavore, meat, Mexican, recipes
6 Comments »


 There are entire books (and at least one blog) devoted to the idea that recipes are the problem, not the solution. Rather than cheerful assistants, the theory goes, recipes can be tyrannical oppressors, stifling creativity and causing culinary heartache.
 Here’s one example that makes use of our favorite pasta + pork + greens trinity: Simmer pasta of your choice. Meanwhile, sauté sausage, bacon, ham, or ground pork; remove the cooked meat with a slotted spoon. Using the same skillet, sauté a clove or two of minced garlic in the rendered fat from the meat; add legumes or greens (examples: shredded kale, chopped broccoli raab, sliced sugar-snap peas, cooked cannellini) and sauté until tender, adding a little stock or water to steam the firmer items. When the pasta’s done, toss everything together, adding a splash of stock or cream. Sprinkle with herbs and/or Parmesan cheese and you’re good to go. (Two favorite variations on this theme include Orecchiete with Broccoli di Ciccio and Italian sausage, and Pasta e Fagioli with ‘Nduja.)


