Posted by Anita on 02.19.10 8:02 AM
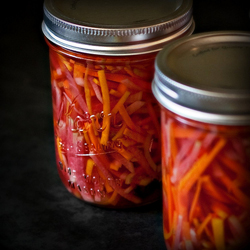 If you’ve ever wanted to try your hand at canning but held back because it seems complicated, consider getting yourself into a pickle.
Pickles are one of my favorite canning projects, because I am both lazy and messy. When dealing with simple brine — instead of the sticky goo of preserves, or the splattery plop of tomatoes — canning becomes almost too easy. You prep your vegetables, mix the pickling liquid, and put everything into jars. And because of most pickles’ high acidity, the chances that anything bad will happen during storage are practically nil. They’re the perfect beginner’s canning project.
The best part is, you don’t even have to wait until cucumbers are in season. Sure, those dilly spears are America’s favorite pickle, but canning books are jammed full of an international variety of vinegar-preserved vegetables. Even the bleakest winter farmers market usually has a decent assortment of root vegetables, and many of them — especially carrots and dense radish varieties — make excellent pickles.
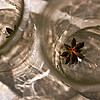
If you’ve ever eaten the Vietnamese heaven-on-baguette sandwich known as banh mi, you’ve almost certainly enjoyed the type of pickle I made for this month’s edition of Tigress’s CanJam. Typically made with little more than carrots, daikon, ginger, vinegar, and salt, the version here adds star anise to give the julienned garnish a mysterious note.
They’re rather on the sweet side, but that makes a nice foil for the meaty, salty goodness of their signature sandwich partner. As the canning gurus at Ball tell us, “The job will go faster if you have a mandoline to julienne the vegetables”. But I managed a half recipe using just a very sharp knife and a lot of patience.
Vietnamese Carrot and Radish Pickle
– from the Ball Complete Book of Home Preserving
3 C white vinegar
3 C filtered water
1-1/2 C sugar
2 tsp grated ginger (microplaned)
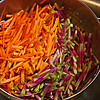
2 pounds carrots, 1/8-inch julienne
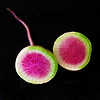
2 pounds dense radish (such as daikon or watermelon) 1/8-inch julienne
6 whole star anise
Prepare canner, lids, and 6 pint jars according to the usual method.
 In a large non-reactive saucepan, combine vinegar, water, sugar, and ginger. Bring to a boil over medium-high heat, stirring to dissolve sugar. Add carrot and radish; stir for 1 minutes, then remove from heat.
Place a star anise into each hot jar. Using a funnel, pack vegetables into hot jars up to just shy of 1/2 inch of the rim. Ladle hot pickling liquid to cover vegetables, leaving 1/2-inch headspace.
Remove air bubbles and adjust headspace; wipe rims and apply lids and rings.
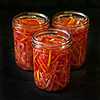
Place jars in canner, ensuring they are completely submerged. Bring to a boil and process covered for 10 minutes. Remove canner lid; wait 5 minutes, then remove jars. Cool, check for seals, and store in a cool, dark place for up to a year.
CanJam, preserving & infusing, recipes
6 Comments »


Posted by Anita on 01.18.10 6:23 AM
 I don’t think anyone would be surprised to hear that I love to can. Most years, I get started on the preservation kick at the height cherry season (when I make my annual batch of cocktail garnishes), and don’t put away the canner until after the last tomato harvest. So when I heard about a new, year-round canning challenge — one that has participants putting up a different type of produce every month — I knew I had to jump on in and join Tigress’s Can Jam.
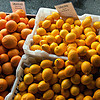
January’s Can Jam theme is citrus, a particularly apt topic here in the Bay Area where farmers markets and backyard trees are bursting with the best oranges, lemons, and grapefruits of the year. I always like canning with a friend to help share the work (and the resulting bounty), so I asked Laura from (not so) Urban Hennery if she’d like to can together when she visited San Francisco last weekend; she happily agreed. I flagged a bunch of citrus recipes in my favorite canning books, thinking I’d let Laura decide which sounded the most appealing. A girl after my own heart, she suggested that we make them all!
The first, a Meyer lemon curd, wasn’t technically eligible for the Can Jam, because it needs to be pressure canned to be shelf-stable. (The challenge requires all recipes to be suited to a standard boiling-water canner.) But we made it anyway, and oh am I glad we did. With the orange yolks from Laura’s hennery eggs — yes, she brought them down in her checked baggage! — and the deep yellow zest from Meyer lemons we bought from Hamada Farms, the end product turned an eye-searing yellow. If I saw a bottle of curd that yellow in the store, I’d walk away, thinking it must be filled with artificial everything.
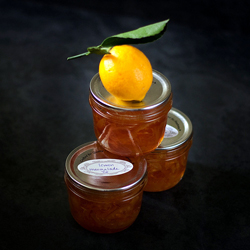
Our second recipe — which used June Taylor‘s three-fruit marmalade as a starting point — featured a quadruple-dose of citrus: Moro blood oranges, lemons, golden grapefruit, and one giant bergamot from our backyard tree. We ended up with 9 half-pint jars of a deep crimson preserve, clear enough to see the different-shaped bits of peel suspended evenly throughout its jewel-like base. It’s pleasantly bitter, and (at least at this stage) you can pick out the flavor of each of the citrus varieties as you make your way through a spoonful… er, I mean, a slice of toast.
The last recipe turned out to be our hands-down favorite. Its simplicity — both of ingredients and of preparation — belies its gorgeous looks and uniquely delicious taste. Combining lemons, sugar, and water, this one’s good enough that Laura and I were already plotting how to get our hands on more Meyer lemons before the week was out.


Meyer Lemon Marmalade
– adapted from Catherine Plagemann’s Fine Preserving
3 perfect, very fresh Meyer lemons
1 more lemon, for juice
sugar (about 4 cups)
Sterilize canning jars and prepare lids according to manufacturer’s directions.
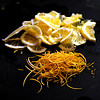
Peel the three lemons, removing just the yellow and none of the pith. Slice the peel into very fine, thin strips and set aside. Cut each peeled lemon in half, lengthwise. Remove as many seeds as possible plus the center strings. On a cutting board with a lip, slice the lemon halves, including the white rind, paper thin. Remove any remaining seeds. In a glass measure, combine the zest, lemon pulp, any juices from the pulp, and the juice of one more lemon. You should have about 1 cup of prepared lemon and juices.
 Cover the prepared lemon with about a cup of cold water; it should be just enough to submerge all of the lemon. Let soak for 3 hours, to soften the zest. After soaking, combine the soaked lemon and zest in a wide Dutch oven along with an equal amount of sugar by volume. Bring to a simmer over medium-high heat, and simmer (do not boil) until the marmalade jells.
Keep a close eye on the cooking marmalade. It will go from liquid to jelled more quickly than you would expect. Don’t go by eye in the pan; the mixture will still look much more wet than a typically set marmalade. Use the saucer test or watch for the liquid to sheet off the edge of a metal spoon.
Ladle into hot, sterilized half-pint jars, leaving 1/4-inch headspace. Wipe rims of jars with a damp, clean towel; adjust canning lids and process in a boiling-water canner for 5 minutes. Turn off the heat and leave processed jars in the canner for 5 minutes more, then remove and cool on a thick towel or a wire rack for 12 hours. When jars are completely cooled, check for proper seal. Remove rings from sealed jars, and put any unsealed jars in the refrigerator to use first.
If you can bear it, it’s best to let this marmalade cure for at least a week before eating, otherwise the zest is a bit tough.
Yields three 8oz jars
CanJam, locavore, preserving & infusing, recipes
15 Comments »


 If you’ve ever wanted to try your hand at canning but held back because it seems complicated, consider getting yourself into a pickle.
 In a large non-reactive saucepan, combine vinegar, water, sugar, and ginger. Bring to a boil over medium-high heat, stirring to dissolve sugar. Add carrot and radish; stir for 1 minutes, then remove from heat.


 I don’t think anyone would be surprised to hear that I love to can. Most years, I get started on the preservation kick at the height cherry season (when I make my annual


