Posted by Anita on 08.15.07 12:31 PM
 Julie Powell notwithstanding, most cooks discovering Julia Child’s recipes for the first time seem mysteriously drawn to the most labor-intensive and luxurious among them. Apparently, this isn’t strictly a modern phenomenon: In his entertaining book The United States of Arugula, David Kamp recounts this very same thing happening when Child’s first book debuted, poking gentle fun at those who “deliberately chose the most difficult [recipes] to execute when company was coming.”
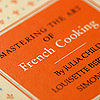
Among these over-the-top creations, Kamp makes much of the overwrought dish known as Veau Prince Orloff, “a display piece consumptive of enough time and money to garner status.” I looked up the offending recipe in my own copy of Mastering the Art of French Cooking, and felt a little queasy: The damned thing goes on for three full pages and contains — I kid you not — no less than a dozen sub-recipes.
Luckily for those of us who don’t have days to spend in the kitchen, Julia’s chef d’oeuvre also offers up simple recipes in spades. Scattered among the aspics and the suprêmes and the canard a l’orange lies a wide assortment of bistro classics and a fair number of recipes that rise no higher than the cuisine de bonne femme of everyday French households. Kamp recounts Julia herself choosing the simple potage Parmentier as the book’s first recipe “so that her audience would not be intimdated.”
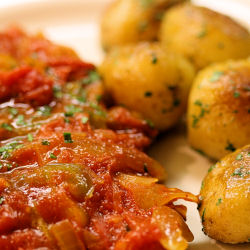
When I pull out my Grandpa‘s battered copy of Mastering, these are the sorts of recipes I crave: The Provençale garlic soup, the mushroom quiche, the steak au poivre. So when Lisa at Champaign Taste proposed her second-annual blog party to honor the 95th anniversary of Julia’s birth, I knew right away the sort of dish I’d share. Sure, it’s not going to win any beauty contests, but it’s a delicious and satisfying plate full of seasonal flavors with a subtle French flair.
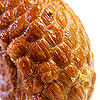
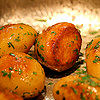
Julia recommends serving this humble “Ham Slices Baked with Tomatoes, Onions and Peppers” alongside her sauteed potatoes — and really, folks, how can you pass that up that kind of good advice? While I prepped the piperade, Cameron peeled a pound of baby spuds and trimmed them to roughly the same size, browned them in butter and oil, then covered them to steam until tender. Along with a bottle of French rosé, they were the perfect foil for the tangy, salty richness of the ham. We raised our glasses to the warbly voiced girl from Pasadena, and counted ourselves truly lucky to have lived in her era.
Jambon en Pipérade
– adapted from Mastering the Art of French Cooking
Cook’s note: Julia simply calls for “peeled, seeded, juiced and sliced” tomatoes; I’ve complicated matters a bit by explaining how you get there. If you dispense with peeling your own tomatoes and opt for good quality whole canned tomatoes — like Muir Glen — you’ll need 2-1/2 cups of tomato pulp plus about 3/4 cup of their juice. Go this route and this simple dish can be on the table in less than 45 minutes.
2 pounds cooked ham, sliced 1/2-inch thick
1 to 2 T bacon fat or olive oil
1 cup sliced yellow onions
1 cup sliced green bell peppers
2 pounds firm, ripe, red tomatoes
2 cloves garlic, mashed
1/8 tsp pepper
pinch of cayenne pepper
1/4 tsp fresh thyme
2 T minced parsley
Preheat the oven to 350°. Meanwhile, bring a saucepan of water to a boil.
While the water heats, prepare an ice-water bath in a large bowl. Peel the tomatoes by scoring an ‘x’ in the bottom of each, then dropping into the boiling water. When the skin begins to peel away from the ‘x’, remove from the pan with a slotted spoon, and drop each tomato in the ice-water bath. When cool enough to handle, remove the tomato and peel off the skin. Proceed with the remaining tomatoes until all are peeled.
Cut each tomato in half, and remove any hard core or stem section. Squeeze the juice and seeds out of the fruit, reserving on the edges of the cutting board (or in a bowl if they become overwhelming). Slice the squeezed tomato flesh into regular pieces. Set aside the tomato flesh and the tomato seeds/juice separately.
Trim any excess fat off the ham, and dry each slice on paper towels. Heat the fat in your largest skillet until it is almost smoking; then brown the ham for a minute or two on each side. Remove ham from skillet and place in a shallow baking dish large enough to hold the ham in one layer. (A slight overlap is fine.)
Lower the heat and stir the onion slices into the fat. Cook over medium-low heat for 5 minutes. Stir in the peppers and cook 5 minutes more, or until the vegetables are soft but not browned.
Place the tomato pulp over the onions and pepper, and continue to cook over medium-low heat. While this is happening, scoop the tomato seeds and juice, along with any seed jelly, into a strainer, and add the strained liquid to the skillet.
Push the solids to one side of the pan, and tilt the skillet to allow the liquids to gather on the now-empty half of the pan. Arrange the skillet off-center on the burner so that the juice side of the pan is directly over the flame, and the vegetables are further away. Simmer until the juices become minimal, stirring everything together and re-dividing every few minutes, to make sure that the juices reduce without overcooking the vegetables.
When the tomato juice has almost evaporated, stir it back into the vegetables and cover the browned ham slices with the mixture. Cover the baking pan with foil, and place in the preheated oven. Cook for 20 to 30 minutes, until the ham is heated through and tender. Baste with juices in the dish, then correct seasoning if necessary. Garnish with chopped parsley, and serve with sauteed potatoes.
cookbooks, holidays & occasions, meat, recipes
7 Comments »


Posted by Cameron on 08.14.07 9:58 PM
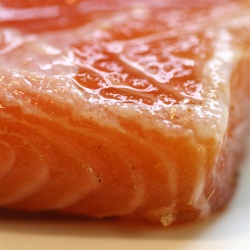 Sometimes, my palate is a live illustration of the law of unintended consequences. The combination of our sausage-making party and the constant talk about preserving food that comes with summer rattled around in my subconscious for weeks.
Then, on a Saturday morning as we did our shopping, we passed by Shogun Fish at the market. They were advertising the first local wild salmon of the season and a relay closed somewhere in my head. Suddenly, I wanted gravlax, and I wanted to make it myself.
On the hunt for a recipe, I turned to Tom Douglas’ Seattle Kitchen. Tom is my first stop when I need wisdom about salmon, and his advice mostly lined up with other recipes and random commentary that I found around the InterWebs. I guess. The big differences were the addition of ground juniper berries (possibly traditional) and the absence of dill (definitely untraditional), and the presence of some other spices.
Fennel? Cayenne? Okay, whatever.
In theory, I knew that the process wasn’t difficult: just a simple salt/sugar cure. But I had no idea how dead-freakin’-easy it would be. Just pack the dry cure over and around the fish, weight the whole pile down with cans or what-have you, refrigerate, wait a few days and POW! Instant gravlax. Seriously, the hardest thing about this whole project was picking the juniper berry flecks out of the finished product. Obsess much? No! Yesssss. (Who said that?)
I love this stuff. I eat it for breakfast — with soft scrambled eggs, yum — for lunch, for a snack, whenever. For my next batch I’m going to try vacuum-sealing and freezing some to see how it holds up.


Gravlax
1-1/4 pound salmon fillet, preferably skin on, pin bones removed
Cure
2/3 cup kosher salt
2/3 cup granulated sugar
1/4 cup firmly packed brown sugar
1 1/2 teaspoons paprika
1 teaspoon ground juniper berries
1 teaspoon fennel seeds, ground
1/4 teaspoon cayenne
Combine the cure ingredients in a small bowl. Sprinkle the bottom of a non-reactive baking pan with about 1/2 inch of the cure and place the fish in the pan, skin side down. Blanket the fish with the remaining cure, creating a layer about 1-1/2 inches thick.
Cover the salmon with a piece of wax paper and top with another smaller pan, then weight the top pan down with a few cans. Store in the refrigerator for two to three days until the salmon is quite firm to the touch; the exact amount of time will depend on how thick your piece of salmon is. Remove the wax paper and the cans, and then use a rubber spatula to scape the cure from the salmon. Remove the salmon from the pan and briefly rinse it, then pat it dry with paper towels. To serve, slice the gravlax very thinly on the bias.
Cook’s note: I was not shy at all about rinsing the gravlax under cold running water until the cure was gone, daddy gone.
breakfast, meat, preserving & infusing, recipes
5 Comments »


Posted by Anita on 07.25.07 9:21 PM
 Otto von Bismarck reportedly quipped that “The less the people know about how sausages and laws are made, the better they sleep at night.” Although the ol’ Prussian was undoubtedly right about legislation, when it comes to wurst, I’d beg to differ. Not only is sausage-making entertaining and educational, it’s also much easier than you might think.
It can even be fun, especially if you divvy up the work among a crew of like-minded friends. One recent Sunday, we rounded up Sean and DPaul plus our new pals Jon and Karen, classmates from Kasma’s Thai cooking series. Everyone brought a dish to share and a five-pound pork shoulder; Cameron and I provided the recipes, the seasonings, the casings, and other miscellaneous bits. In a matter of hours, the six of us created a spectacular assortment of sausages to stock our freezers.
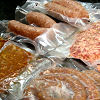
Between us, we amassed four KitchenAid mixers, three meat grinder attachments, two pairs of sausage-stuffing tubes, and one very porky kitchen. All told, we ended up cranking out more than 25 pounds of sausage. We stuffed a French-style garlic saucisse — courtesy of Michael Ruhlman’s acclaimed Charcuterie — into stout links, curled Kasma’s recipe for spicy sai oa into a hog-casing spiral, squeezed delectable Kentucky-style breakfast sausage into petite sheep casings (plus a few patties), and parceled out our spicy Mexican chorizo in bulk. Even after a hearty sampling, everyone went home with a bit more than a pound of each flavor, with no more effort than making a single batch on their own.
Although we had a blast with the grind-and-stuff method, don’t let a lack of specialized equipment hold you back from making great sausage. Most good butchers will grind any roast to order. Choose a nice, fatty pork shoulder — also known as a Boston butt or simply pork butt, even though it comes from nowhere near the hind end of the pig — and ask for a coarse grind. Mix the ground pork with your seasonings, shape into patties, and voilá: You’ve just made sausage.
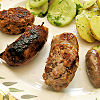
Folks were pretty evenly divided about which of our creations they loved best. For me, the winner of the day was the Kentucky breakfast sausage. There’s no stronger compliment that I can pay it than it just tasted right… something like your Southern grandmaw would have made, if you’d been so blessed.
Go on, don’t be shy: Be your own Southern grandmaw. It’s much easier than getting a bill through Congress, I promise.


Kentucky Breakfast Sausage
– adapted from Bruce Aidells’ Complete Sausage Book
4 pounds well-marbled pork shoulder, cubed
1-2 pounds pork back fat, cubed
— quantity varies depending on the fattiness of the meat
2 T kosher salt
4 tsp freshly ground black pepper
1/4 cup ground, dry sage
2 tsp ground cayenne pepper
2 tsp ground coriander seeds
1 tsp freshly grated nutmeg
1 cup water
sheep casings (optional)
Cut the pork and fatback into cubes. Place in a metal bowl in the freezer for 30 minutes to chill well, along with the grinder parts. When thoroughly chilled, grind the pork and 1 pound of fatback through the coarse plate of the grinder.
In a large bowl, mix all the ingredients (except casings), kneading and squeezing until well blended. Fry a test patty and taste for seasonings and fat content; adjust as needed.
For links, stuff the sausage into casings and tie or twist at three-finger-width intervals. If making patties, shape the meat into large rolls, 2 inches in diameter. Wrap them in waxed paper, and refrigerate until ready to use; slice into patties as needed.
(Sausage keeps refrigerated for 3 days, or frozen for 2 to 3 months.)
cookbooks, cooking, equipment, meat, recipes
14 Comments »


Posted by Anita on 07.02.07 12:18 PM
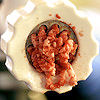
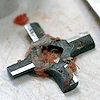
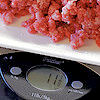
 Frankly, I don’t know how I ever survived without my KitchenAid mixer’s meat-grinder attachment. Sure, it’s great for the occasional sausage-making session, but its real appeal lies in its ability to turn a worthy chuck roast into the world’s juiciest, tastiest hamburger in nothing flat.
When we were living in the basement, I resorted to store-ground meat a few times, and got a taste of what I’d been missing: Even when we bought good Prather Ranch ground beef, the pre-processed meat morphed into chewy, dry-ish, and lackluster patties — a pale shadow of the glorious burgers made the same beef, freshly ground.
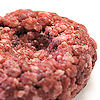
Fortunately, grinding your own burgers is so simple it’s easy enough for a weeknight: Cube your chuck roast, run it through the grinder’s coarse plate, season the ground meat, and measure out 5 to 6 ounces per patty. Ever-so-gently, pat each portion into a thick disk, then make an indentation in the center to keep the patties flat when cooked. Grill or broil to your desired doneness, and serve on a good, lightly toasted bun — we like the pain de mie buns from Acme.
Cleanup’s a snap, too: All the grinder parts go right in the dishwasher. Even taking into account setting up the mixer — which takes all of 2 minutes — the process isn’t drastically more troublesome than opening a cellophane-covered styrofoam pack.
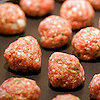
And in this age of mad cows, it’s comforting to know that our hamburgers contain only the parts that I put through the grinder. But even if it weren’t a safer alternative, the taste of home-ground meat alone would win me over. And if you aren’t feeding a crowd, you can make more patties and freeze them for later, although I find they lose a bit of the charm in the freeze-thaw cycle — I usually turn my leftover ground chuck into meatballs.
Whatever you do with your home-ground beef, I promise you’ll taste the difference.
cooking, equipment, meat
17 Comments »


Posted by Cameron on 04.18.07 9:47 PM
 “I got nasty habits, I take tea at three
Yes and the meat I eat for dinner
Must be hung up for a week”
–“Live With Me,” The Rolling Stones
Quick flashback to five years ago, just before we became legally married with dinner. We relate our honeymoon plans to friends and acquaintances and are met with raised eyebrows and a single repeated question:
“You’re going to England for two weeks? What are you going to eat?”
Everything that we could fit in, thank you very much, and the list was longer than we’d have time or money for. Every Real Ale pub within reach of the Underground. Boxwood Cafe. Pork and stilton breakfast sandwiches from the Borough Market, washed down with Monmouth Coffee. Cheese from Neals Yard Dairy. English breakfast, bangers please. Eton Mess. Branston Pickle. Chip shops. Eccles cakes. Pret a Manger. McVitties. Packaged meals from London groceries as good or better than you could make with fresh ingredients.
 But the meal that I was not-so-secretly looking forward to the most was dinner at St. John Bar and Restaurant. It was food that (at the time) I could only find in England. Every possible part of some ridiculously tasty animal prepared and served practically unadorned. Anita still wakes with a start from dreams of Middlewhite pork. Here I found what I adore about English cuisine: naked love for animal fat, roasted flesh, organ meats, connective tissue, and wild things from the hunt. Pig tails, venison, game birds, sliced roast beef, Yorkshire pudding.
And beef marrow. Have mercy, the beef marrow.
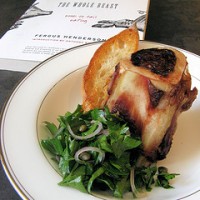
Roast Bone Marrow and Parsley Salad
from The Whole Beast: Nose to Tail Eating, by Fergus Henderson
(note: this recipe captures just a bit of Chef Henderson’s calm, dry voice and humor. The actual cookbook is as entertaining to read as it is to use. Plus, who else is going to tell you how to deep-fry lamb’s brains?)
– serves four
twelve 3-inch pieces of veal marrowbone
a healthy bunch of flat-leaf parsely, leaves picked from the stems
2 shallots, peeled and very thinly sliced
1 modest handful of capers (extra-fine if possible)
Dressing:
juice of 1 lemon
extra-virgin olive oil
a pinch of sea salt and freshly ground pepper
a good supply of toast
coarse salt
Put the marrowbone pieces in an ovenproof frying pan and place in a hot 450 degree (F) oven. The roasting process should take about 20 minutes depending on the thickness of the bone. You are looking for the marrow to be loose and giving, but not melted away, which it will do if left too long (traditionally the ends would be covered to prevent any seepage, but I like the coloring and crispness at the ends).
Lightly chop your parsley, just enough to discipline it, mix it with the shallots and capers, and at the last moment, dress the salad.
Here is a dish that should not be completely seasoned before leaving the kitchen, rendering a last-minute seasoning unnecessary by the actual eater; this, especially in the case of coarse sea salt, gives texture and uplift at the moment of eating. My approach is to scrape the marrow from the bone onto the toast and season with coarse sea salt. Then a pinch of parsley salad on top of this and eat. Of course once you have your pile of bones, salad, toast, and salt it is diner’s choice.
English food is not a joke because nose to tail eating is serious business.
This post is part of the Fish & Quips event hosted by Becks & Posh, in honor of St. George’s Day.
cookbooks, cooking, holidays & occasions, meat, other blogs, recipes, travel
9 Comments »


Posted by Anita on 02.26.07 7:34 AM
 We didn’t by any plum buns or fat hogs — although we did buy both pâté maison and calabrese sausage from the Fatted Calf, so I’ll take that last one on points. But we did spend a very chilly late morning at the market Saturday. By some miracle, the dogs let us sleep until 9:30, so we were on the late shift, but still mostly alone in the artic air.
Chilaquiles? SÃ, por supuesto! (And also delicious tacos de pollo hiding under some rather insipid guacamole.) We made quick rounds of the veggie stands, admired some of the first signs of spring — plenty of blossom-studded boughs, stacks of baby onions, and buckets of tulips and calla lilies to make you glad you left your nice, warm bed.
I’m getting a chill just thinking about it, though. Damn, it was cold! Quick, inside the building, chat up the guys at Prather, flirt a bit, get a lovely flat-iron steak for the grill and one of those heritage chickens we’re hearing so much about. (That’d be $15-ish each, not per pound, thank god.) After warming up — and a stop at Miette, of course — it’s back out front to pick up chips, tortillas and Yellow Eye beans from Rancho Gordo… where Steve tells us we just missed Alan Richman from GQ and that the NY Times will be singing his praises two weeks hence. Let’s hope he remembers us when he’s well and truly famous.
All in all, a successful re-entry into San Francisco. The kitchen’s coming along nicely, too — but it’s all under tarps at the moment, so the promised update will have to wait.
In the meantime, there are more market photos here…
farmers markets, meat, shopping
8 Comments »


Posted by Anita on 02.18.07 1:59 PM
 Happy Lunar New Year to all! We wish you prosperity and good luck for the coming year.
Today’s the first day of 4705, so what better way to celebrate the Year of the Fire Pig than with some our our favorite porky recipes…
..from the MwD archives:
New Year’s Cassoulet
Pear and Arugula Salad with Guanciale
Not-Spam and Eggs
Carnitas Tacos
Cochinita Pibil
..from swine-lovin’ friends and fellows:
Homemade sausage from Cookiecrumb at I’m Mad and I Eat
Milk-braised chops from Dr. Biggles at MeatHenge
Devils on Horseback from Sean at Hedonia
Tartiflette from Lucy’s Kitchen Notebook
Senate Bean Soup from Steve at Rancho Gordo
Larb from Molly at Orangette
Ants on a Tree from Matthew at Roots & Grubs
As soon as we start cooking and/or eating anything noteworthy again, I promise we’ll be back with some original content.
And stay tuned for another remodeling update, too. (I’ll be home on the 22nd, and Cameron says the kitchen is looking “so beautiful I want to sleep in it.”)
holidays & occasions, meat, other blogs, recipes
1 Comment »


Posted by Anita on 10.29.06 5:00 PM
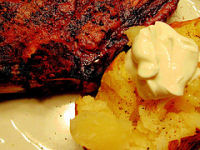 Those of you who visit (or live in) Los Angeles have probably driven past one of the three Clearman’s North Woods Inn restaurants. They’re pretty hard to miss, looking for all the world like a giant log cabin, complete with “snow” on the roof and “icicles” hanging from the eaves. Inside, the rustique effect continues with stained-glass lamps, taxidermy specimens, and bordello-style “art” on the walls.
Once upon a time — in fact, until quite recently — the cocktail waitresses even dressed up in skimpy frontier barmaid costumes, complete with red-plaid shrugs and miniskirts short enough to show off their frilly underpants. The waiters still wear lumberjack outfits right out of Monty Python, with red-plaid vests, black pants, and arm garters. (No hats with ear flaps, alas.)
My mom and dad have been going to Clearman’s for more than 40 years, since before they were married. When we sisters were kids, it was one of the first nice-ish restaurants we ever went to. As you might expect from the decor, the menu runs the gamut from steak to steak, with a few minor detours into fried chicken and kabobs. Before your main course arrives, you always get a pair of salads — a red cabbage slaw and iceberg with blue cheese dressing — and artery-clogging cheesetoast, all served family style. And, of course, every steak comes with a baked potato as big as your head, groaning with fixin’s.
My middle sister’s the only family member who lives in Southern California these days, so our visits to Clearman’s are growing fewer and farther between. Truth be told, I don’t think the food’s as good as it once was. But we keep going, mostly because it’s a sentimental favorite… and probably also because you’ve got to love a place with signs in the bar insisting that you throw your peanut shells on the floor. We’re obviously not the only family that maintains a soft spot for the place, given that they sell their cheesetoast spread in almost every supermarket south of Santa Barbara.
Dad mentioned last week that he wanted us to make Clearman’s-inspired red-cabbage slaw for dinner over the weekend, and we happily obliged. We went whole hog (or is that cow?) by adding — you guessed it — steaks, potatoes, and iceberg lettuce with bleu cheese dressing to the menu. We hunted the local markets for the cheese spread, but came up empty.
When we told Dad about our fruitless search, it took him about 10 seconds to find a recipe for the stuff online. (You now know where I inherited my strong Google-fu from.) I whipped up a quarter-batch, Mom slathered it on some sliced sourdough bread, and we popped it under the broiler. The end result wasn’t bad — in fact, made with butter instead of the standard margarine, I think I like it even better than the original.
The red-cabbage slaw recipe comes from the L.A. Times, and we’ve made it regularly over the years. It’s perfectly fine on its own, but it’s even better mixed up with iceberg and blue-cheese salad.
“Just Like North Woods Inn’s” Red Cabbage Slaw
1/2 head red cabbage
1/2 cup vegetable oil
1/2 cup + 1T red wine vinegar
3T sugar
4 tsp. salt
1 tsp. seasoned salt
1/4 tsp. black pepper
1/4 tsp. onion powder
Shred cabbage irregularly, with some coarse and some fine shreds. Combine other ingredients in a bowl (or shake together in a jar or bottle) and pour over the cabbage. Mix well and let stand, refrigerated, for at least a few hours, or over night.
Makes 6-8 servings.
family, meat, recipes, restaurants, SoCal
10 Comments »


Posted by Anita on 10.19.06 7:36 AM
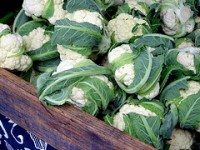 Ack, I hate it when I look up and realize that (a) it’s almost the weekend and (b) I haven’t written anything since the previous weekend. Chalk it up to a busy week, I suppose.
Which is not to say that we haven’t been cooking — and eating — quite a lot. Saturday we did our usual trek to the Ferry Plaza Farmers Market in the morning. Although the light wasn’t as gorgeous as it was the week before, there were still plenty of gorgeous specimens to photograph… many of which you’ll see in the week’s menus.
Saturday evening, we roasted a little chicken from Hoffman, which made us realize — duh! — that yes, Virgina, there is a huge difference between these coddled birds and even the Rosies and Rockys at Whole Paycheck. Just like the pork and beef from Prather, I’d much rather spend the same money to have a little of this kind of chicken than a lot of the commercial stuff. Anyway, sermon over…
I’d also bought a bagful of broccoli di ciccio and turned it into a tasty side dish with orecchiete and sauteed chickpeas. For such a simple recipe, it was incredibly satisfying — and even better the next day for lunch, with some of the leftover chicken meat shredded into it.
The next morning, I got up early and baked a Red Velvet cake from the Lee Bros. cookbook, in preparation for a dinner that evening with friends. Just like every other recipe I’ve tried from that book, it required a bit of interpolation to make it work, but the end result was pretty good… and definitely red! I realized in the process that I hadn’t done much baking at all, in a very long time. That’s going to change — I really miss it!
There’s nothing we like better than puttering around the house, tidying and cooking and getting things ready for a dinner party. In this case, an impromptu meal with our friends Sean and DPaul, who we hadn’t seen for dinner in far too long. They’d spent the afternoon putting up a truckload of preserves, so by the time they hit our living room, they were well ready for a drink… and to sit down!
We drank our Manhattans and ate a plate of radishes with Irish butter and fleur de sel, and listened enviously to their tales of pear butter and other seasonal spreads. Ah, another thing I haven’t done this year — not even a batch of pickles. Sigh.
Dinner was a salad of marinated roasted beets served with bleu cheese crumbles and rosemary-roasted walnuts; the Zuni Cafe cookbook’s mock porchetta — our old standby — with roasted teeeensy potatoes and chunks of fennel; and, of course, that Red Velvet cake.
Monday night brought a soup-and-sandwich supper: The triumphant return of the cauliflower and Stilton soup from a Soup of the Fortnight of yore, paired with BAT (bacon, avocado, and tomato) sandwiches. Yum! So much fun to take good bacon — this time from Prather Ranch — and pair it with pain de mie and one of the last superripe heirloom tomatoes of the season.
And then Tuesday, we ate a very simple dinner of chorizo tacos and soupy beans. Man, those Fatted Calf boys know how to make tasty sausage — I think theirs is even better than my own! Paired with Rancho Gordo ojo de cabro beans and fresh-masa tortillas, I can’t imagine a better quick-weeknight dinner. Or breakfast! We smashed up some of the beans, tossed in some leftover chorizo, doused it all with good salsa roja, and stirred in some of RG’s chips, and sprinkled with queso… chilaquiles on a weekday, be still my beating heart!
More food later… must go pay the bills.
baking, cookbooks, entertaining, farmers markets, meat, Mexican, shopping, Soup o' the Fortnight
2 Comments »


Posted by Cameron on 10.09.06 2:31 PM
 Leftovers are the very fabric of happiness. Half the fun of Thanksgiving dinner is making cold turkey and stuffing sandwiches the next day.
I’m grooving on the leftovers of Saturday’s dinner: braised beef short ribs that Anita bought from Bristol Farms last week on spec, knowing that I’d make good use of them. I used a really simple treatment and they rewarded me by tasting absolutely wonderful. We ate them Saturday night with polenta and roasted brussel sprouts.
The real party started Sunday, though, when we made sandwiches from the leftovers. Pulling apart the meat was just the start. I had about a quarter-cup of the sauce left over that, refrigerated, set up like meat-wine jelly. Demi-glace, more or less, only without the tomato. Perfect for spreading on bread with a little mayo.
The First Braised Short Ribs of Fall
- 2.5# beef short ribs
- 2 medium onions cut into half-inch slices
- 1 medium carrot roughly cut (3/4-inch chunks)
- 1.5 c full-bodied red wine (e.g. syrah, zinfandel)
- 2 c chicken stock or broth
- 4-5 sprigs fresh thyme
- Olive oil
- Salt & pepper
- 2-4 T butter
Preheat oven to 225 degrees. Liberally salt and judiciously pepper the short ribs. Haul out your dutch oven or other large, deep, heavy, ovenproof pot. Heat the pan over a medium-high flame until it’s way too hot to touch. A droplet of water should bounce off the bottom of the pan. Really hot. Pour in 2-3 tablespoons of olive oil. Maybe even four. Enough to coat the bottom of the pan with style and grace. Let the oil heat up.
Turn on your hood. Open the windows. Close the door to the living room. Genuflect. Crank the flame up to afterburner and USING TONGS, gently lower the ribs into the pan and sear all sides until a good brown crust appears. Do not crowd the pan. Sear the ribs in batches if you have to, but keep that pan Top-Gun hot. Don’t burn the meat, but don’t wimp out on the sear: if it just looks gray, you’re not done yet. Keep your kitchen clean (ish) by covering your pan with a spatter guard. As you finish the ribs, remove them to a plate. Nice and brown all over, right? This whole affair will probably take 10-15 minutes.
After the meat is done, dump in the onions and carrot with a half-teaspoon of salt. Sweat the vegetables until the onions are translucent. If you want a sweeter sauce, you could go until they’re golden. Pour in half the stock and half the wine. Use a wooden spoon to loosen any browned bits sticking to the pan. Put the ribs back in the pot along with any juice that’s pooled on the plate. Add the rest of both stock and wine slowly, stopping if the liquid level threatens to submerge the meat. At least 1/4 of the typical meat-and-bone mass should be poking out above the liquid. Add the thyme. Bring to a low boil, cover, and put in the oven and cook for three hours or until you can have your way with the meat. It should be soft and falling off the bone, easy to pull apart (see bonus note below).
Put the meat on a plate and tent it with aluminum foil. Pour whatever is left in the pan through a strainer, and then get the resulting delicious liquid back on the stove in a skillet or saucier. If you didn’t go the way of the extra bonus note, you’ll want to skim as much fat off the top as you can.
Reduce the defatted liquid over medium-high heat until it’s thick enough to coat the back of a spoon. Kill the flame and stir in a couple of tablespoons of butter. Taste while holding onto the counter top so that when your eyes roll back into your head you won’t fall over. Adjust the seasonings. Add more butter if you think it needs it. Plate the meat and drizzle some sauce over it. Don’t blow all the sauce on your guests. Save some that you can put in the refrigerator and spread on sandwiches after it gelatinizes.
Bonus note: You can make this recipe both more tasty and easier to handle by executing it over the course of a couple of days. After the meat has cooked, cool the pot and then refrigerate. It will be fine for a few days. When you’re ready to serve, skim the congealed fat, reheat gently until all is liquid again, and then continue as above.
cooking, meat, recipes
Comments Off on Concentrate


 Julie Powell notwithstanding, most cooks discovering Julia Child’s recipes for the first time seem mysteriously drawn to the most labor-intensive and luxurious among them. Apparently, this isn’t strictly a modern phenomenon: In his entertaining book The United States of Arugula, David Kamp recounts this very same thing happening when Child’s first book debuted, poking gentle fun at those who “deliberately chose the most difficult [recipes] to execute when company was coming.”


 Sometimes, my palate is a live illustration of the law of unintended consequences. The combination of our


 Otto
Otto 


 Frankly, I don’t know how I ever survived without my KitchenAid mixer’s


 “I got nasty habits, I take tea at three
 But the meal that I was not-so-secretly looking forward to the most was dinner at
  We didn’t by any plum buns or fat hogs — although we did buy both pâté maison and calabrese sausage from the Fatted Calf, so I’ll take that last one on points. But we did spend a very chilly late morning at the market Saturday. By some miracle, the dogs let us sleep until 9:30, so we were on the late shift, but still mostly alone in the artic air.
 Happy
Happy  Those of you who visit (or live in) Los Angeles have probably driven past one of the three
  Ack, I hate it when I look up and realize that (a) it’s almost the weekend and (b) I haven’t written anything since the previous weekend. Chalk it up to a busy week, I suppose.
 Leftovers are the very fabric of happiness. Half the fun of Thanksgiving dinner is making cold turkey and stuffing sandwiches the next day.