Posted by Anita on 12.19.10 3:24 PM
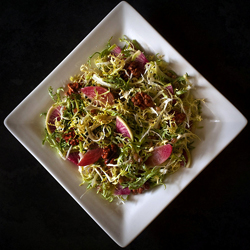 Hungry Mother always seemed like the kind of place we’d enjoy: local and sustainable sourcing, Southern-inspired food, and a great cocktail list. It’s been on our short list of places to try for years, and on a recent trip to Boston, we finally made it there.
It’s easy to win hearts and minds with menu items like pimento cheese, bourbon-braised pork shoulder, and cheddar grits with house-made tasso, not to mention winning cocktails like the No. 43 (rye, tawny port, maple syrup, and bitters). But amid all of these decadent treats was a salad that sounded so tame that I actually felt a little boring for ordering it.
The buttermilk-chive dressing was what pushed me over the edge, luring me away from other options. That, I suppose, and the pecans, which I love but can’t get locally here in Northern California. What I hadn’t expected was that the farro — a humble, wheat-like grain — would be the star of the show, bringing a nutty depth to the dish that made it substantial enough to stand up to the rich main courses that followed.
I woke up the next morning dreaming about this salad, knowing I wanted to recreate it when we got home. I realized that with a few adjustments — walnuts for pecans, wheatberries for farro — I could make it entirely from locally sourced ingredients, making it a perfect candidate for our first Dark Days Eat Local Challenge meal of the winter.
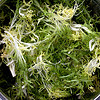
Don’t be put off by the little ingredient-prep recipes that go into this dish; none are particularly difficult or time-consuming, and all of the parts can be stored for future use. And be sure that you’re picking through and using tender frisée leaves, as more-mature ones are unpleasantly grassy and spiky.



Autumn Salad with Wheatberries
– inspired by Hungry Mother; serves 2
6 cups loosely packed tender frisée leaves
3 to 4T buttermilk dressing
1/2 cup cooked wheatberries
roasted beet wedges equal to 1 large beet (or 2 to 3 small beets)
1 watermelon radish (or 3 to 5 small radishes), sliced thinly and cut into quarter-rounds
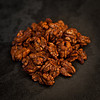
6 to 8 sweet-savory walnut halves
Toss all ingredients together, and serve on chilled shallow bowls or rimmed plates.
– Roasted Beets
Preheat the oven to 375°F. Scrub the beets and trim off tops and tails. Place in a baking dish about as deep as the beets are tall, and add 1/4 inch of water. Cover tightly with foil and bake until the beets are barely tender through (run a toothpick or cake tester through the center), about 45 minutes for large beets, 20 to 30 minutes for smaller ones. Remove from the oven and let sit, covered, for 5 more minutes. Uncover the beets, rub off the skin, and trim the tops and tails again. Cut into wedges and season to taste with salt. If not using within an hour or so, toss with a bit of olive oil; they will keep a few days in the fridge if well covered.
– Cooked Wheatberries
Note: For the 1/2 cup cooked wheatberries the salad requires, you’ll need 1/4 cup uncooked. However, it’s hard to cook less than 1 cup at a time. Leftovers freeze well, and they make a great base for grain salads, or in place of cooked rice in soups.
Soak the wheatberries overnight, or for at least a few hours. Bring the berries to a boil in a large saucepan of salted water. Reduce heat to a slow simmer and cook until tender but not blown out, about 2 hours. (Depending on freshness, wheat variety, and soaking time, this can take as little as 45 minutes or up to 3 hours.) When cooked, drain the berries and set aside.
– Buttermilk-Green Garlic Dressing
1/4 cup sour cream or plain yogurt
1/4 cup buttermilk
1/4 cup mayonnaise
1 tsp Champagne vinegar (or white-wine vinegar)
1 stalk green garlic, minced, or 1T minced chives
coarse-ground black pepper, to taste
salt, to taste
Mix all ingredients in a bowl, and refrigerate for at least an hour.
– Sweet-Savory Walnuts or Pecans
adapted from Epicurious
2 tsp sugar
1/4 tsp salt
1/4 tsp paprika
1T egg white
1 cup walnut or pecan halves (about 1/4 pound)
Preheat oven to 350°F. Lightly oil a rimmed cookie sheet, or line it with parchment.
Whisk together sugar, salt, and paprika in a small bowl. Whisk egg white in a medium bowl until frothy, then stir in nuts, mixing until evenly coated with egg white. Add sugar mixture and toss to coat.
Spread the nuts in the pan in a single layer. Bake, stirring once or twice, until dry and well toasted, about 20 minutes. Loosen nuts from pan, then cool completely.
Farmers and food artisans who created the ingredients for this week’s meal:
Massa Organics, Hamilton City: wheatberries
Star Route, Bolinas: frisée
Mariquita Farm, Watsonville: beets, watermelon radish
Glashoff, Fairfield: walnuts
Clover Organic, Petaluma: buttermilk, yogurt
Eatwell Farm, Dixon: Pastured eggs (for mayo)
Bariani, Sacramento: olive oil
Katz, Napa: Champagne vinegar
Knoll Farms, Brentwood: green garlic
Guisto’s Vita-Grain, South San Francisco: sea salt
Range Brothers, Capay Valley: pork chop
Exemptions: sugar, peppercorns
Boston, Dark Days challenge, locavore, recipes
13 Comments »


Posted by Anita on 12.10.10 1:48 PM
 This month’s final CanJam theme — dried fruit — had me kicking the walls. I don’t really enjoy the texture of dried fruit, and given that it’s already preserved, it seems redundant to can it.
But our hostess, Tigress, set naysayers’ minds at easy, allowing that even a small amount of the featured ingredient was acceptable. With that in mind, I went back through the files to find a way to preserve a seasonal fresh ingredient with just a touch of dried-fruit flavor.
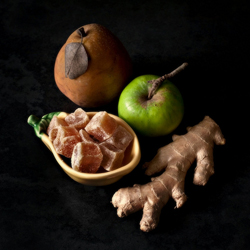
While looking through recipes for last month’s pome-fest, my runner-up candidate sounded so good that I put it aside, knowing I’d want to make it some other time. Calling for both dried currants and candied ginger, it definitely fits the bill for this month’s CanJam.
If you, like me, can’t get enough of ginger’s piquant flair, you’ll be happy to see that this recipe calls for ginger in three forms — fresh, candied, and ground — for a triple dose of sweet heat. The original recipe-writer calls this preserve a chutney, which it technically is, given the onions and vinegar. But the resulting texture is more like a savory compote or chunky pear-applesauce hybrid than the sticky, almost-chewy texture most of us associate with chutney. It’s delicious, of course (just look at that ingredients list… how could it not be?), but I felt a name-change was in order.
If your pears are thin-skinned and relatively free of blemishes, you may want to leave them unpeeled, to give the preserve a more rustic texture and color. If you prefer a smoother, lighter-colored preserve, do peel them. Note too that I’ve halved the original recipe’s quantities, so doubling the quantities below to make a 6-jar batch should be trouble-free.


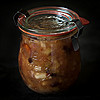
Savory Triple-Ginger Pear Preserves
– adapted from Chow Times
3 cups peeled (if desired), cored, and diced pears, mixed varieties
1/2 cup peeled, cored, and diced tart apple
1/2 cup chopped onion
1/4 cup minced candied ginger
1/4 cup seedless sultanas or dried currants
5oz apple cider vinegar
1/2 cup raw sugar or light brown sugar
1 clove garlic, sliced
1/2 T grated fresh ginger
1/4 tsp salt
1/4 tsp red pepper flakes
1/4 tsp ground dried ginger
Prepare canner, lids, and three 8-oz jars according to the usual method; keep jars hot until needed.
In a medium saucepan, heat all ingredients except pears, and bring to a boil over medium-high heat. Reduce heat to medium-low and simmer uncovered for 30 minutes, stirring occasionally.
Add the pears and bring to a boil over medium-high heat. Reduce heat again to medium-low and simmer until the desired consistency is reached, about 30 minutes depending on simmering speed, stirring occasionally at first but more often as you come closer to the end. The mixture is ready when it easily holds together and no excess liquid appears when parted with a spoon.
Using a stainless-steel canning funnel, ladle preserves into hot jars, leaving 1/2-inch headspace. Remove air bubbles using a plastic knife or chopstick, and readjust headspace as needed. Wipe jar rims with a clean, damp cloth and center the hot lids on jars. Screw band to fingertip-tight.
Place jars in canner, ensuring they are completely submerged. Bring to a boil and process covered for 10 minutes. Remove canner lid; wait 5 minutes, then remove jars. Cool thoroughly, check for seals, and store in a cool, dark place for up to a year.
CanJam, locavore, preserving & infusing, recipes
6 Comments »


Posted by Anita on 11.19.10 12:41 PM
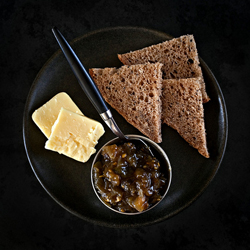 The Cosmic Cowgirl picked pomes — that’s apples, pears, and quinces to you and me — as the theme of this month’s CanJam. As I dreamed of making mebrillo, pear butter, and dozens of other suitable recipes, I sat at the window overlooking our garden, still groaning with tomatoes. They’re ripening slowly now, and it’s time to plant our winter crops; a green tomato preserve was what I really needed to tackle before I gave any thought to recreational canning.
As interesting as it seemed, we never made much of a dent in the green tomato jam I made around this time last year. It’s finally dawning on me that our capacity for sweet preserves is fairly limited, so I knew this year’s project would have to be savory. I hit the books, and came up with a few ideas for pickles and such, but nothing that really made me want to pull out the canner. Then, while browsing on a completely unrelated topic, I serendipitously encountered a recipe for a green tomato and apple chutney. Voilá — two birds, one stone.
I love a nice, tidy solution, but experience has taught me that my effort’s wasted if I preserve something nobody wants to eat. That won’t be a problem this year: Barely an hour after the lids went ‘ping!’, we’d already polished off one small jar of this piquant preserve, slathered on good brown bread with hunks of aged cheddar to make a thoroughly autumnal ploughman’s lunch. A few days later, we cracked another jar and gobbled up a good share of it alongside an Indian curry. And just last night, Cameron sighed as he wondered aloud how well it would go alongside the Thanksgiving turkey, in place of the cranberry sauce that neither of us really craves.
I find myself in the odd position of hoping that the weather turns cold soon, so that the last of this year’s tomatoes won’t ripen and I’ll have another batch of green fruit to transform into chutney. If not, at least I know what I’ll be doing with the tail end of next year’s crop.

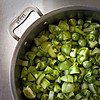
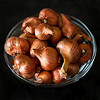
English-style Spicy Green Tomato & Apple Chutney
– adapted from BBC Food
1/2 oz fresh ginger (about a 2-inch piece)
8 to 10 fresh hot chiles, halved but not seeded
4 pounds green tomatoes, chopped
1 pound apples, peeled, cored, and chopped
4 oz golden raisins, chopped, or dried currants (or half of each)
1 pound shallots, chopped
2 tsp kosher salt
1 pound raw sugar or light brown sugar
1 pint malt vinegar
Prepare canner, lids, and nine 8-oz jars according to the usual method; keep jars hot until needed.
Bruise the ginger and tie it into a muslin jelly bag with the chiles.
Place jelly bag and the remaining ingredients in a Dutch oven or other large, wide pan. Bring to a boil, stirring until the sugar has dissolved, and simmer until the desired consistency is reached, about an hour depending on simmering speed, stirring occasionally at first but more often as you come closer to the end.
Remove the jelly bag. Using a stainless-steel canning funnel, ladle the chutney into hot jars, leaving 1/2-inch headspace. Remove air bubbles using a plastic knife or chopstick, and readjust headspace as needed. Wipe jar rims with a clean, damp cloth and center the hot lids on jars. Screw band to fingertip-tight.
Place jars in canner, ensuring they are completely submerged. Bring to a boil and process covered for 15 minutes. Remove canner lid; wait 5 minutes, then remove jars. Cool thoroughly, check for seals, and store in a cool, dark place for up to a year.
CanJam, locavore, preserving & infusing, recipes
9 Comments »


Posted by Anita on 09.17.10 10:57 PM
 I have a great story to tell you about the peach preserves I made for this month’s CanJam — the theme of which is stone fruit — hosted by The Hip Girl’s Guide to Homemaking. But work has managed to sap every last ounce of my attention this week, and it’s already 11pm. Making matters worse, the hard-and-fast deadline for the CanJam roundup means this post must go up no later than midnight tonight. Time, it seems, is not on my side.
So you’ll just have to trust me when I say that the peaches we bought — the deep, aromatic, and complex-flavored ‘Oh Henry’ variety from Woodleaf Farm — were so damned perfect that we couldn’t bear to embellish them with the fancy ingredients we had originally planned to use. Instead, we turned to a formula that I learned years ago from preserves maven June Taylor, a simple recipe that lets the taste of the fruit shine.
We also wanted to preserve the deep blush of the peaches, so we didn’t peel our fruit before jamming. And truthfully, unless your peaches have problem skin, we recommend just giving them a quick rinse in cool water and drying them with a towel. Peeling is a pain in the neck, and you won’t notice the difference in the final preserve.


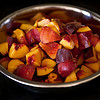

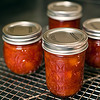
Perfectly Simple Peach Preserves
– adapted from June Taylor
 3 pounds pitted ripe peaches
– rinsed, dried, and cut into bite-sized pieces
10 oz white sugar*
2-1/2 T lemon juice
1 T orange zest
4 8-oz canning jars and lids
Prepare canner, lids, and jars according to the usual method; keep jars hot until needed.
Toss together the ingredients in a non-reactive bowl and let sit, covered, overnight to allow the peaches to soften and release their juices.
Transfer the macerated fruit and juices into a heavy, wide stainless-steel pot, and bring to a boil, stirring as necessary. After the mixture comes to a boil, reduce heat to maintain a steady simmer; stir frequently to distribute the mixture and prevent burning.
Actual cooking time will vary depending on the fruit’s moisture level and the speed of your simmer. Most batches are done at between 20 and 25 minutes; you don’t want to simmer longer than 30 minutes or the sugars will begin to caramelize.
As the mixture approaches a sauce-like consistency, stir constantly to prevent scorching. To test for proper gel, use the saucer test or watch for the liquid to sheet off the edge of a metal spoon.
When the preserves have reached the proper set, remove from the heat. Working quickly, ladle into hot prepared jars, leaving 1/4-inch headspace. Remove air bubbles and adjust headspace as needed. Wipe rims and center lids on jars; screw band to fingertip-tight.
Place jars in canner, ensuring they are completely submerged. Bring to a boil and process jars for 10 minutes with the canner lid on. When time is complete, remove canner lid and turn off heat; wait 5 minutes, then remove jars. Cool, check for seals, and store in a cool, dark place for up to 6 months.
—
* Sugar can and should be adjusted depending on the fruit’s level of sweetness and your own taste. The sweetest fruit will require a ratio of 5.5 pounds of prepared fruit to 1 pound of sugar; the least-sweet fruit will be closer to 4:1.
CanJam, locavore, preserving & infusing, recipes
7 Comments »


Posted by Anita on 08.20.10 6:06 PM
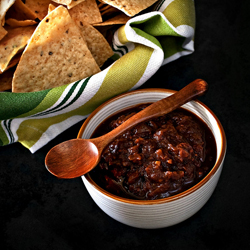 When life gives you lemons, as the saying goes, make lemonade. When life — or, in this case, a distracted farmer — gives you under-ripe tomatoes, make salsa.
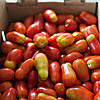
I’d ordered 40 pounds of San Marzano tomatoes from my favorite farm, planning to use some for my contribution to this month’s CanJam — hosted by What Julia Ate — and to pressure-can the rest for this winter’s cooking.
But when I got home and opened the crates, my heart sunk. I’d gotten two whole cases of tomatoes that ranged from rock-hard-green to just-barely-red, with the vast majority in the not-really-ripe category.
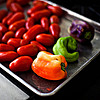
Already up to my ears in green-tomato jam from last season’s garden, I really didn’t want to go that route again. Happily, I remembered — no doubt from some wise Rick Bayless recipe — that the judicious application of heat helps less-than-perfect tomatoes become something better than they ought to be. Roasting tomatoes under a broiler gives them a soft, smoky sweetness, making them the perfect base for sauces and salsas.
The most appealing canner-ready recipe I found for roasted tomato salsa calls for a mix of dried chipotles and cascabel chiles. Having neither on hand, I opted for a mix of locally grown guajillos and some chilhuacles de oaxaca left over from a mole-making adventure. (Although you shouldn’t generally tinker with canning recipes, this kind of one-to-one substitution is fine, so long as the ingredients have the same acidity and moisture levels as the ones they’re replacing.)
The resulting salsa is a mix of bright acidity and smoky complexity, garlicky and rich with chile flavor. It’s definitely the best tomato salsa I’ve ever canned, and a great change from our usual tomatillo salsa. And although I seriously hope I’m never confronted with another case of under-ripe tomatoes, at least I now know exactly what to do with them.


Fire-Roasted Salsa Negra
– adapted from the Ball Complete Book of Home Preserving
Makes eight 8-oz jars or four pint jars
 24 dried chile peppers, such as chipotle, guajillo, ancho, etc.
2 cups hot water
3 pounds ripe plum tomatoes
2 large mild to medium-hot green chiles, such as Anaheims (or bell peppers, if you prefer)
2 small onions
1 head garlic, broken into cloves but not peeled
2 tsp white sugar
1 tsp salt
1 cup white vinegar
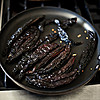
Preheat your broiler. Meanwhile, toast the dried chiles in a large, dry skillet over medium heat, about 30 seconds per side, until they are softened and fragrant. Transfer softened chiles to a heatproof bowl and cover with the hot water, weighing down with a saucer or small plate to keep chiles submerged. Soak the chiles for 15 minutes.
Working in batches, transfer soaked chiles and some of their soaking liquid to a blender; puree until smooth. Taste the puree; if you find it bitter, press the puree through a mesh strainer or sieve with a wooden spoon. Continue pressing and scraping until you’re left with a dry lump of seeds and bits of skin with no flesh attached.
Meanwhile, roast the tomatoes, peppers, onions, and garlic under the preheated broiler, turning to roast all sides. When the tomatoes and peppers are blistered, blackened, and softened, and the onions and garlic skins are blackened in spots, remove them from the broiler; this usually takes anywhere from 10 to 20 minutes, depending on the age of your vegetables and the strength of your broiler. The garlic will likely need to come out before other vegetables are done, so keep tongs handy.
Set tomatoes, onions, and garlic aside to cool. Place the peppers in a paper bag and roll the top closed tightly; set aside. Peel and chop all of the vegetables as they become cool enough to handle.
Prepare canner, lids, and jars according to the usual method; keep jars hot until needed.
In a large, stainless-steel saucepan, combine reserved chile puree, chopped roasted vegetables, sugar, salt, and vinegar. Bring to a boil over medium-high heat, stirring constantly. Reduce heat and simmer, stirring frequently, until slightly thickened, about 15 minutes.
Ladle hot salsa into hot jars, leaving 1/2-inch headspace. Remove air bubbles and adjust headspace as needed. Wipe rims and center lids on jars; screw band to fingertip-tight.
Place jars in canner, ensuring they are completely submerged. Bring to a boil and process 8-ounce jars for 15 minutes and pint jars for 20 minutes with the canner lid on. When time is complete, remove canner lid and turn off heat; wait 5 minutes, then remove jars. Cool, check for seals, and store in a cool, dark place for up to a year.
CanJam, locavore, preserving & infusing
20 Comments »


Posted by Anita on 05.31.10 11:05 PM
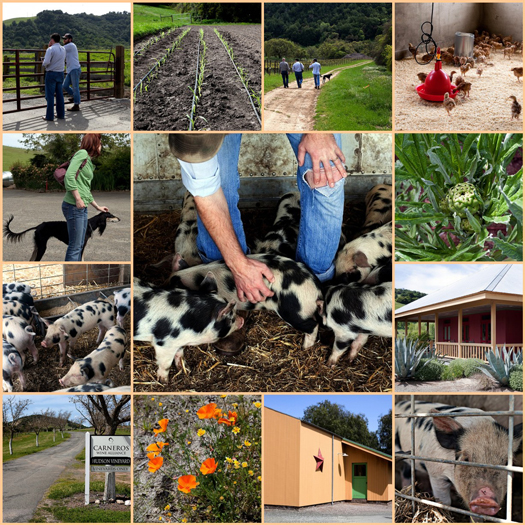
Last month, our friend Morgan Weber — who runs Revival Meats in Houston — came to town to talk shop with his Bay Area cohorts. He visited a who’s-who list of our local charcuterie shops and sustainable butchers, hitting up Fatted Calf, Boccalone, Bi-Rite Market, Prather Ranch, and a number of other carnivore havens. I don’t want to put words in anyone’s mouth, but I think it’s safe to say that one of the highlights of his trip was the Saturday afternoon spent at Hudson Ranch, a trip Morgan generously invited us to share.
Ranch manager Scott Boggs escorted us around Hudson’s spread, showing us both their hog and poultry sites, as well as their CSA vegetable farm. Hudson is primary known as a winery — their wines are cult favorites — but Scott came on board 2007 specifically to manage the edibles at Hudson Ranch. A veteran of The French Laundry’s garden operation as well as its kitchen, Scott brings true farm-to-table experience to the ranch; he understands what chefs want and need to see coming through the kitchen door.
We started our tour near the ranch offices, just off the main Carneros Highway. Our first stop — as Morgan was in town specifically to see them — was a pen full of dalmatian-spotted piglets, a litter born from an Old Spots sow mated to a boar of wilder heritage. Anyone with lingering doubts about how ethical meat can be would have been happy to see what we saw: A spacious, shaded pen with lots of room for piglets to play and plenty of room for their mama to move around (though she kept her snout in the trough during our whole visit), plus a view across to a beautiful lake and rolling hills beyond.
Down the road a piece, we got to peek in on a gaggle of chicks: babies in their boxes, and adolescents in their indoor roosts. By now, some of these birds are out on pasture, scratching away and fattening up for Chez Panisse and other local tables. A little further away, we trekked down a winding dirt road to check in on the CSA fields, where the first corn and tomato seedlings were already reaching for the sun.
We’re lucky that we were already eating lots of Hudson Ranch-raised food, even before we had any idea who they were. Hudson Ranch supplies Fatted Calf with some of their pork and poultry. (They also sell chickens and game hens to many restaurants you’d recognize.) The pig from Cameron’s birthday pig-roast last year was a Hudson, as were two of our last three Thanksgiving turkeys. Hudson also makes an award-winning olive oil, and they stock the produce shop at the Oxbow Public Market in Napa, in addition to supplying their CSA members’ weekly produce boxes.
One of my new year’s resolutions for 2010 was to eat more food grown by people we know. It wasn’t just born from a desire to eat more local food — we’re pretty much doing that all the time, now — but out of the realization that the closer we are to the source of our meals, the more satisfying they are for us. Even before last year, when we had the pleasure of picking our own tomatoes at Mariquita Farm, we were well acquainted with Julia, our Thursday night “casual CSA” farmer. And of course we had the privilege of helping Alexis and Eric after their devastating fire at Soul Food Farm, where our CSA chickens and eggs start out. We’ve toured Marin Sun Farms with Dave Evans, and seen where much of our beef, chicken, and pastured eggs come from.
Every time we open a quart jar of tomatoes, I’m reminded of the drive we took down to Watsonville and the morning we spent picking the very ripest Beefsteaks. When we enjoy a perfect omelette, a crisp roast chicken, or a plate of freshly dug new potatoes, we take a certain pride in knowing where it the ingredients came from, and in doing right by the food and the farmers who grew it. It may seem corny, but when we take a particularly delicious bite of food, we often thank the farmers, the ones who bring our daily feasts. I’m glad we can add Scott and his beautiful ranch to our roster of farmers we know.
Hudson Ranch
5398 Carneros Highway
Napa, California 94559
(by appointment only)
707-255-1455
http://www.hudsonia.com/hudson-ranch.html
@HudsonRanch on Twitter
—–
FTC disclaimers:
Morgan and Stacey Weber are friends of many years; Revival Meats is an editing client.
Hudson Ranch sent us a bottle of olive oil earlier this year as part of a media promotion.
farms & farmers, Napa & Sonoma
3 Comments »


Posted by Anita on 04.24.10 9:06 PM
 The newest addition to the ever-growing list of Bernal Heights culinary resources can be found at 331 Cortland, both the name and the address of a conglomeration of food-centric stalls in a single storefront. After longer-than-expected delays for construction and permitting — apparently, nobody in city hall knew quite how to handle a multi-unit setup under one roof — the six marketplace vendors held a soft opening today for their Bernal neighbors.
We stopped in around 3pm and found a good-sized crowd full of happy folks getting their afternoon snack on. Bernal Cutlery features Japanese whetstone knife sharpening, plus a beautiful assortment of knives both culinary and otherwise. El Porteño, a familiar vendor at many local farmers markets, carries their full line of sweet and savory Argentinian empanadas. Paulie’s Pickling sells pickles, of course, as well as a rotating selection of sandwiches and deli salads.
On the other side of the shop, Wholesome Bakery features vegan and low-glycemic treats and breads. ICHI Lucky Cat Deli, the new home of ICHI’s itinerant sushi-makers, offers nigiri, maki, and sashimi, as well as some specialty snacks (katsu-sando sliders, oh my!). In the front window, Della Terra Organics sells a pretty assortment of fresh produce from local farms. Each of the vendors will set their own hours, but the marketplace as a whole plans to be open 7am to 7pm every day.
It’s a plethora of options, and a welcome addition to the area. The new marketplace joins the small but quite comprehensive Good Life Grocery, the much-lauded Avedano’s Meats down the block, and newcomer Sandbox Bakery at the other end of the Cortland shopping district. You can stroll a few blocks and pick up pretty much everything you need for a picnic in Holly Park, or a home-made dinner. Surprising as it seems, once-sleepy Bernal could actually become food-lover’s shopping destination.




The Marketplace at 331 Cortland
331 Cortland Avenue (x Bennington)
San Francisco, CA 94110
@331Cortland on Twitter
ICHI Lucky Cat Deli
http://ichisushi.com
415-822-4024
@ICHIsushi on Twitter
El Porteño Empanadas
http://www.elportenosf.com
415-357-3621
@ElPorteno on Twitter
Paulie’s Pickling
http://www.pauliespickling.com
415-285-0800
@PauliesPickling on Twitter
Wholesome Bakery
http://www.wholesomebakery.com
415-343-5414
@wholesomebakery on Twitter
Bernal Cutlery
http://www.bernalcutlery.com
415-902-6531
@BernalCutlery on Twitter
Della Terra Organics
http://www.dtoproduce.com
Bernal, locavore, shopping
2 Comments »


Posted by Anita on 04.04.10 9:43 AM
 Spring has come to the blog: We made it to the end of the Dark Days Challenge! We’re excited to share some spring recipes with you soon. But before we head off into the sunshine, I’m sending a round of applause to all the other Dark Days bloggers who stuck it out to the end, especially our hostess, Laura at (not so) Urban Hennery.
It’s been funny, pretending it was still Dark Days when the weather — and the market — make it clear that spring is upon us. Despite last week’s avocado orgy, we’ve tried to stick with the spirit of the challenge (and not torture participants in colder climates), using pantry goods and foraging in the freezer.
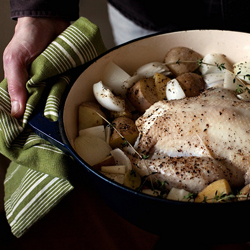
The weather has been obligingly wintery here in San Francisco this past week, so for our final Dark Days meal, we turned to a cool-weather dish I’ve been wanting to try for months. I came across this recipe in the River Cottage Cookbook, and was captivated: Why on earth had I never heard of pot-roast chicken before? We make pot roast with beef, and pork, and even lamb, but apparently the Brits (or at least Hugh F-W) know something we don’t. Dead simple, this one: Just chunk up whatever hardy vegetables you have on hand — vary the list below with the seasons, so long as there’s a starch and some onions — pop them in a big pot with a chicken in the middle, and Bob’s your uncle.
We made a few tweaks to the River Cottage recipe: Even once it was fully cooked, we found the chicken a little flabby and the pan juices a little thin for our taste. We solved both problems by popping the chicken back in the oven on its own for a few minutes to crisp the skin while reducing the pan juices a bit on the stove top. (Even if you don’t take this extra step, everything tastes delicious.) Cooked in this novel method, even the breast meat stays moist — a perfect ingredient for, say, chicken salad the next day. And should you have any leftover vegetables, they make a fine soup pureed with chicken stock and garnished with a bit of cream and a sprig of herbs.


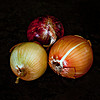

Pot-Roast Chicken and Vegetables
– adapted from The River Cottage Cookbook
1 chicken, 4 to 6 pounds
2T butter
2 tsp salt
freshly ground black pepper
2 onions
3 large carrots
3 stalks of celery
2 leeks
3 potatoes
2 bay leaves
1 cup white wine
1 cup unsalted chicken stock (or water)
3 sprigs of thyme
Preheat the oven to 375°F. Cut up the vegetables into large chunks. Smear butter over the top of the chicken, and season with salt and pepper. Place the buttered chicken in a large casserole or a deep lidded roasting pan, and surround with the chunked vegetables. Pour in the wine and stock, add the thyme, cover, and place in the preheated oven.
After an hour, remove the lid; stir the vegetables and baste the chicken with the fat on the top of the pan juices. Return to the oven, uncovered, for another 30 minutes or until the breast is browned and the juices run clear at the thigh.
Carve the chicken into individual portions and place in an oven-safe plate or pan; return it to the oven to get a little more brown and crispy while you finish the pan juices. Remove the vegetables to a serving bowl, and cover to keep warm. On the stove, simmer the juices in the roasting pan, reducing to a medium consistency (or as you like).
Farmers and food artisans who created the ingredients for this week’s meal:
Soul Food Farm, Vacaville: chicken
Catalán Family Farm, Hollister: onion, leeks, celery
Dirty Girl Produce, Santa Cruz: carrots
Little Organic Farm, Marin: potatoes
Spring Hill Cheese Company, Petaluma: Jersey butter
Souverain, Geyserville: white wine
Guisto’s Vita-Grain, South San Francisco: sea salt
…and our own homegrown bay leaves and thyme, and home-canned chicken stock
exemptions: black pepper
Dark Days challenge, locavore, meat, recipes
Comments Off on Dark Days, spring chicken


Posted by Anita on 03.29.10 8:19 AM
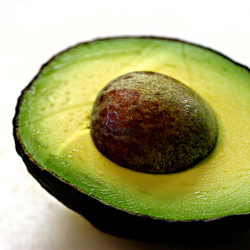 The first glimmers of spring are showing up at the farmers market, just as we’re on the home stretch of the Dark Days Challenge, and boy are we excited. Not so much for the strawberries; they’re still white in the center, and I’ll happily wait until they’re fully ripe. But we’re gorging ourselves on the new, tender asparagus, and we’re definitely making up for lost time in the avocado department.
We put up jars of salsa last summer to help get us through the bleak winter months — without tomatillos, tomatoes, or chile peppers, Mexican food becomes downright impossible. But avocados defy preserving, and even on those rare occasions when we break down and buy an out-of-season avocado or two (sometimes it’s a guacamole emergency, I tell ya!) we always remember why it pays to wait. The watery, wan specimens that make their way here from Mexico or Chile just can’t compare with Will’s buttery, nutty avocados. So we wait. And wait. And wait. Rather impatiently, I might add. It’s one of the few winter deprivations that actually makes me cranky.
And so this week, we celebrated the avocado’s return to our kitchen with a big mess of tacos. It’s another one of those shopping-not-cooking recipes: Once you’ve got all the ingredients on hand, it’s a little bit of chopping, and a whole lot of gobbling. And should you have any leftovers, I can vouch that this filling, along with perhaps a little cheese and a soft-scrambled egg or two, makes an exceptional breakfast taco.


Chorizo-Potato-Mushroom Tacos
– adapted from Mexico One Plate at a Time
2 medium waxy potatoes (about 1/2 pound)
1/2 pound Mexican chorizo
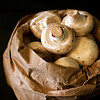
1/4 to 1/2 pound mushrooms, any variety, sliced
1 small white onion, diced
1/2 cup or more tomatillo salsa (homemade or store-bought)
1 ripe avocado
6 to 8 fresh tortillas
Cube the potatoes and simmer in a pot of salted water until tender; drain and set aside in a medium bowl.
Saute the chorizo and onion in a wide skillet over medium heat until the sausage is cooked through. Using a slotted spoon, remove the sausage and onions to the bowl with the potatoes, leaving the rendered fat in the pan. Add the mushrooms to the pan and saute until softened and beginning to brown. Return the potatoes and chorizo-onion mixture to the pan and cook until the potatoes begin to brown.
Meanwhile, thoroughly mash the avocado in a bowl, then add the tomatillo salsa. Add more salsa until the mixture is like a sauce. Season with salt as needed.
Warm the tortillas in a skillet or griddle, or by running them over an open flame. Wrap them in a towel as you go, to keep them warm for the table. When tortillas are all warmed, move the taco filling to a serving bowl, and bring to the table with the avocado salsa and the warm tortillas. Let each person build their own tacos at the table with a scoop of the filling and a drizzle of the salsa in the middle of each tortilla.
 Farmers and food artisans who created the ingredients for this week’s meal:
Little Organic Farm, Marin: potatoes
Fatted Calf, Napa: chorizo
Far West Fungi, Moss Landing: mushrooms
Catalán Family Farm, Hollister: onion
Will’s Avocados, Soledad: Avocados
La Palma Mexicatessen, San Francisco: fresh tortillas
…and our own home-preserved tomatillo salsa
Dark Days challenge, locavore, meat, Mexican, recipes
6 Comments »


Posted by Anita on 03.19.10 11:06 PM
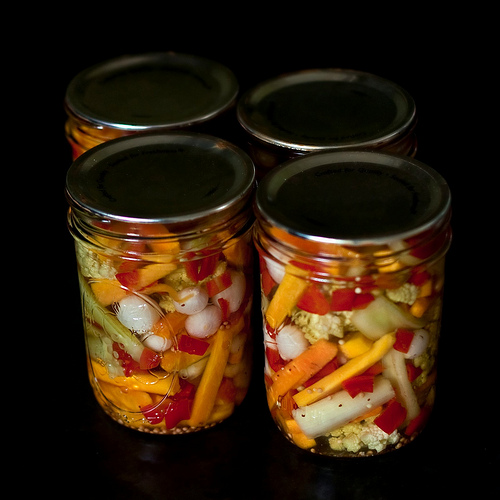 Trying to plan a suitable entry for this month’s CanJam — the theme is alliums — left us a little perplexed. It’s not that we haven’t been known to preserve onions: I’m a big fan of the bright-pink Yucatecan pickled onions served with cochinita pibil, and Cameron has a special fondness for English-style pub onions.
But because we prefer them very crisp, we usually make both of these recipes as refrigerator pickles. (Processing seals the jars and kills any lingering toxins, but it also cooks whatever’s in the jar.) Neither of us really cares for sweet condiments with our savory dishes, so onion jams were out.
Then it occurred to me: Giardiniera.
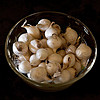
Now, strictly speaking, onions are just one of this Italian-style pickle’s many components, but the little devils take an ungodly amount of time to prep, way more than all of the other parts combined. First you have to slice off the hair-like root end, but oh-so-carefully so as to not dislodge the onion’s layers from one another. Then you have to peel each tiny onion — no mean feat when natural sugars keep papery skins adhered firmly to outer layers of the onion’s flesh — without cutting them in half or otherwise mangling them.
It’s a labor of love, I tell you, but it’s all worth it when you open up that first jar and taste. The onions are integral part of giardiniera, the linchpin of its piquant flavor.
Giardiniera means “gardener” in Italian, the implication being that this hodgepodge of different vegetables would be a great way to preserve the bounty of an active kitchen plot. But its traditional components — red peppers, carrots, celery, onions, and cauliflower — are never simultaneously seen in abundance in any garden I’ve ever known. Even in Italy, I think you’d be hard-pressed to find red peppers and cauliflower in the same patch. (I did a little research on how this seasonal impossibility got its start, and came up empty; if anyone knows how these ingredients ended up in a single pickle, I’d love to hear!)
Other than the peppers, though, we’re able to get everything we need from our own garden, or nearby farmers, even in late winter. In place of the bell peppers, I used a bunch of skin-on piquillo peppers I’d stashed in the freezer last summer, but added them to the mixture just before portioning the cooked vegetables into the jars, to avoid softening them any further. Their texture wasn’t so hot, but they’re mostly there for color, anyway. Next year, I might just — shhh! — buy an imported pepper or two.



Giardiniera (Italian-style Pickled Vegetables)
— adapted from Sunset Canning, Freezing, and Drying
1/2 pound carrots*
1/2 pound celery*
2 red bell peppers
1 large cauliflower or romanesco
1 pound small white pearl onions
1 cup pickling salt
2 quarts white vinegar
1/4 cup mustard seed
2T celery seed
1 small dried hot pepper
1-1/2 cups sugar
Peel carrots, then cut into 1-1/2-inch by 1/4-inch sticks; you should have about 4 cups*. Remove strings from the celery, then cut into into 1-1/2-inch by 1/2-inch planks; you should have about 3 cups*. Stem and seed the peppers peppers, then cut into wide strips. Break the cauliflower into florets; trim the stems. Carefully peel the onions, leaving the root intact. Try not to swear.
In a very large bowl, dissolve the pickling salt in 4 quarts cold water. Add the vegetables to the brine, and refrigerate for 12 to 18 hours. Drain the vegetables, rinse in cold water, and drain again.
Prepare canner, lids, and 6 pint jars according to the usual method.
 Combine the vinegar, mustard seed, celery seed, chili pepper, and sugar in a 6-quart stainless or enamel pan. Bring to a boil and continue to cook for 3 minutes. Add the vegetables, reduce heat to low, and cook for a few minutes until the vegetables just begin to soften. Remove from heat and discard the chili.
Using a funnel, pack vegetables into hot jars up to just shy of 1/2 inch of the rim. Ladle hot pickling liquid to cover vegetables, leaving 1/2-inch headspace.
Remove air bubbles and adjust headspace; wipe rims and apply lids and rings.
Place jars in canner, ensuring they are completely submerged. Bring to a boil and process covered for 5 minutes. Remove canner lid; wait 5 minutes, then remove jars. Cool, check for seals, and store in a cool, dark place for up to a year.
—
* Note: After reading comments from a friend and long-time reader, I suspect that my weight-to-volume measurements are incorrect here. Please see this comment and this follow-up.
CanJam, Italian, locavore, preserving & infusing
10 Comments »


 Hungry Mother always seemed like the kind of place we’d enjoy: local and sustainable sourcing, Southern-inspired food, and a great cocktail list. It’s been on our short list of places to try for years, and on a recent trip to Boston, we finally made it there.


 3 pounds pitted ripe peaches
 When life gives you lemons, as the saying goes, make lemonade. When life — or, in this case, a distracted farmer — gives you under-ripe tomatoes, make salsa.


 24 dried chile peppers, such as chipotle, guajillo, ancho, etc.


