Posted by Cameron on 08.16.06 3:48 PM
 Anita and I were chatting about charcuterie as we sat down to dinner on Monday night when she allowed as how she always thought of pâté as a winter dish: something hearty for blustery weather.
Of course she’s right. Charcuterie evolved as a way of both using scraps and preserving so that it could be eaten when fresh meat wasn’t on the menu…say, when the winds of winter blew.
But for me, charcuterie is linked with summer, not winter. The natural place for a sausage is sizzling and popping on the grill, leaking fat onto the flames. When I was a kid, it wasn’t summer until we were piling ham, salami, and whatever else onto sandwiches for lunch with cold Cokes and crunchy Fritos. And pâté insists on a picnic basket, grass prickling your legs, and French white wine poured from a bottle that’s ice cold and slick with condensation.
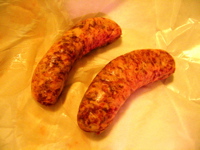
Should you find yourself with a picnic basket to stock, do yourself a favor and include a slice of pâté maison from The Fatted Calf. They appear at farmers’ markets on both sides of the SF Bay and you can order from their Web site. We’ve liked everything that we’ve tried so far (don’t even talk to me about Aidells anymore), but the pâté is especially good. It’s well balanced, not heavily spiced, and tastes fresh, which is an odd thing to say about a preserved dish, but for you I’ll make an exception. Now waggle your eyebrows and read that last sentence in your best Groucho Marx voice.
meat, shopping
3 Comments »


Posted by Anita on 05.26.10 11:28 AM
This post is the third of 12 installments in the Dinner on a Deadline series, a project designed to help you get thoughtful meals on the table quickly without resorting to processed convenience foods. Each week features homework to help you put the lessons into action, plus a sample recipe to show how we use the week’s tips in real life.
2010 AEC *All Rights Reserved*") There are entire books (and at least one blog) devoted to the idea that recipes are the problem, not the solution. Rather than cheerful assistants, the theory goes, recipes can be tyrannical oppressors, stifling creativity and causing culinary heartache.
There are entire books (and at least one blog) devoted to the idea that recipes are the problem, not the solution. Rather than cheerful assistants, the theory goes, recipes can be tyrannical oppressors, stifling creativity and causing culinary heartache.
Though I’d never go that far myself — my cookbooks and recipe binders are a source of wonderful inspiration, and a great resource for those rare days when I have plenty of time to spend in the kitchen — I definitely see the value of dispensing with recipes for many everyday meals.
When it comes to no-recipes meals, there are plenty of old standbys. On Twitter, I asked what readers like to make when they cook without recipes. Nearly everyone named at least one dish that falls into the category our friends Sean and DPaul call leftovers velcro: Omelettes and frittatas filled with bits of cheese and herbs, a chef’s salad with cold roast chicken and a few crumbles of bleu cheese, hearty soups made from stock and the assorted contents of the vegetable bin.
All of these are good, simple meals, and I love them because creative re-use is both easy on the wallet and environmentally fabulous. But cooking without recipes can be much more than just a way to clear out your fridge. It’s a way of thinking about ingredients that gives you basic formulas for easy suppers, and a platform for improvising even as you plan. If you stock your pantry well, you can combine protein, starch, and seasonal vegetables in dozens of ways.
 Here’s one example that makes use of our favorite pasta + pork + greens trinity: Simmer pasta of your choice. Meanwhile, sauté sausage, bacon, ham, or ground pork; remove the cooked meat with a slotted spoon. Using the same skillet, sauté a clove or two of minced garlic in the rendered fat from the meat; add legumes or greens (examples: shredded kale, chopped broccoli raab, sliced sugar-snap peas, cooked cannellini) and sauté until tender, adding a little stock or water to steam the firmer items. When the pasta’s done, toss everything together, adding a splash of stock or cream. Sprinkle with herbs and/or Parmesan cheese and you’re good to go. (Two favorite variations on this theme include Orecchiete with Broccoli di Ciccio and Italian sausage, and Pasta e Fagioli with ‘Nduja.)
This method also works great with international flavors. For an Asian-style meal, sauté a quick-marinated protein (sliced meat, shrimp, or tofu tossed with soy sauce, sherry, sesame oil, and a bit of cornstarch) in peanut oil; remove with a slotted spoon. Sauté garlic and greens (such as long beans, bok choy, spinach) until tender. Stir in a regionally appropriate flavor enhancer (like curry paste, oyster sauce, chili-garlic sauce), then add the meat back into the pan and heat through; serve over rice or noodles. If you prefer a Tex-Mex variation, you can make fajitas: Grill or sauté chicken or steak strips, add sauteed peppers and onions, and serve with tortillas. Once you have the basics down, the variations are only limited by your imagination and the depth of your pantry.
This week’s homework
No-recipe novices: Plan at least two meals for the upcoming week, including at least one no-recipe dinner. Make use of your newly organized pantry staples.
Extra for experts: Take one of your existing no-recipe meals and adapt it into something new. For example: If you usually use pasta as the base, turn it into a stir-fry over rice. Or, add an ethnic twist, use a different protein, or make some other modification that will push your creativity.
2010 AEC *All Rights Reserved*")
2010 AEC *All Rights Reserved*")
2010 AEC *All Rights Reserved*")
2010 AEC *All Rights Reserved*")
2010 AEC *All Rights Reserved*")
This week’s recipe
I realize that this goes entirely against the spirit of the lesson, giving you a real recipe with measurements and timing. But for anyone new to the no-recipes concept, it’s useful to see how it works. After you’ve done it a few times, you’ll be able to come up with your own variations, judging quantities and timing by eye.
We made this dish — a Food 52 category winner — for a midweek supper with our friend Meriko; we liked it so much we had it again this week. (The fact that we’ve got a bumper crop of sugar-snap peas helps, too.) The second time around, we were out of mint and low on cream, so we swapped in some parsley and chicken stock; we liked the fresher end result even better. Feel free to make your own substitutions depending on what you have on hand or what strikes your fancy.
Creamy Pasta with Prosciutto and Snap Peas
– adapted from Food 52
For each 3 servings; multiply as needed
6 to 8oz dry shaped pasta (preferrably shells, orechiette, or other cup-shaped pasta)
2 cloves garlic, minced
1-1/2 T olive oil
2oz prosciutto, lonza, or country ham, thickly sliced (1/4-inch minimum) then minced
2 small shallots, minced
1/2 cup cream
1/2 cup unsalted stock
1/4 cup freshly grated Parmesan, plus more for the table
1/4 pound fresh sugar-snap peas, chopped into 1/2-inch pieces
2T to 1/4 cup minced fresh flat-leaf parsley
salt and freshly ground pepper
In a large saucepan, bring salted pasta water to a boil while prepping the various ingredients. (If it comes to a boil before you’re ready, cover and reduce heat to low.) When everything is ready to go, add the pasta to the boiling water.
In a heavy skillet, heat the olive oil over medium heat. When shimmering, add the garlic and cook until just softened. Add the minced prosciutto and cook for an additional 3 to 4 minutes. Add the shallots; continue cooking until softened. If at any point the garlic or shallots start to brown, add a splash of water and/or turn down the heat. When cooked through, season to taste with salt and freshly ground black pepper. (Amounts will vary greatly depending on how salty your pork is.) If there are more than 3 minutes left on the pasta timer, reduce the skillet heat to low, or remove the pan from heat, depending on how long you have left.
When your pasta is about 3 minutes away from being done, add the peas to the proscuitto mixture and cook for 2 minutes over medium heat, until just tender. With one minute remaining, raise the heat to high; add the cream and stock, and bring to a boil while stirring. Add the Parmesan, stir to combine, and reduce the heat to low.
Drain the pasta, and add to the sauce; toss to coat. If the sauce is loose, simmer over medium-high heat until it coats the pasta. Sprinkle liberally with fresh herbs, and serve with black pepper and extra Parmesan.
cooking, Dinner on a Deadline, recipes
15 Comments »
Posted by Anita on 05.18.10 11:54 AM
This post is the second of 12 installments in the Dinner on a Deadline series, a project designed to help you get thoughtful meals on the table quickly without resorting to processed convenience foods. Each week features homework to help you put the lessons into action, plus a sample recipe to show how we use the week’s tips in real life.
2010 AEC *All Rights Reserved*") So, gang — how’s the menu planning going? From my point of view, the homework looks great! Between the comments on last week’s post and the Twitter stream, I’ve seen some good menu plans, lots of delicious meals made from items already on hand, and many good tips for weeknight dinner prep. So let’s move on with some more ideas for getting food on the table.
So, gang — how’s the menu planning going? From my point of view, the homework looks great! Between the comments on last week’s post and the Twitter stream, I’ve seen some good menu plans, lots of delicious meals made from items already on hand, and many good tips for weeknight dinner prep. So let’s move on with some more ideas for getting food on the table.
One of the most powerful weapons in the weeknight-dinner arsenal is a well-stocked pantry. Now, when I say “pantry”, I hear all the small-kitchen cooks groan. But a pantry doesn’t have to be large or lavish to be effective — even a single, dedicated shelf next to the dishes is better than nothing. No matter whether you have an enormous pantry or a tiny one, keeping staples on hand encourages spontaneous meals and lets you shift gears quickly when your weeknight throws you a curve. And, stocking up is especially important if you’re not a particularly dedicated meal planner.
Once you stock your pantry, keeping it up to date needs to be a continuous process. At our house, we opt for the instant-replacement method: If we use, say, a package of penne, we add penne to the grocery list and buy it on our very next trip to the store. When we get down to the last few ounces of soy sauce, it goes on the list, too. We never wait until we need a staple item to replace it. In the case of items we use a lot, we even keep backups on hand when space permits.
Speaking of space: The elephant in the room here is that most people’s pantries (including mine, until I tidied it up last weekend) look like a disaster area. Once you clear away the clutter, you may find yourself with a lot more storage space than you thought you had. With this in mind, the first real step in stocking the pantry is a thorough clean-up. I know the idea of spending your precious kitchen time tackling a long-postponed chore isn’t terribly appealing, but the payoff is huge. Even the most rudimentary kitchen organization helps make it fun to cook, instead of a hassle. Once you’ve got your kit organized, you won’t have to dig through a mess to find things when you need them quickly. You’ll also have a better idea of what you have, and what you’re missing.
When it comes to quick weeknight dinners, staples are key. There are a few million articles online dedicated to stocking your pantry. (Simple Bites has a good one, with links to many others.) Every site’s list is a little different — and they should be. There’s no one right way to fill your shelves; the important thing is that you figure out the kinds of meals you eat (or want to eat) and stock for them. Personally, I don’t like to rely a lot on the canned soups, commercially frozen vegetables, and other industrial products that some of the lists include. You know your own tastes better than I do; look through a few lists, and use them as a jumping off point.
Here’s what our pantry typically contains:
• In the fridge: Eggs, cheese (something melty plus a hard cheese like Parmesan), bacon, milk, sour cream, kimchi and/or sauerkraut, tortillas, bread, butter, mushrooms, olives, mustard, peanut & almond butters, maple syrup
• In the garden: Fresh herbs, lettuce, carrots, radishes, celery, lemons, green onions, one or two seasonal vegetables (peas, tomatoes, etc.)
• In the cupboard: Pastas, rices, polenta, dry beans, posole, coconut milk, chiles (pickled/dry), tomatoes, pressure-canned chicken stock, pickles & preserves, soy sauce & fish sauce, canned tuna, shallots & onions, garlic, ginger, potatoes, crackers, tortilla chips, nuts, salsas, herbs & spices, oils & vinegars, baking supplies
• In the freezer: Precooked beans and grains; pie and pizza doughs; pasta sauces; curry pastes; leftover bread/buns; leftover cooked meat; precooked meatballs; quick-thawing raw proteins (ham cubes, chicken parts, sirloin tips, ground meat, duck confit) in meal-size packs; sausages (Italian, chorizo, breakfast, ‘nduja); pancetta & guanciale; butter; blanched garden veggies; ice cubes of many types: chicken stock, lemon and lime juice, egg whites, tomato sauce/paste, chipotle en adobo, etc.
(I know there’s a a lot of untapped detail in that last bullet item; we’ll talk more about stocking the freezer later in the series.)
Looking at our list, you can probably already see that, even without a recipe, I can get a number of basic dinners on the table using just what we have on hand. This week, I made a simple Asian-style noodle dish using beef from the freezer and a bunch of items from the pantry, plus a few vegetables from our farm box. Pretty much once a week — and more often when we’ve been traveling or otherwise unable to get to the farmers market — we eat this way, “shopping” from the items we’ve put aside for quick weeknight meals.
Once you have a well-stocked larder, you’ll be amazed at how handily you’re able to put together meals, even when you’ve got “nothing” in the house. After just a few weeks of building meals from what you’ve got on hand, you’ll start to develop a repertoire of pantry-based suppers.
In addition to this week’s recipe below, here are a few meals we make using pantry staples and just one or two fresh ingredients:
– Simple chilaquiles
– Fondue mac & cheese
– Weeknight paella
– Korean-style tacos
– Deep-dish pizza
– Pasta carbonara
– Pea and proscuitto risotto
– Pasta with leafy broccoli and sausage
– Sopa Azteca (tortilla soup)
– Ham, chickpea, and orzo salad
– Chorizo, potato, and mushroom tacos
That’s not an exhaustive list, by the way — that’s just the pantry-centric ideas we’ve already blogged about. Once you’ve got your own pantry stocked, you’ll see the possibilities and patterns in your own meals.
This week’s homework
Novice pantry-stockers: Organize your pantry space: Take everything out and put it on the counters, wipe down the shelves, and then put things back in an order than makes sense based on the way you use them. Same thing with the fridge and the freezer — they’re an extension of your pantry, after all. Give away (to the food bank / coworkers / freecycle) anything you don’t want to eat that’s taking up space. Think about the kinds of meals you like to eat, make a list of what’s missing, and stock up as your budget permits. Plan and cook at least two meals, each using a pantry ingredient you already have.
Extra for experts: Tackle the organization project above, plus one of these two options: (1) Write a post about at least 5 items in your pantry, and why they’ve earned a permanent spot on your shelves. (2) Buy yourself one splurge-worthy ingredient (Calabrian chiles, a new kind of rice, heirloom beans, etc.) and cook with it, using at least two existing pantry ingredients that you’ve let languish.
2010 AEC *All Rights Reserved*")
2010 AEC *All Rights Reserved*")
2010 AEC *All Rights Reserved*")
2010 AEC *All Rights Reserved*")
2010 AEC *All Rights Reserved*")
This week’s recipe
I love this recipe — which really is more like a template — because it’s so flexible. Don’t have beef? Use the same quantity of sliced chicken, butterflied shrimp, ground pork, or tofu cubes. You can use pretty much any Asian noodle, too: Fresh, dry, egg, wheat, rice, curly, straight — they all work, so long as you’ve got close to the right quantity going into the wok. Any crunchy vegetables can take the place of the peas; we’ve used boy choy pieces, green beans, and celery cut on the bias; don’t be afraid to experiment.
When it comes to Thai-style curry paste; we like the Mae Ploy brand that comes in a plastic tub (it keeps almost forever in the freezer if you roll up the inside bag tightly); this recipe is especially good with the red and yellow varieties, but it’s flexible enough to use what you’ve got. Heat and saltiness vary widely, though, so if you’re using another brand, start out with less paste; if you find the end result is a little bland, spike it up with some fish sauce and/or chile flakes at the table, and make a note to adjust the recipe the next time. I like to mix it up by using half red curry paste and half peanut butter, which makes an especially tasty combination for little kids or other spice-phobic eaters.
This recipe can be made by one focused cook in less than 30 minutes from start to finish, but to streamline the post-work chaos, I generally do all of the prep the night before, then store all of the measured and cut ingredients in the fridge overnight.
Thai Curry Beef Noodles
– adapted from Big Bowl Noodles and Rice
For two servings — multiply as needed:
4 to 6 oz dry Asian wheat or egg noodles (for substitutions, see end of instructions)
Peanut or vegetable oil
6 oz beef (such as flank steak or sirloin tip) sliced thin across the grain into 2-inch lengths
1-1/2 tsp dark soy sauce (we like Kimlan Super Special)
1 tsp sesame oil
1 tsp cornstarch
1/3 cup homemade chicken stock (or water — canned broth is too salty)
1-2T fish sauce (depending on the saltiness of the curry paste)
1T fresh lime juice
1-1/2 tsp sugar
1/2 to 1 red chile (such as Fresno), julienned
1/4 cup thinly sliced red onion
a handful (12 to 15) snow or snap peas, cut in half on the diagonal
1 to 2T Thai curry paste (depending on how hot you like it; you can use half peanut butter)
1/4 cup peanuts, chopped
a few tablespoons chopped cilantro leaves
Bring 4 to 6 quarts of water to a boil and cook the noodles according to package directions. Drain, run under cold water, drain again, and toss with a teaspoon of peanut oil; set aside.
Mix the beef with the soy sauce, cornstarch, and sesame oil. In a separate bowl, mix the chicken stock with the fish sauce, lime juice, and sugar and whisk to blend. Set both the mixtures aside.
Heat 1/2 cup oil in a wok (or your largest skillet) over high heat until very hot but not smoking; add the beef, stirring to separate the slices. Using a slotted spoon or a spider, remove the meat to a clean plate when still pink in the center. Pour off the oil into a heatproof bowl.
Wipe the wok clean and return it to the burner over high heat. When hot, add 2T of the reserved oil. Add the chiles, onions, and peas; cook, tossing rapidly, until well coated with the oil. Scoot the vegetables to the side of the wok and add the curry paste to the bottom. Stir the paste around briefly in the oil to release the flavor. Add the seasoned stock mixture; bring to a boil, stirring or whisking to distribute the curry paste. Then, add the noodles.
Cook, tossing the noodles until mixed with the sauce and vegetables. Add the beef and toss briefly until everything is heated through and well mixed. Remove the cooked noodles to a platter, sprinkle with peanuts and chopped cilantro, and serve.
—
If you want to substitute other noodles, keep in mind that fresh noodles gain very little mass when cooked, where dry pastas can double or triple in size. You want 8 to 10 oz of cooked noodles for two servings. If you find you’ve prepped too many noodles, they keep for a day or two in the fridge, provided they’re tossed liberally in oil and well covered. They make a great snack or lunch when reheated with a little peanut butter, a splash of water or stock, and a sprinkling of chili flakes.
cooking, Dinner on a Deadline, recipes
17 Comments »
Posted by Anita on 03.29.10 8:19 AM
2010 AEC *All Rights Reserved*") The first glimmers of spring are showing up at the farmers market, just as we’re on the home stretch of the Dark Days Challenge, and boy are we excited. Not so much for the strawberries; they’re still white in the center, and I’ll happily wait until they’re fully ripe. But we’re gorging ourselves on the new, tender asparagus, and we’re definitely making up for lost time in the avocado department.
The first glimmers of spring are showing up at the farmers market, just as we’re on the home stretch of the Dark Days Challenge, and boy are we excited. Not so much for the strawberries; they’re still white in the center, and I’ll happily wait until they’re fully ripe. But we’re gorging ourselves on the new, tender asparagus, and we’re definitely making up for lost time in the avocado department.
We put up jars of salsa last summer to help get us through the bleak winter months — without tomatillos, tomatoes, or chile peppers, Mexican food becomes downright impossible. But avocados defy preserving, and even on those rare occasions when we break down and buy an out-of-season avocado or two (sometimes it’s a guacamole emergency, I tell ya!) we always remember why it pays to wait. The watery, wan specimens that make their way here from Mexico or Chile just can’t compare with Will’s buttery, nutty avocados. So we wait. And wait. And wait. Rather impatiently, I might add. It’s one of the few winter deprivations that actually makes me cranky.
And so this week, we celebrated the avocado’s return to our kitchen with a big mess of tacos. It’s another one of those shopping-not-cooking recipes: Once you’ve got all the ingredients on hand, it’s a little bit of chopping, and a whole lot of gobbling. And should you have any leftovers, I can vouch that this filling, along with perhaps a little cheese and a soft-scrambled egg or two, makes an exceptional breakfast taco.
2010 AEC *All Rights Reserved*")

2010 AEC *All Rights Reserved*")
2010 AEC *All Rights Reserved*")
2010 AEC *All Rights Reserved*")
Chorizo-Potato-Mushroom Tacos
– adapted from Mexico One Plate at a Time
2 medium waxy potatoes (about 1/2 pound)
1/2 pound Mexican chorizo
1/4 to 1/2 pound mushrooms, any variety, sliced
1 small white onion, diced
1/2 cup or more tomatillo salsa (homemade or store-bought)
1 ripe avocado
6 to 8 fresh tortillas
Cube the potatoes and simmer in a pot of salted water until tender; drain and set aside in a medium bowl.
Saute the chorizo and onion in a wide skillet over medium heat until the sausage is cooked through. Using a slotted spoon, remove the sausage and onions to the bowl with the potatoes, leaving the rendered fat in the pan. Add the mushrooms to the pan and saute until softened and beginning to brown. Return the potatoes and chorizo-onion mixture to the pan and cook until the potatoes begin to brown.
Meanwhile, thoroughly mash the avocado in a bowl, then add the tomatillo salsa. Add more salsa until the mixture is like a sauce. Season with salt as needed.
Warm the tortillas in a skillet or griddle, or by running them over an open flame. Wrap them in a towel as you go, to keep them warm for the table. When tortillas are all warmed, move the taco filling to a serving bowl, and bring to the table with the avocado salsa and the warm tortillas. Let each person build their own tacos at the table with a scoop of the filling and a drizzle of the salsa in the middle of each tortilla.
 Farmers and food artisans who created the ingredients for this week’s meal:
Little Organic Farm, Marin: potatoes
Fatted Calf, Napa: chorizo
Far West Fungi, Moss Landing: mushrooms
Catalán Family Farm, Hollister: onion
Will’s Avocados, Soledad: Avocados
La Palma Mexicatessen, San Francisco: fresh tortillas
…and our own home-preserved tomatillo salsa
Dark Days challenge, locavore, meat, Mexican, recipes
6 Comments »
Posted by Anita on 03.17.10 9:46 AM
2010 AEC *All Rights Reserved*") Every St. Patrick’s day we wonder: How did we let another year go by without making corned beef with all the trimmings? It’s simple, affordable, and delicious — too good to save for the holiday celebrations.
Every St. Patrick’s day we wonder: How did we let another year go by without making corned beef with all the trimmings? It’s simple, affordable, and delicious — too good to save for the holiday celebrations.
Sure, you can buy your corned beef at the market, but if you’d rather make your own using local meat and ingredients you can trust, it’s not difficult to brine it yourself. All it takes is a few minutes of measuring, a week of waiting, and a bit of refrigerator space.
We’ve made a number of recipes over the years, but the one we keep coming back to is the simplest. Hugh Fearnley-Whittingstall’s corned beef recipe serves 10 in its original ratios, so we’ve scaled it down to a more manageable size. If you do end up with extra meat, you’re in luck: In my book, corned-beef hash and Reubens are right up in leftovers heaven alongside the meatloaf sandwich.
Many recipes call for curing salt, but its only purpose is to maintain the pink-red color of the meat; it doesn’t serve any preservative purpose in corned beef, so we usually leave it out. (In charcuterie, it’s a necessary ingredient, but here it’s just for looks.) If you prefer the traditional blush, add 2 tsp of pink curing salt — also known as sodium nitrite or Insta Cure #1 — to the brine.
2010 AEC *All Rights Reserved*")
2010 AEC *All Rights Reserved*")
2010 AEC *All Rights Reserved*")
2010 AEC *All Rights Reserved*")
2010 AEC *All Rights Reserved*")
Corned Beef and Cabbage
– adapted from The River Cottage Meat Book
3 to 3-1/2 pounds well-marbled brisket
—
* for the brine:
2-1/2 quarts water
8oz demarara or light brown sugar
1-1/2 pounds coarse sea salt
1/2 tsp black peppercorns
1 tsp juniper berries
3 cloves
2 bay leaves
a sprig of thyme
—
* for cooking:
bouquet garni
1 carrot, chopped
1 onion, chopped
1 stalk celery, chopped
4-6 cloves garlic
—
* at the end:
3-5 large carrots, cut into large chunks
1 medium head cabbage, quartered, leaving core intact (or 4 small heads, halved)
5-10 potatoes, halved
2-3 turnips (optional), halved or quartered
Put all the brine ingredients in a medium saucepan and stir well over low heat until the sugar and salt dissolve. Bring to a boil, then remove from heat and let cool to room temperature.
Place your brisket in a large, non-metallic container (we use a large zip-top bag, but a deep casserole works well, too). Cover the meat with the cooled brine; weigh it down with a saucer or other non-reactive object if it floats (not necessary with the bag). Leave in the refrigerator for 5 to 7 days, turning every couple of days.
The day before you want to cook the corned beef, remove the brisket from the brine and soak it in cold water for 24 hours, changing the water at least once.
After the soak, place the brisket in soup pot with the bouquet garni, chopped vegetables, and garlic. Cover with fresh water and bring to a gentle simmer. Poach gently on top of the stove (or in a 275°F oven) until tender, about 3 to 3-1/2 hours. (A good test is to run a metal skewer through the meat; if it slides in easily, your brisket is done.) About 30 minutes before the brisket is done, add the remaining vegetables and simmer along with the meat.
Serve the hot corned beef cut into thick slices, along with the simmered vegetable chunks. (You can discard the smaller chopped vegetable bits in the broth.) Serve with fresh horseradish cream at the table.
Farmers and food artisans who created the ingredients for this week’s meal:
Prather Ranch, MacDoel: brisket
Catalán Family Farm, Hollister: onion, celery
Dirty Girl Produce, Santa Cruz: carrots, cabbage
Little Organic Farm, Marin: potatoes
Iacopi, Half Moon Bay: garlic
Happy Girl Kitchen Co., Big Sur: prepared horseradish
Clover Organic, Petaluma: sour cream
…and our own homegrown bay and thyme
Exemptions: sugar, peppercorns, juniper berries, cloves
Dark Days challenge, holidays & occasions, locavore, meat
8 Comments »
Posted by Cameron on 03.07.10 2:40 PM
2010 AEC *All Rights Reserved*")
Tara, one of our very favorite meat-eating vegetarians, is on the San Francisco leg of her book tour. Happily for us, we’ve been able to see quite a bit of her when she’s not chatting with admirers, moderating debates between militant vegetarians and ethical carnivores, and seducing the crowds with her prose.
We got to talking about meat pies in general and pork pies in particular, and Tara told us about something that she had read in Danny, The Champion of the World, by Roald Dahl. The passage, which she first encountered when she was very young, describes a cold meat pie with hard-boiled eggs buried in it. The description struck a nerve, and it stayed with her into adulthood (apparently, she’s not the only one).
I love meat pies. Love, love, love, love. Cornish pasties, forfar bridies, empañadas, pot pies, steak pies, pork pies, you name it; there’s just something completely, utterly, and ineffably right about the combination of meat and pastry. Tara hadn’t even finished her story before Anita and I were waggling our eyebrows at each other and grinning like schoolkids. “So,” I asked the woman who has only recently begun to forge a relationship with meat after a lifetime of vegetarianism, “Want to make a pork pie?”
What fun! While Anita weighed and diced up the filling, Tara pulled together the hot-water crust with the quick, sure movements of a woman who has been cooking almost since she could walk. I caught the briefest of hesitations when she turned to the next step, but undaunted, she was quickly up to her forearms in a bowl of three different kinds of cold chopped pork. In honor of Mr. Dahl’s Danny, we buried hard-boiled eggs in the filling, and then I rolled out the top crust and crimped it in place.
This is my third time through this recipe, taken from The River Cottage Meat Book, and it’s a winner. The recipe doesn’t call for hard-boiled eggs, but they did just fine when we popped them in there.
The only downside of pork pie is that — because it’s best cold — you don’t get to taste it until the day after you’ve made it. We put together the pie on Sunday and it was our Dark Days Challenge dinner on Monday night, with pickles and mustard on the side.
Raised Pork Pie
– adapted from The River Cottage Meat Book
Filling
2# pork shoulder, cut into 1/2 inch cubes
8 oz fatty sausage meat (or ground pork belly)
8 oz salt pork, pancetta, or bacon, finely chopped
5 to 6 hard-boiled eggs, top and bottom trimmed so yolk shows through (optional)
12 sage leaves, finely chopped
leaves from 2 good sprigs of thyme, chopped
1 tsp salt
1 tsp coarsely ground black pepper
1 t ground white pepper
1/2 tsp ground mace
A good pinch of cayenne pepper
1 bay leaf
1 cup good pork stock that will set to jelly
Crust
7 T lard, diced
7 T butter, diced
Scant 1 cup water
4 1/4 c AP flour (approximately 630 g)
1-1/2 t salt
2 medium eggs, beaten, plus 1 egg, beaten, to glaze
Make the hot water crust pastry first. Put the lard , butter, and water in a saucepan and heat gently until melted; do not let it boil. Put the flour and salt in a mixing bowl. Make a hollow in the center and add the beaten eggs, stirring them gently around with a knife so they are half mixed with the flour. Pour in the melted fat and water and mix together to form a soft dough; add up to 3 1/2 T extra warm water if it is too dry. Knead gently, adding more flour if it is too sticky to handle. Wrap in plastic wrap and chill thoroughly (at least 1 hour).
For the filling, mix all the meats with the herbs, salt, and seasonings (except the bay leaf), so they are thoroughly combined.
Now assemble the pie. Preheat oven to 350 degrees. Cut off a generous quarter of the pastry and keep in the fridge, for the lid. On a floured surface, roll out the rest of the pastry into a 12 inch circle around 1/3 inch thick. Use this to line an 8 inch springform (or removable bottom) cake pan, pressing the pastry into the sides and flattening any overlap with your fingers. It should come 2-1/2 to 3 inches up the sides of the pan.
Fill with the seasoned pork mixture and push the bay leaf into the middle of it. (If you are adding eggs, lay down a thin layer of filling, place the eggs in a ring halfway between the center and the pie edge, and then add the rest of the filling around and covering the eggs.) Roll out the reserved piece of pastry into a circle about the size of the pan. Brush the edges of the lining pastry with a little beaten egg, and lay the pastry lid on top of the pie. crimp the edges together so they are sealed. Cut a 1/3-inch diameter hole in the center of the pastry lid.
Place the pie in the oven and bake for 30 minutes. reduce the temperature to 325 degrees and bake for a further 1-1/4 hours. If your top crust is concave instead of convex, a pool of juice and fat may form around the center hole during baking that you’ll want to remove with a turkey baster, or the crust may become soggy.
Remove the pie from the oven and carefully release the side of the pan. Brush the top and sides of the pie with beaten egg and cook for another 15 minutes to set the glaze. Take the pie out of the oven and allow to cool. The filling will have shrunk slightly, creating a cavity that is traditionally filled with jellied stock. When the pie is still a little warm, heat the jellied stock just until it’s pourable — not too hot! Carefully lift the edges of the center hold of the pastry with the tip of a knife, making sure you have good access to the cavity. Use a small funnel or, better still, a turkey baster to gently introduce the stock through the center hole. Tilt the pie from time to time to distribute the stock, then try and get a little more in. Stop when the stock begins to overflow from the hole. Leave the pie to cool, then put it in the fridge.
Farmers and food artisans who created the ingredients for this week’s meal:
Shasta Valley Farm, Gazelle: pork loin and pork sausage
Boccalone, Oakland: pancetta
Prather Ranch, MacDoel: leaf lard
Soul Food Farm, Vacaville: eggs
Guisto’s Vita-Grain, South San Francisco: flour, sea salt
Spring Hill Cheese Company, Petaluma: butter
…and our own homemade pickles, and homegrown celery and carrots (for pork jelly); sage, bay, and thyme
exemptions: pepper, mace, cayenne
Dark Days challenge, locavore, meat, recipes
15 Comments »
Posted by Anita on 02.28.10 5:33 PM
2010 AEC *All Rights Reserved*") I used to work with a woman who brought in a sleeve of bagels, a tub of cream cheese, and a carton of orange juice every Monday. She parked them in the office fridge and then religiously ate the identical breakfast every morning, for weeks, months, years.
I used to work with a woman who brought in a sleeve of bagels, a tub of cream cheese, and a carton of orange juice every Monday. She parked them in the office fridge and then religiously ate the identical breakfast every morning, for weeks, months, years.
Just the memory of it makes me a bit twitchy, but also more than a little envious — think of how much time I could save if I could be content with monotony! But though I crave familiarity as much as the next person, I could never be one of those people who eats the same thing over and over, day in and day out. Heck, I can barely stand to repeat a dinner menu more than monthly.
So you can imagine my surprise when I found myself craving — and then making — the same salad three times in two weeks. Originally, the recipe appealed because I found myself the proud owner of three heads of escarole, courtesy of our latest Mariquita Farm mystery vegetable box. I’d intended to use this broad-leafed chicory in a variety of recipes: in Zuni bread salad, in brothy Italian sausage soup, and sauteed simply and scattered with pine nuts. But once I’d tasted this salad, I couldn’t stop making it.
It bears more than a passing resemblance to salade lyonnaise — that heavenly mixture of pleasantly bitter frisée and thick lardons of bacon, crowned with a poached egg — but requires a lot less fuss. You can boil the eggs and fry the bacon hours ahead of time, then whip everything together when you’re ready to serve. And it’s interesting enough to hold its own, or sit happily alongside a simple main course like the roast chicken we made for this week’s Dark Days Challenge dinner.
2010 AEC *All Rights Reserved*")
2010 AEC *All Rights Reserved*")
2010 AEC *All Rights Reserved*")
2010 AEC *All Rights Reserved*")
2010 AEC *All Rights Reserved*")
Warm Escarole Salad
Рadapted from Bon App̩tit
1 small head of escarole, torn into bite-size pieces (about 4 cups)
1 large slice bacon
1T extra-virgin olive oil
1T balsamic vinegar
3T finely chopped shallot
1 hard-boiled egg, diced
Over medium heat, cook the bacon until just crisp. Remove to paper towels, reserving the bacon drippings in the skillet. Chop bacon and set aside.
In a small bowl, whisk olive oil and vinegar together. Reheat the bacon drippings in the skillet; add shallots and sauté until slightly softened but not browned. Add olive oil mixture and stir until heated through. Season to taste with salt and pepper.
Divide escarole between two plates, and drizzle warm vinaigrette over the top. Sprinkle with egg and bacon, and serve warm.
Farmers and food artisans who created the ingredients for this week’s meal:
Mariquita Farm, Watsonville: escarole
Shasta Valley Farm, Gazelle (via Live Culture): bacon
Bariani, Sacramento: olive oil & vinegar
Dirty Girl Produce, Santa Cruz: shallot
Soul Food Farm, Vacaville: eggs and chicken
Guisto’s Vita-Grain, South San Francisco: sea salt
exemptions: black pepper
Dark Days challenge, locavore, recipes
4 Comments »
Posted by Anita on 02.22.10 12:12 PM
2010 AEC *All Rights Reserved*") I find it fascinating how some recipes languish in my clippings folder for months, years even, before I set my mind to trying them. It’s not that they don’t sound appealing — clearly they do, or I wouldn’t have bothered putting them aside — but maybe the moment’s not right, the ingredients aren’t at hand, the quantities are best saved for a party.
I find it fascinating how some recipes languish in my clippings folder for months, years even, before I set my mind to trying them. It’s not that they don’t sound appealing — clearly they do, or I wouldn’t have bothered putting them aside — but maybe the moment’s not right, the ingredients aren’t at hand, the quantities are best saved for a party.
Not every recipe gathers dust, though. Some send me sprinting to the kitchen as soon as I read them. And our friends Michael and Jen’s deep-dish pizza is one that I absolutely had to try right away.
I saw the original version of the recipe on Jen’s blog, Last Night’s Dinner, almost a year ago. We made it ourselves fairly soon thereafter, and we liked it. But we’re rather set in our pizza-making ways here, generally leaning toward thin-crust Italian-style pies when we decide to go the home-pizzeria route. Seeing Jen’s photos of Mike’s latest tweaks to his deep-dish recipe reminded me that we have a giant stash of Italian sausage waiting in our freezer, and got me thinking how well it would complement a sauce made from last summer’s home-grown tomatoes for this week’s Dark Days Challenge meal.
We gave Mike’s new edition a try — actually two tries in one week, that’s how much we like it — and weren’t surprised that it’s even better than the original pie. I made a few tweaks to the crust to adjust it to our taste; unfortunately, these changes turn Mike’s relatively painless recipe into a process that’s less convenient for weeknight preparation, so you may very well prefer his streamlined version. I often like to make and rise my pizza dough after dinner on one night, then tackle the second rise on the next. If your schedule’s a little more compressed, you can quick-rise the dough — as Mike’s master recipe does — and the end result will still be very, very good.
2010 AEC *All Rights Reserved*")
2010 AEC *All Rights Reserved*")
2010 AEC *All Rights Reserved*")
2010 AEC *All Rights Reserved*")
2010 AEC *All Rights Reserved*")
Deep-Dish Pizza
Adapted from Last Night’s Dinner, with crust tips from American Pie
– Crust
2 tsp active dry yeast
1 tsp sugar
1C warm water
3T unsalted butter, softened
1tsp table salt or 2tsp kosher salt
3C unbleached AP flour [15oz]
Grease a medium bowl with olive oil and set aside. In the bowl of a stand mixer fitted with a dough hook, combine the yeast, sugar, butter, and water; let sit 5 minutes or until frothy. Add the flour and salt, and combine at low speed. Increase speed to medium and mix until the dough pulls away from the sides of the bowl and crawls up the dough hook, about 1 minute. Add 1 to 2 tablespoons water if dough is dry; add 1 to 2 tablespoons flour if dough is wet. Continue to knead (in the mixer, or by hand) until dough is silky smooth and passes the windowpane test.
Form the dough into a ball and place in the oiled bowl, turning to coat all sides of the dough ball with oil. Cover with plastic wrap and let rise until it doubles in bulk, about an hour. Punch down, reshape, and let rise again (covered) in the refrigerator, at least 2 hours or overnight. Bring the dough back to room temperature 2 hours before you plan to roll it out. (You can also use the dough immediately after the first rise, or even let it complete the second rise at room temperature, but the texture and taste will be better if you proceed with the second, slower rise.)
– Sauce
1T extra-virgin olive oil
1 small onion, peeled and diced
2 cloves fresh garlic, peeled and sliced
2T shredded carrot
1-1/2 T chopped fresh thyme
a 28oz can of whole peeled tomatoes, crushed with your hands
1/4 C red wine or port
salt, to taste
In a medium saucepan, heat olive oil over medium heat. Add onion and a pinch of salt; sauté until soft and golden, then stir in garlic and cook until soft. Add carrot and thyme and continue cooking until the carrot is soft.
Add tomatoes and their juice, plus wine. Lower the heat and cook until the sauce is thick, about 30 minutes, seasoning to taste as you go.
– Finishing
1 recipe crust
1 recipe sauce
1/2 lb Italian sausage
2T olive oil
3/4 to 1 pound button mushrooms, quartered
8 oz mozzarella (if fresh, torn into 1-inch pieces; if drier, shredded — we like half and half)
1/2 cup freshly grated hard cheese (such as Dry Jack or Parmesan)
1/2 cup fresh basil or spinach leaves, chiffonade
Preheat the oven to 400°F.
Heat a 12-inch cast-iron skillet on the stove over medium heat. Add 1T olive oil and crumble Italian sausage into the skillet. Brown, adding more olive oil if needed, until cooked through. Using a slotted spoon, remove the sausage to a plate lined with paper towels, leaving the fat in the skillet. (If your sausage is on the fatty side, you might remove some of the fat, but be sure to leave the skillet well greased.)
While sausage is cooking, saute the mushrooms in a large skillet: Heat 1T olive oil over medium heat, then add the mushrooms and saute until they lose their liquid. Salt if desired, and set aside.
Pat or roll the room-temperature dough into a circle about 12 inches in diameter. Let rest for 5 minutes — this will help keep the crust from shrinking — then transfer it to the skillet. Press dough down into bottom of skillet and partway up the sides. Drizzle a little olive oil over the crust, then layer the sauce, sausage, mushrooms, and mozzarella. Bake on bottom rack of oven for 30 minutes. Start checking the pizza for doneness; you want the pizza crust to be golden brown, and the toppings to be just starting to brown. Remove pizza from oven and top with grated cheese and basil.
Farmers and food artisans who created the ingredients for this week’s meal:
Spring Hill Cheese Company, Petaluma: butter
Guisto’s Vita-Grain, South San Francisco: sea salt, flour
Bariani, Sacramento: Olive oil
Catalán Family Farm, Hollister: onion
Iacopi, Half Moon Bay: garlic
Ottimino, Occidental: Rancho Bello Zinfandel (for sauce)
Shasta Valley Farm, Gazelle (via Live Culture): Mangalitsa Italian sausage
Far West Fungi, Moss Landing: button mushrooms
Belfiore Cheese Company, Berkeley: mozzarella
Vella Cheese, Sonoma: dry Jack cheese
Mariquita Farm, Watsonville: spinach
Anchor Brewing, San Francisco: beer
…and our own homegrown carrots, tomatoes, thyme
exemptions: yeast, sugar
Dark Days challenge, locavore, other blogs, recipes
7 Comments »
Posted by Anita on 01.03.10 11:40 PM
2010 AEC *All Rights Reserved*") If it’s New Year’s week, it must be time for cassoulet at our house. For this week’s Dark Days Challenge meal, we used the same streamlined recipe we’ve been making for the last couple of years. But this year, we went back to the classic preparation, and made our own duck confit.
If it’s New Year’s week, it must be time for cassoulet at our house. For this week’s Dark Days Challenge meal, we used the same streamlined recipe we’ve been making for the last couple of years. But this year, we went back to the classic preparation, and made our own duck confit.
We were lucky enough, last fall, to buy one of the Pekin ducks that Massa Organics was using for pest control in their rice fields. We parted out the bird, setting aside the breasts for searing, making stock out of the carcass, rendering down the fat and skin, and preserving the legs in the rendered fat.
One of my new year’s resolutions is to eat more food grown by people I know in 2010. We already do a pretty good job of finding local sources, but it’s always that much sweeter when we know the families behind our dinner. This cassoulet was a pretty good first step — we’re friends with three of the producers: Steve Sando from Rancho Gordo, Taylor Boetticher from Fatted Calf, and Greg Massa of Massa Organics. We know many of our other farmers by sight from our market trips, but in the next year we’re going to try and become even more familiar with the people who put food on our plates.
The recipe below may seem long, but trust me when I say that it’s a gross simplification of Judy Rogers’s original recipe, which runs to 6 full pages. Just like her Mock Porchetta (and pretty much every other Zuni recipe), the length isn’t so much an indicator of complexity or difficulty, but rather a mix of thoughtful hints, step-by-step signposts, and thought-provoking commentary. In the book, Rogers details how various duck breeds adapt to the master recipe, recounts her laborious process to find the best variety of salt for curing, offers ideas on how to get enough fat to cover your meat, makes suggestions for adapting the recipe to duck breasts or gizzards, and provides a number of serving ideas. It’s a treatise on duck confit in all its glory, and I highly recommend you read it at least once in its entirety. (If you don’t already own a copy, it’s well worth picking up. You don’t have to take my word for it: Eat Me Daily named it one of their top cookbooks of the past decade.)
2010 AEC *All Rights Reserved*")
2010 AEC *All Rights Reserved*")
2010 AEC *All Rights Reserved*")
2010 AEC *All Rights Reserved*")
2010 AEC *All Rights Reserved*")
Duck Confit
– adapted and condensed from The Zuni Cafe Cookbook
4 whole duck legs (legs and thighs attached)
1/3 oz (approximately 2 tsp) sea salt per pound of meat
rendered duck fat, sufficient to cover the legs
– (approximately 2 cups fat per pound of meat) plus a little extra for insurance
Rinse the legs well and pat dry, trimming off any ragged edges of skin or fat. Working on a sheet of parchment, salt the legs all over, a little more on the thick parts and less on the bony legs and ankles. Roll the legs in the salt left on the parchment. Arrange the legs in a single layer in a wide glass, ceramic, or stainless container, skin side down. Refrigerate for 18 to 24 hours, depending on the size and meatiness of the legs.
Rinse the legs well, one at a time, under cold running water; do not soak or you will end up with waterlogged meat. The flesh should feel firm, but knead the excess salt out of any areas that feel especially hard. Dry the rinsed legs on a clean towel and pat dry. Test for saltiness by trimming off a bit of meat and simmering it in duck fat for 5 minutes. If it tastes too salty, rinse and dry each leg again. (Rogers says it should be reminiscent of well-seasoned sausage, and not to worry if it’s tough at this stage.) Place the legs on a very clean plate and rest at room temperature for an hour, or overnight in the refrigerator, covered with plastic wrap.
Heat the fat until warm but not bubbling, then add the duck legs to the warm fat. Choose the smallest pot that will fit your duck, to reduce the amount of fat you’ll need. Unlike most recipes, it’s fine — in fact, it’s desirable — to crowd the pieces into the pan, but do not stack more than 2 layers deep. If needed, add more fat to submerge the legs completely. Heat the fat and legs to just below a simmer (200°F is a good target, if you have a deep-frying thermometer), skimming off any foam.
Stand by to adjust the heat, maintaining a steady temperature to avoid toughening the meat. Cook for an hour, then begin testing for doneness every 10 minutes. (Large legs often take 90 minutes to 2 hours; small legs, like those on the Massa ducks, are done just after an hour.) The meat should yield to a firm prodding in the pot; when it does, remove a piece from the fat, and slice off a bit. Allow the sample to cool; fully cooked meat will be tender when just cooled enough to hold with your bare hands.
When the meat is done, remove the pot from the heat and allow to sit undisturbed for 20 to 30 minutes. Skim the surface of the fat, removing any stray bits. Using tongs, gently move the legs to a sterilized glass or ceramic container, trying not to tear the skin or to disturb the liquid on the bottom of the pot beneath the fat. Skim the fat again, and ladle it through a fine-mesh strainer over the meat, again taking care not to disturb the gel at the bottom of the pot. Cover the meat completely — depending on the size of your storage container, you may need to melt more fat — and cool to room temperature. Cover the container well, then refrigerate for three days to a week before using. For longer storage, I prefer the freezer; the fat protects the meat from drying, and the deeper chill prevents any off flavors.
Farmers and food artisans who created the ingredients for this week’s meal:
Rancho Gordo, Napa: flageolet beans
Fatted Calf, Napa: Toulouse sausage and ham trimmings
Massa Organics, Hamilton City: duck
Catalán Family Farm, Hollister: onions
Guisto’s Vita-Grain, South San Francisco: sea salt
…and our own homegrown thyme and crumbs from homemade bread
Dark Days challenge, locavore, meat, preserving & infusing, recipes
5 Comments »
Posted by Anita on 12.27.09 11:37 AM
2009 AEC *All Rights Reserved*") I don’t know what it’s like at your house, but holiday weeks around here can be a little nuts. Even if we don’t have a gaggle of family in residence, there’s always some last-minute preparation, either for a landmark meal, a potluck contribution, or an impending trip.
I don’t know what it’s like at your house, but holiday weeks around here can be a little nuts. Even if we don’t have a gaggle of family in residence, there’s always some last-minute preparation, either for a landmark meal, a potluck contribution, or an impending trip.
This year, it was the latter — we’re off to Seattle for the week after Christmas — so when planning our dinners, we wrestled with the extra complication of creating leftover-free meals. Pasta’s always a simple, comforting for Dark Days Challenge meals, but neither of us was really in the mood for our weekly dose of bolognese.
This recipe reminds me a bit of the Pasta e Fagioli with ‘Nduja that’s become a standard in our kitchen: It comes together in a snap, and it’s far more delicious than a simple reading of the ingredients would suggest. But in place of the beans, this version has leafy broccoli (either broccoli raab or broccoli di ciccio work) and the sausage stays crumbly, rather than melting alluringly into the sauce. Any small pasta will do, but I like shells or ear-shaped orecchiette, which catch bits of the sauce in their cups.
2009 AEC *All Rights Reserved*")
2009 AEC *All Rights Reserved*")
2009 AEC *All Rights Reserved*")
2009 AEC *All Rights Reserved*")
2009 AEC *All Rights Reserved*")
Pasta with Leafy Broccoli and Sausage
— adapted from Kitchen Sense
1/2 to 3/4 pound leafy broccoli (broccoli rabe or broccoli di ciccio)
6 to 8oz small pasta shells or orecchiette
1/4 cup olive oil
1 small white or yellow onion, chopped
3 garlic cloves, minced
a generous pinch of red pepper flakes
1T chopped parsley
1/2 pound mild Italian sausage, removed from casings
freshly grated Parmesan-style cheese
Bring 4 quarts of well-salted water to a hard boil. Meanwhile, trim the tough ends from the broccoli, and cut into 1-inch pieces. (You’ll want to split the florets lengthwise if you’re using di ciccio.) Add the pasta to the water and cook until it’s just beginning to soften, about 4 minutes. Add the broccoli pieces and continue to cook until the pasta is al dente. Reserve about half a cup of the cooking water, then drain the pasta well.
While the pasta cooks, saute the sausage meat in a large skillet over medium heat, breaking into small pieces. When browned. remove to a plate using a slotted spoon, and set aside. Add enough olive oil to generously coat the pan (the amount will vary depending on how much rendered fat you got out of your sausage). Add the onion and sweat until soft; do not brown. Add the garlic and the pepper, and cook until softened.
Add the drained pasta/broccoli to the skillet, along with about 1/4 cup of the cooking liquid. Toss the pasta, adding another 2T of olive oil, or as needed to coat the pasta thoroughly. Add the parsley and more of the cooking liquid if needed to give the dish a sauced appearance.
Serve in wide bowls, scattered with grated Parmesan-style cheese. Makes 2 to 3 main-course servings.
Farmers and food artisans who created the ingredients for this week’s meal:
Heirloom Organic Farm, Hollister: broccoli di ciccio
Eduardo’s, San Francisco: pasta shells
Bariani, Sacramento: olive oil
Catalán Family Farm, Hollister: onions
Iacopi, Half Moon Bay: garlic
Tierra Vegatables, Santa Rosa: crushed red pepper
Mariquita Farm, Watsonville: parsley
Fatted Calf, Napa: Calabrese sausage
Vella Cheese, Sonoma: dry Jack cheese
Dark Days challenge, locavore
4 Comments »
